The modern DSLR is an amazing tool that supplies immense control over our image making. This control is delivered through a vast array of camera settings and options. Once you leave the Auto or Program Mode, the options you need to keep track of really begin to stack up.
Creating great imagery requires good light, a good subject, excellent composition and the right camera settings. It is so easy to miss the shot because you were in the wrong Focus Mode or you forgot to turn off your Self-Timer. Keeping track of all of the different camera settings can overwhelm the beginning photographer and even trip up the seasoned pro.
Lets start with a list of options that are likely to change depending on your subject matter or shooting conditions:
• Image Quality- Raw? JPEG?
• ISO
• Aperture
• Shutter Speed
• White Balance
• Shooting Mode- Manual, Aperture Priority, Shutter Priority, etc.
• Auto/Manual Focus
• Focus Mode - Single Point, Dynamic Area, or Auto Selection of focus point?
• Lens Servo/Drive Mode- Single Shot, Continuous Shooting?
• Self Timer
• Mirror Lock Up
• Image Stabilization/Vibration Reduction
You can roughly divide the two common types of photography into two categories of settings: Action/Portrait and Fine Art/Landscape. This could also be categorized as Things that move quickly and Things that don’t move quickly. Of course there are countless divisions and subtleties within these categories, but let’s use a wide stroke of the brush here.
If you are photographing things that move quickly, you generally want to set:
• Image Quality- Raw or JPEG. Raw for the most part unless you really need to capture many frames per second, then JPEG.
• ISO- The lowest ISO’s always give you the best image quality, but if you need to raise the ISO to GET the shot, then by all means do so.
• Aperture- wider apertures of f2, F4, and f5.6 are the norm for this type of photography. The shallow depth of field enhances portraits and enables faster shutter speeds.
• Shutter Speed- Hand holding or using a mono pod requires faster shutter speeds to keep the image sharp. Fast motion requires a fast shutter speed to stop the action.
• White Balance- Dependant on the situation.
• Shooting Mode- Manual, Aperture Priority, Shutter Priority, etc.- Shutter Priority and Manual shooting modes are the norm. However if you are just starting out, Program mode may be just the ticket.
• Auto/Manual Focus- Most folks prefer auto focus for photographing people.
• Focus Mode - Single Point, Dynamic Area, or Auto Selection of focus point? Dynamic area or Auto Selection will help you keep the face sharp in your portraits. Check you manual for facial recognition options within your focus modes. Choose to use to less points for faster focusing when shooting sports.
• Lens Servo/Drive Mode- Single Shot, Continuous Shooting? Sports Photography will definitely benefit from continuous shooting. Holding the shutter down will capture as many frames per second as your camera allows. The same can be said of portrait photography when the subject is fast moving or expressions are likely to change. Single Shot works well for posed, traditional portraiture.
• Self Timer - Off
• Mirror Lock Up - Off
• Image Stabilization/Vibration Reduction - Turn this feature on if you are hand holding to reduce camera shake. Always turn this feature OFF when on a tripod!
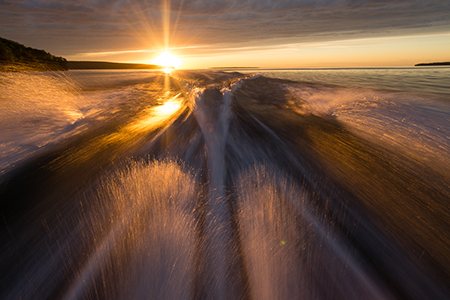
If you are photographing things that are not moving quickly, you generally want to set:
• Image Quality to Raw. The Raw file will give your greater latitude when editing you images in post processing.
• ISO - If you are on a tripod, why not choose the lowest ISO to provide you with the best image quality! Again, if you need to stop some action, don’t hesitate to raise the ISO as needed.
• Aperture - Small apertures such as f11 and f16 will provide deep depth of field. This is generally desired for landscapes and architecture.
• Shutter Speed - Can be kept to slower speeds as long as the subject is stationary or slow. Lower shutter speeds allow smaller apertures which provide deeper Depth of Field.
• White Balance - Try to use the White Balance dictated by the conditions. Direct Sun for sunny days, Cloudy for overcast or Shade for open shade conditions.
• Shooting Mode - Manual, Aperture Priority, Shutter Priority, etc.. Manual exposure will give you the most control. Although Aperture Priority is common when starting out, practicing in Manual Mode will go a long way in making you a better photographer.
• Auto/Manual Focus-Your choice. Most pros use a combination of Manual and Auto focusing.
• Focus Mode - Single Point, Dynamic Area, or Auto Selection of focus point? Single Point Auto Focusing is the norm here. When things are not moving quickly, there is no need to drain your batteries.
• Lens Servo/Drive Mode- Single Shot, Continuous Shooting? Same as above.
• Self Timer - If you are not using your cable release, the Self-Timer will help you avoid camera shake when mounted to tripod.
• Mirror Lock Up - for a slight increase in sharpness (at slower shutter speeds), the mirror can be locked up before shooting. This gives the camera a second or two to stop vibrating before the shutter opens.
• Image Stabilization/Vibration Reduction - If you are using your tripod, turn OFF the IS or VR function of your lens. Only use this feature when hand holding. Note: Some lenses have a mode that can be employed for panning when on a tripod. Check your lens manual for instructions.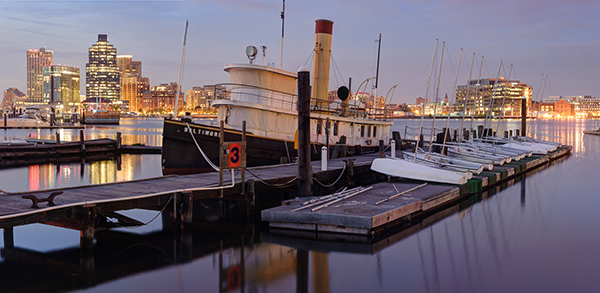
Custom Shooting Bank
Looking at the above settings you might wish that you could always have two cameras handy! Indeed, many pro photographers actually work with two cameras. However, many cameras also give you the ability to set up a custom shooting bank, each with a set of camera settings that you design. Explore your camera manual. If your model allows a custom shooting bank, spend some time setting up one for Sports and one Landscape. These “presets” will save precious time out in the field.
With your camera and exposure settings in place, check your composition before clicking the shutter:
⁃ Border Patrol – Check the borders of your frame looking for distracting items.
⁃ Are there distracting bright areas in the photograph?
⁃ Are areas of high contrast competing with your main subject?
⁃ Watch for lines going out the corners of your photo.
⁃ Keep an eye out for Tight Mergers-places where strong or obvious lines, come very near other strong or obvious lines.
⁃ Depth of Field - Do you have enough? Do you have too much?
Be Prepared! Precious few professional images are spur of the moment. Almost all are the result of careful planning or being prepared for the moment when it comes. 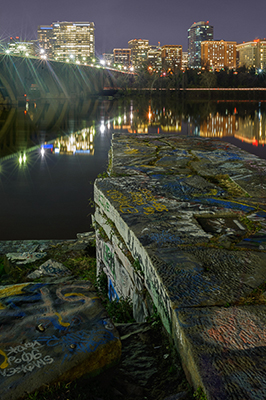
Check your settings before and after you shoot. Before heading out, imagine what you might encounter. Preset your ISO, Aperture, and Shutter Speed, and attach the desired lens so that you will be ready for the shot when it happens. Likewise, its easy to get carried away basking in the afterglow of the shoot. Instead, take a moment to reset your camera settings. You may have increased the ISO or engaged the Mirror Lockup to capture the shot. Resetting the options to YOUR standard settings will increase your chances of success the next time you pull your camera out.