 Photographing your favorite subjects in snow offers a special way to make winter memories.
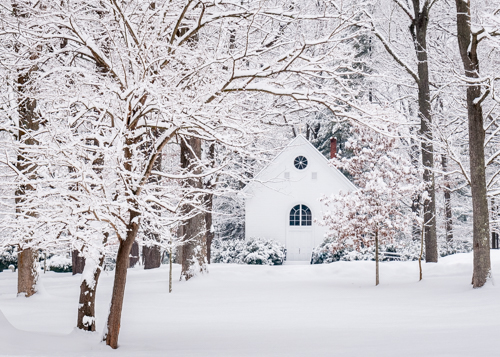
Grab your gear and head out to capture your kids sledding down a hill-a blur of bright jackets and hats, or find winter’s frozen designs in sparkling snowflakes through a macro lens, or frame a nearby stream or wooded trail still covered with freshly fallen snow.
No matter what your favorite snow subject is, exposure can be tricky. Our camera’s light meter is easily fooled by the brightness and underexposes snow scenes resulting in dark photos with washed out, gray looking snow.
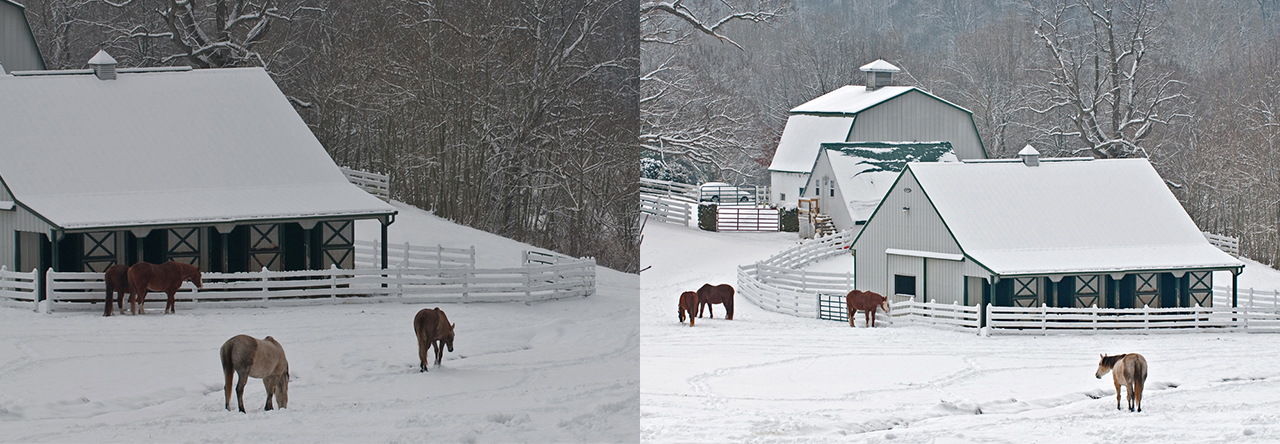
What we view as a beautiful snowy scene (photo below on right), the camera reads as an overly bright subject and determines less exposure is necessary. This is because the camera’s light meter is designed to measure the amount of reflected light from a subject and make it medium toned. But since bright subjects, such as snow, reflect twice as much light as medium tone, the camera overcompensates and underexposes the scene. The result is drab scene with gray snow (photo on left) but it can be pretty easy to correct for this.
Four Exposure Setting Tips For White Snow.
 1. If using A, S or P (Aperture, Shutter or Program mode), use Exposure Compensation. Look for a button with a +/- symbol. Set the compensation in the (+) plus direction by 1 to 2 stops. (0.3 is 1/3 of a stop, 0.7 is 2/3 of a stop, 1.0 is one full stop, and so on.) Refer to your instruction manual under Exposure Compensation for how to set this on your camera.
2. Another way to capture white snow when using A, S or P is to use Exposure Lock. Aim the camera at something neutral in tone; something tan, grey, or the blue sky, then press the exposure lock button keeping the pressure on it until you recompose and depress the shutter all the way. (See your camera manual to locate the Exposure Lock button.) Exposure Lock is best to use with either spot metering, or, if using the cameras default metering system (evaluative or matrix), fill the frame with the subject that is neutral in tone and then lock exposure, recompose, then shoot.
3. If shooting in full Manual mode, spot meter the snow and simply change the shutter speed or aperture until the meter scale in the bottom of the viewfinder reflects 1 to 2 stops over exposure. (Each of the little pegs on the meter scale represents 1/3 of a stop. Dial it towards the plus + direction until its shows 1 to 2 full stops over zero).
4. Lastly, if using the Auto Mode, look to see if your camera has a Snow/Sand setting (usually found as one of the Scene modes). This setting is designed to properly expose for subjects that reflect more light than normal. If your camera doesn’t have Snow/Sand setting, try locking the exposure on something other than snow - aim at something neutral in tone, depress the shutter button half way and keeping the pressure on it, recompose then depress fully. This may lock focus as well, so it’s best to aim it at something at the same distance as your subject.
With any of the above, set a low ISO of 100 or 200, especially on sunny days.
Additional Shooting Tips:
- If you're shooting on a cloudy snowy day and you notice a blue cast to your images, try the Cloudy White Balance setting to add a little warmth. Also experiment with the Sunny setting.
- Look for interesting shadows and silhouettes. In the winter, patterns and shapes become more visible simply because of the lack of color. It’s also a great time for black and white photography. It’s a fun way to take an OK image and kick in drama and creativity with some black and white treatment.
- Enable your highlight alert setting if your camera offers it (usually in the Playback menu settings) to ensure you don’t go too far and overexpose your highlights. If the alert is set and you over expose something, you'll see it blinking when viewing the image in Playback.
- Lastly, use your histogram as a helpful tool to ensure you haven’t overexposed the highlights. Snowy scenes will show most of the data in the right side of the histogram which is fine, just check that the mountain range comes down within the graph and doesn’t hit the right side which would indicate overexposure. If this happens, change the exposure to take away a bit of light and then retake the photo.
Winter is upon us and it’s a bonus to have snow so get out there and enjoy it. Who knows when we’ll see it again!
Caring For Your Camera In Winter
Find important tips for caring for your camera in winter in our blog article, Tips For Winter Camera Care.