
The Power of Editing - Bringing Your Photos to Life
September 10, 2026 by Marie Joabar
Taking the photo is only part of the photographic process. Editing gives you another opportunity to draw attention to what matters and bring the photograph closer to what you saw or envisioned when you pressed the shutter.
If you photograph with a DSLR or mirrorless camera, programs such as Adobe Lightroom offer an incredible range of editing tools.
Phone photographers also have a surprisingly powerful collection of built-in editing tools, as well as many third-party editing apps.
Regardless of what you use, editing gives you the same opportunity: to make the most of the image you captured.
To Edit or Not to Edit? It’s Your Choice
How much you edit or whether you edit at all is a personal and creative choice.
Some photographers enjoy the editing process as an important part of creating the final image. Others prefer to make their decisions in-camera and do little or no editing.
Both approaches are perfectly valid.
Why Edit Your Photos?
Our eyes and our cameras don't see a scene in exactly the same way. Editing gives us an opportunity to make adjustments after the picture has been taken.
Sometimes an image only needs a few small changes. Other times, editing can completely transform it.
Raw vs. JPEG: Does It Matter When Editing?
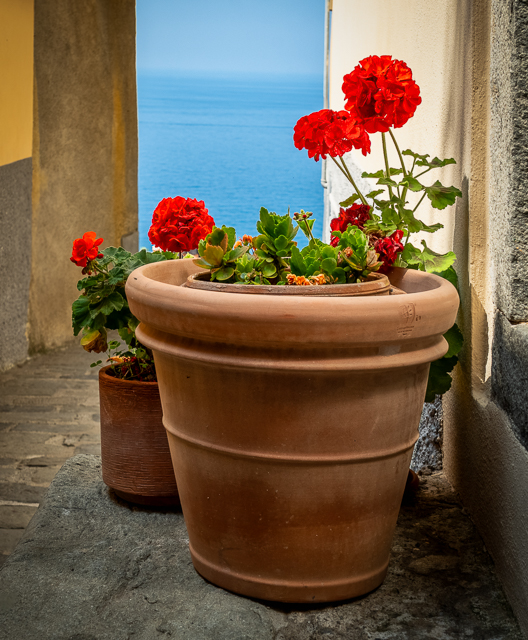
Whether you're capturing images in Raw or JPEG can make a difference in how much flexibility you have when editing.
A Raw file retains much more of the image data giving you greater latitude when adjusting exposure, highlights, shadows, white balance and color.
With a JPEG, the camera has processed the image data according to its settings and algorithms and then compresses it into a JPEG. These can certainly be edited but they contain less data so there is less latitude for making significant adjustments.
Phone photographers may also have the option of capturing RAW images, depending on the phone and camera app being used. But you don't need to shoot RAW to benefit from editing. Plenty can be accomplished with JPEG and HEIC formats.
Start With the Basics
You don't need to know dozens of editing tools to make a noticeable improvement to your photographs. A handful of basic adjustments can go a long way.
A good place to begin is with adjustments that affect the overall image. Once you've established a good foundation, you can move on to selective edits that target specific areas.
There's no single "correct" order for editing, but here's one possible workflow.
1. Remove Distractions
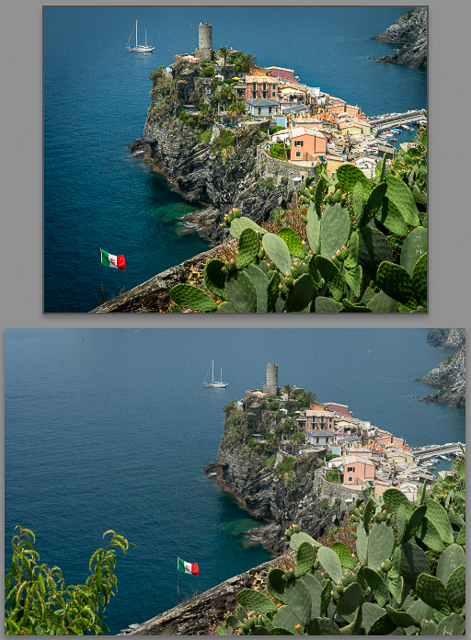
Take a close look at your image for sensor dust, spots and other distracting elements that pull attention away from your subject. Best practice is to address these early in your workflow
Today's editing programs make it remarkably easy to remove many unwanted elements. Lightroom offers several removal tools, and many phone editors and third-party apps now include similar capabilities.
2. Adjust Exposure and Tone
Next, look at the overall brightness and tonal range of your image.
Adjusting Highlights can help recover detail in bright areas such as clouds, while opening Shadows can reveal details in darker areas.
The Whites and Blacks sliders can help establish the brightest and darkest points in the photograph and add contrast and depth.
Texture and Clarity can add depth and definition. Texture works on finer details, while Clarity has a stronger effect on midtone contrast. With portraits, Texture is often the gentler of the two, and we typically want to reduce Texture slightly to soften skin rather than increase it.
Phone editors offer many of these same basic tonal controls. On an iPhone, for example, the Brilliance adjustment can be particularly useful for balancing bright and dark areas of an image.
3. Fine-Tune the Color
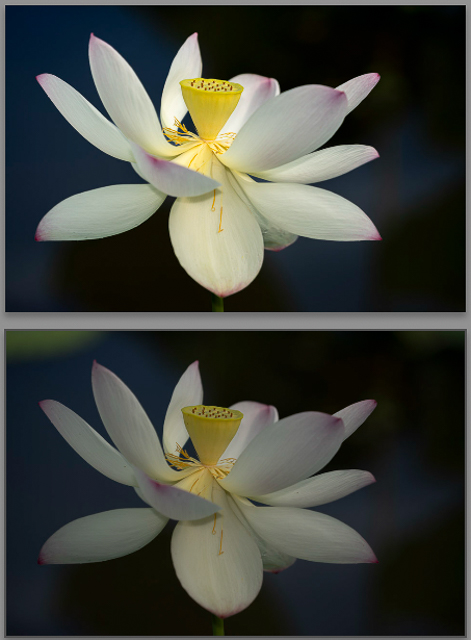
Color has a tremendous influence on how a photograph feels and the mood it projects.
White Balance adjustments can make an image warmer or cooler. This can be useful for correcting inaccurate color, but it can also be a creative choice. A little added warmth, for example, might help communicate the feeling of late-afternoon sunlight.
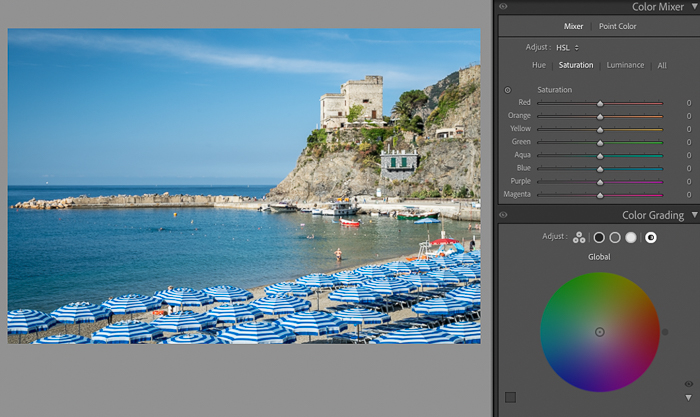
Saturation and Vibrance can give colors more impact but they're easy to overdo, especially Saturation. A little can make an image come alive; too much can quickly make colors look unnatural.
Lightroom also offers more advanced color tools. Point Color and the Color Mixer give you control over individual colors.
Color Grading allows you to adjust color independently in the shadows, midtones and highlights.
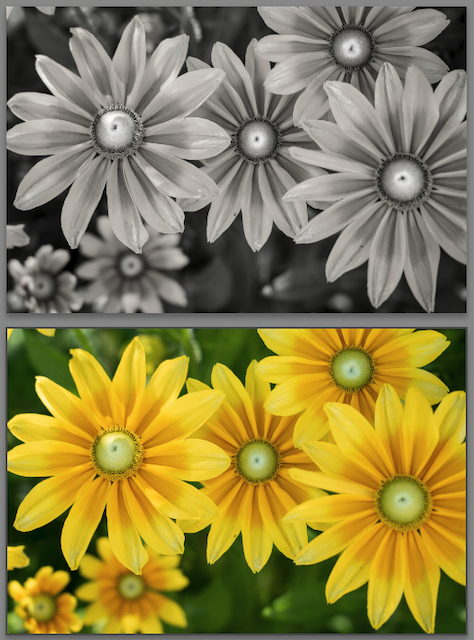
And don't forget about removing color altogether. Try converting an image to black and white. Lightroom's Profiles and Presets can give you a variety of starting points for exploring different black-and-white interpretations.
Phone photographers can experiment with many of these same concepts using the color, warmth, saturation and filter controls available in their native or third-party editing apps.
4. Crop & Straighten
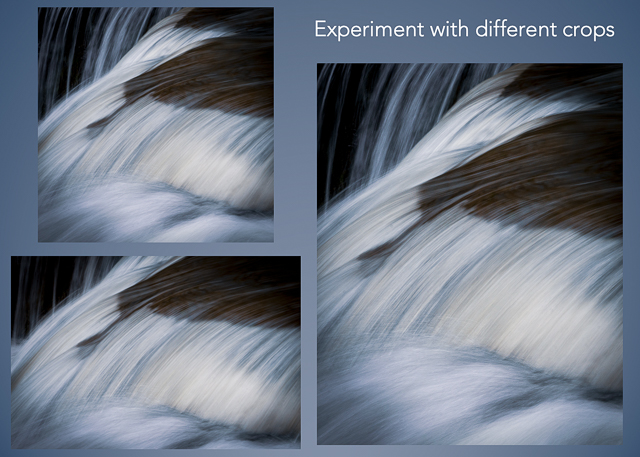
Ideally, we want to frame our subject well when we take the photograph, but cropping gives us another opportunity to strengthen the composition afterward.
Try cropping the same image several different ways. In Lightroom, you can create Virtual Copies so you can experiment with different crops and compare the results side by side without creating additional copies of your original file.
Cropping tools can also help straighten a tilted horizon. For buildings and architectural images, Lightroom's Transform tools can be especially helpful for correcting perspective and straightening vertical or horizontal lines. Try the Auto option as a starting point and fine-tune from there if needed.
Cropping and straightening are also available on our phones.
5. Apply Lens Corrections
Lenses can introduce distortion, darkening around the edges of the frame and other optical characteristics. Lightroom's Lens Corrections tools can compensate for these issues.
Direct the Viewer's Eye
Once you've made adjustments to the overall image, selective editing opens up another world of possibilities.
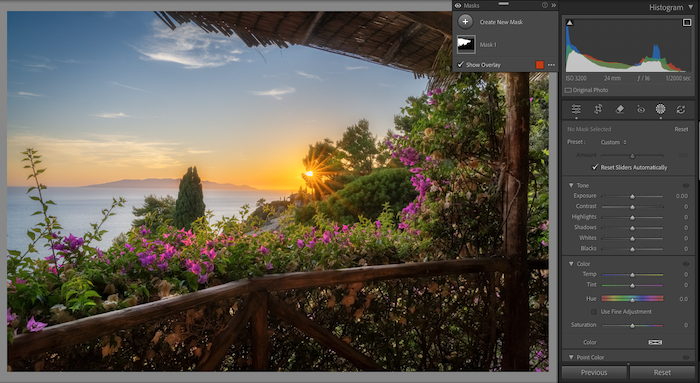
Using Masks in Lightroom, you can make changes to individual portions of a photograph without affecting everything else. This can be an incredibly effective way to direct the viewer's eye.
For example, you can:
- Brush over or select a specific area and adjust only that portion.
- Separately adjust the sky, water, land, buildings or vegetation.
- Brighten your subject while leaving the background darker.
- Use People masks to select facial skin, body skin, eyes, teeth, lips, hair, clothing and more.
Many phone third-party editing apps offer selective editing capabilities, although the specific tools vary.
The important concept isn't which tool you use, it’s where is the viewer's eye going, and where do you want it to go? Selective editing can help you guide it there.
Sometimes Less Is More
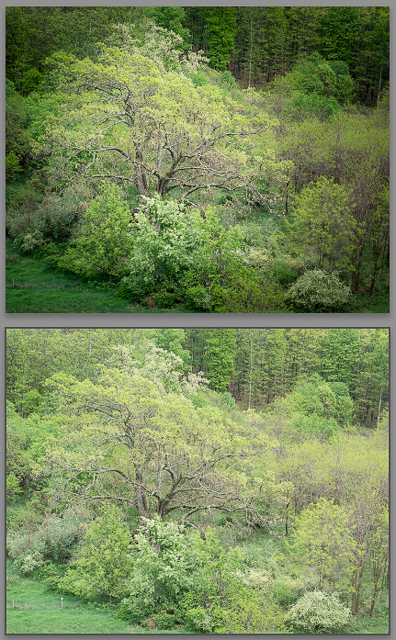
With so many editing tools available, it's tempting to use all of them. It's also very easy to go too far.
Oversaturated colors, halos around objects, unnaturally bright shadows, overly dark skies and excessive sharpening or Clarity can make an image look overprocessed rather than polished.
One helpful habit is to step away from an image after you've finished editing it. Come back a little later and look again. You may find yourself backing off an adjustment that initially seemed just right.
There Isn't Always One "Right" Edit
Editing isn't only about correcting exposure and color. It can also be a creative part of photography and there may be more than one way to create an impactful image.
Experiment and See What Happens
The next time you take a photograph you like, spend a few minutes exploring what a thoughtful edit can do.
And don't limit yourself to your newest photographs. Take a look through your image library for hidden gems that just need a bit of editing to bring them to life. You might be surprised by how much potential is hiding in an image you've already captured.
The purpose of learning about editing tools isn't to suggest that every photograph needs to be changed. It's to understand what's possible so you can decide when an adjustment might help you achieve the image you want.
Looking for a good workflow for your editing? Check out our Lightroom classes. In-Person and on Zoom, we've got you covered with our Editing/Post Processing classes!