
Travel Photography Tips: Planning, Packing, and Capturing Great Photos
June 24, 2026 by Marie Joabar
 Travel offers some of the best opportunities for photography, whether you're visiting a national park, exploring a new city, or discovering hidden gems close to home. But successful travel photography starts before you ever take your first picture.
Choosing the right gear, packing it safely, protecting it while on the road, and having a plan for backing up your images can make your trip more enjoyable and help ensure you come home with great photographs.
Choosing the Right Gear
One of the biggest decisions before any photography trip is deciding what equipment to bring. While it can be tempting to pack every lens and accessory you own, traveling lighter often makes photography more enjoyable.
Start by thinking about what you plan to photograph.
If your itinerary includes landscapes, cityscapes, or architecture, you'll likely want a wide-angle lens. A telephoto lens can be useful for wildlife, details, candid moments, and distant subjects. For many photographers, a lens range covering from18mm to 200mm is ideal for most travel situations. Consider wider such as a 14mm for more unique architectural and cityscape shots.
If you have lenses or accessories that you rarely use at home, ask yourself whether you'll truly use them on the trip. Chances are, you'll be happier carrying less gear.
Consider packing:
- A versatile camera and lens combination
- Extra batteries
- Multiple memory cards
- Battery charger and charging cables
- Circular polarizing filter for reducing glare and enhancing color
- Tripod if you expect to photograph landscapes, night scenes, or long exposures
- A second camera body or backup camera if you're traveling to a remote destination
- Some people use one case to get their gear to their destination, and another once they get there (especially helpful when flying).
Don't forget your smartphone. It can serve as a capable backup camera, a tool for scouting locations, GPS tagging, and quick image sharing while traveling.
How to Carry Your Equipment
 If you're flying, it's generally best to carry your camera bodies and lenses with you rather than checking them.
Look for a camera backpack or roller bag that meets airline carry-on requirements. Before traveling, check your airline's current baggage policies.
A few additional tips:
- Remove lenses from camera bodies before packing.
- Use padded dividers to protect equipment.
- Pack tripods in checked luggage when practical.
- Use TSA-approved locks on checked bags.
- Keep spare lithium-ion batteries in your carry-on bag and store them so the contacts cannot touch other batteries or metal objects.
Once you arrive at your destination, consider using a smaller bag to comfortably carry only the gear you'll need for the day.
When traveling in busy areas, avoid camera bags that prominently advertise expensive equipment.
Protecting Your Gear While Traveling
Travel can expose your equipment to heat, humidity, rain, dust, and sand.
Whenever possible:
- Avoid leaving camera gear in a hot vehicle.
- Use a rain cover or plastic bag during unexpected showers.
- Keep cameras and lenses protected from blowing sand at beaches and deserts.
- Store gear in a padded camera bag when not in use.
- Consider carrying a few silica gel packets to help reduce moisture in humid environments.
A little preparation can prevent costly damage and keep your equipment functioning throughout the trip.
 Planning Your Photography
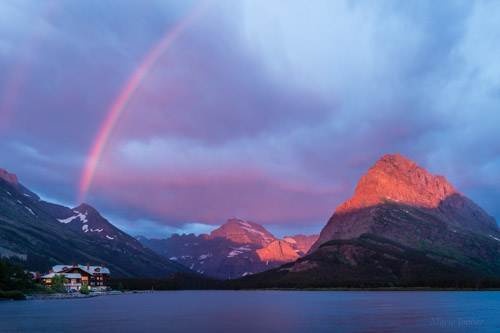
A little research before your trip can help you identify interesting locations, viewpoints, and the best times to visit.
That said, don't over-plan. Some of the most memorable photographs come from unexpected moments rather than carefully scheduled stops. Leave room for spontaneity and exploration.
Talk to local residents when possible. They often know about unique viewpoints, hidden locations, and photo opportunities that don't appear in guidebooks.
Tips for Better Travel Photos
Photograph During the Best Light
-Early morning and late afternoon often provide the most flattering light for photography. The lower angle of the sun creates warmer colors, softer shadows, and more depth in your images.
Avoid Harsh Midday Light
-Bright midday sun can create strong contrast and deep shadows. Use this time to photograph indoors, visit museums, scout future locations, enjoy a meal, or simply take a break.
Take Advantage of Cloudy Days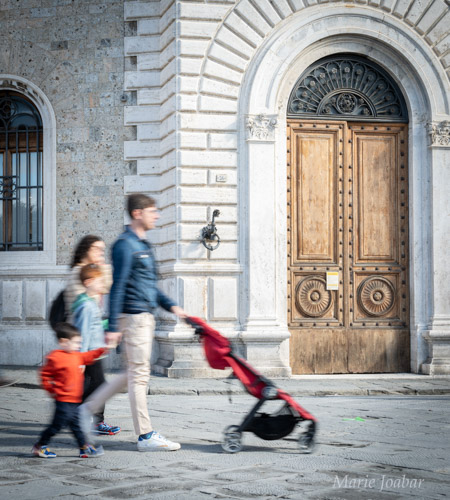
-Overcast conditions create soft, even light that works well for portraits, gardens, street photography, and architectural details.
Include People in Your Images
-People add scale, interest, and a sense of place to travel photographs. Whether photographing friends, family or the locals, including people can help tell the story of a destination.
-When creating portraits outdoors, look for open shade whenever possible. Shade helps avoid harsh shadows under the eyes and chin.
-If your subject must stand in direct sunlight, try some fill flash to help brighten shadow areas and create a more balanced exposure.
Improve Landmark Photos
-When photographing family or friends in front of landmarks, avoid placing them directly in the center of the frame. Position them slightly off to one side and compose the image so both the person and the landmark are clearly visible.
-Focus on the person rather than the background to create a stronger image.
Look Beyond the Obvious Shot
-When you find an interesting scene, don't stop after taking one photograph. Often the best image isn't the first one you see.
-Try different angles. Move closer. Step farther away. Shoot high, shoot low, zoom in on details, and explore the scene from multiple perspectives.
 Backing Up Your Images While Traveling
-One of the biggest mistakes photographers make is waiting until they return home to back up their images.
-Whenever possible, create multiple copies of your files throughout your trip.
Options include:
- Backing up images to a laptop each evening
- Using a portable SSD or external hard drive
- Uploading important images to cloud storage when reliable internet is available
- Using dual memory card slots to record duplicate copies in-camera
If you prefer not to travel with a computer or backup device, carry multiple memory cards and avoid storing them all in the same bag. Separating cards reduces the risk of losing every image if a bag is lost or stolen.
The goal is simple: never have only one copy of your photographs.
Before You Fly
Travel regulations can change, so it's always a good idea to review current transportation guidelines before your trip. The TSA website provides the latest information on carry-on items, batteries, and security procedures.
- TSA: https://www.tsa.gov/
- TSA PreCheck: https://www.tsa.gov/precheck
Be sure to review your airline's current carry-on size and weight restrictions before traveling, as policies can vary by airline and fare type.
Enjoy the Journey
The best travel photographs often come from moments we didn't plan. Pack thoughtfully, travel light when possible, and remain open to unexpected opportunities.
Happy travels and happy shooting!