10 Tips For Landscape Photography
June 25, 2020 by Marie Joabar
The key to an engaging landscape image is to photograph visually interesting scenes, convey a sense of depth, have foreground interest and use strong compositional elements. Review these 10 tips for stronger Landscape shots.
1. Plan Your Shoot
Is there a specific image you’re looking to capture? If so, research and plan where you can go to get it. Make a scouting trip so you know where to go, where to park, what angle you’ll shoot from, etc. Make a note of how it will be lit and whether to shoot it in the morning or afternoon. If you can’t go there in person to scout, do some online research and gather as much info as you can.
2. Use An App
The Photographer’s Ephemeris (TPE) is invaluable for knowing the direction of the light for your scene at various times of day at whatever location you dial in. You can also pay for Skyfire which forecasts the probability of a colorful sunrise or sunset.
Another popular app is PhotoPills (for iOS) which gives even more; depth of field tables, exposure adjustments when using filters, Milky Way position tools, star trail calculator and Augmented Reality (AR) modes so you can see the sun, moon, or Milky Way position overlaid on your scene.
3. Plan For the Best Light
If the scene is facing east, plan a morning shoot and capture the soft golden light. If it’s facing west, plan for late afternoon. If the scene is facing south, either morning or late afternoon could work, and if facing north, it will be shaded just about all of the time.
Cloudy days give nice even light allowing us to shoot all day while thick, heavy clouds may be gloomy (fine if that’s the mood you want to capture). Consider processing your drab sky images as black and white. Cloud formations before and after storms are dramatic and definitely worth capturing.
 4. Lenses For The “Look” You’re After
Wide angle lenses such as 14mm, 18mm, 24mm give greater depth of field. So when you want everything rendered sharp from front to back, you’ll have an easy time if you use a wider lens. Try using f8 and f11 if there is nothing too near you in the foreground, use f16 or 22 if there are nearby foreground elements that you want sharp as well as the background.
For the times when you cannot get close enough physically, a longer telephoto will come in handy. However, these give less depth of field and compress space so carefully choose the aperture and zoom in in playback to make sure you captured the depth you wanted.
5. Composition
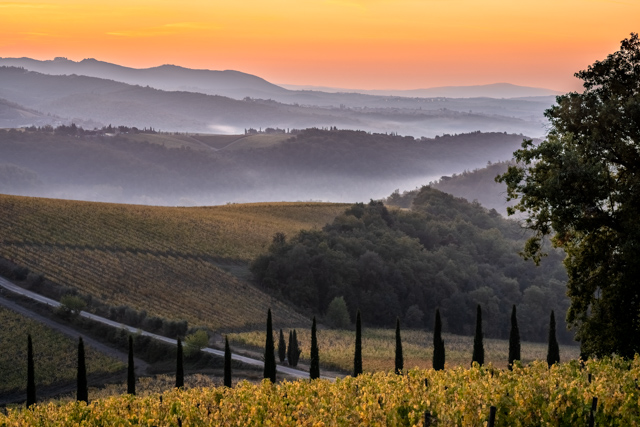
- Frame a compelling image. Successful landscape images usually include a foreground element as well as the vast scene beyond. This conveys both depth and visual interest.
- Intentionally decide what to include in the frame and what to leave out. If it’s not helping the image, it’s not worth including. Sometimes less is more and helps focus the viewer’s attention.
- Practice “Frame Patrol,” look at the edges along the entire frame, are there distracting elements? Can you zoom tighter, or go wider?
- Shoot from different position and angles. Capture a few compositions of the same scene; some wide, some tight, some vertical and some horizontal. When you get home, you can decide which you like best.
- Avoid centering your main subject, instead, think thirds and place your horizon lines in the upper or lower third of frame. Think of a tic-tac-toe grid over your viewfinder and place your main subject near one of those intersecting lines for better visual interest.
- Work with compositional elements to affect mood.
- Bright colors, convey excitement and energy and grab the viewer’s attention. A moody scene with a muted color palette can cause the viewer to pause and linger.
- A winding path, road or stream will lead the viewer’s eye through the frame as will leading lines.
- Play with angles, shapes and patterns for visual interest.
6. Check Focus
For the large scenic landscape shot, focus on something approximately one third into the scene and press the depth of field preview button* to see if you have the sharpness throughout the scene that you want. If not, focus on something a bit nearer or further and again check what’s sharp. Be sure to put some distance between yourself and your closest subject for best results.
*Depth of Field Preview button - When we look through the lens, the aperture is wide open letting in the most amount of light so we can see what we’re shooting. When we press the depth of field preview button, it closes the aperture to the one we’re using so we can see what’s in focus and what’s not.
Don’t forget to zoom in in Playback to ensure you have a tack sharp image.
 7. Check Exposure
Set your camera to display over exposure warnings (sometimes referred to as the blinkies) so you can retake the image if needed with a different exposure setting. Use the camera Histogram to measure your exposure and to determine if you have captured a good range of data in your file.
8. Gear Recommendations
- Carry a tripod so you’re able to use low ISO settings and have less grainy images. These also to allow you to use slow shutter speeds that might be needed when using small apertures of (f16 or 22). Additionally, you can be more creative and blur the moving clouds and flowing water, etc.
- Plan on 3 filters;
- On sunny days a Circular Polarizer will blue up your skies, add nice contrast and give better saturation.
- For times when the sky is super bright, a split Neutral Density filter can be placed over the lens to darken the sky and balance it better with the landscape below.
- A Variable Neutral Density filter allows you to dial in the amount of darkness that you need in the whole scene and allows you to use slow shutter speeds on bright days, great for shooting waterfalls, blurring flowing water or clouds.
9. Be flexible and Go With The Flow
Careful planning can help you reach your goals for lovely landscape shots but sometimes things happen that are out of our control. Don’t despair, look for the silver lining in the situation and try to make something from it. Having a Plan B helps.
 10. Shoot Happy
Don’t get caught off guard, carry extra memory cards and batteries and bring water and a snack. Bug spray in the summer and hand/foot warmers in the winter. Don’t let poor planning distract you from capturing that winning landscape shot!
For hands-on practice with landscape compositions, consider any of our In-The-Field-Shooting classes. Hope to see you at one soon.