8 Great Tips for Photographing Holiday Lights
December 5, 2012 by Marie Joabar
 Colorful holiday lights add to the magic of the season and can be great fun to photograph. At this time of the year we’ll find beautifully lit outdoor displays at many of the DC area regional parks, at houses in our neighborhoods, along city streets and of course let’s not forget the Christmas tree in our own living room.
Here are a few tips for capturing the magic.
1. Photographing holiday lights is no different than most low light photography. This means your best friend will be your tripod. If you don’t have one, (maybe something to put on your Santa list) get a good sturdy one that guarantees to hold your camera steady. This is especially important for shooting the lights outdoors as you won’t be using a flash and you’ll need a slow shutter speed to expose properly.
You don’t necessarily have to have an SLR to make the necessary adjustments, most point and shoot cameras have a dedicated low light mode and allow you to disable the flash and even adjust the ISO if necessary. It’s not as important what camera you have, as much as it is on how you use it.
2. If shooting in the Auto modes, look for the Night Scene mode. If you are shooting people in front of the tree (in the evening or indoors at night) look for the Night Scene & People mode. This will fire the flash at the end of the exposure so their faces will show nicely.
3. In the Manual modes, choose the Aperture (A or AV) mode. With a tripod, try starting with ISO 200, set the aperture to f8 and take a few shots. If they are too bright or too dark, use the Exposure Compensation (the +/- button) to make the needed adjustment. Dial towards the minus sign if photos are too bright and dial towards the plus sign if the photos are too dark. This is a starting point, work to get the proper exposure then you can begin tweaking it and changing the aperture for the desired look.
 4. For most outdoor lights that you’ll be photographing, you can forget the flash but for indoor shots, it can make all the difference. Shooting the Christmas tree with the proper mix of flash and ambient light can result in a lovely photograph. Shooting it without flash you risk seeing dark shadows and a much lower level of detail. Detail is the key with smaller displays so it might be best to use the flash to fill in the darker areas. The pop-up flash won’t cover more than 10 feet and can be quite harsh. An off-camera flash will give better results as it allows you to control both the quality and quantity of light.
5. The White Balance setting tells your camera the color of the light you’re shooting in. With holiday lights, try using the Auto WB to start. Also try a few others to see if you get a better color tone in the image. The incandescent/tungsten (light bulb icon) may work well, also try daylight (sun icon). Experiment with this at each location you photograph at.
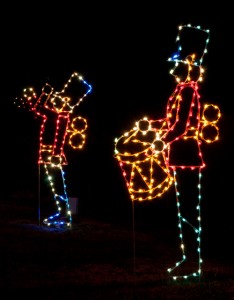
6. Composition is obviously very subjective and your lens choice will reflect this. To capture outdoor displays and holiday scenes, a wide angle lens of 50 mm or less will work great. For isolating areas of a scene, or featuring one item to stand out among the rest, use a telephoto lens of 100mm to 200mm.
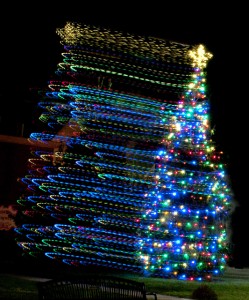
 7. For a creative or artsy look try moving the camera slightly or zooming the lens during the exposure to purposely create a blurring effect. This is a case when blurring is a good thing, done correctly you can create a colorful, abstract masterpiece. Another fun trick is to shoot the lights out of focus. Using a telephoto lens, this can render the lights as colorful disks or balls of lights.
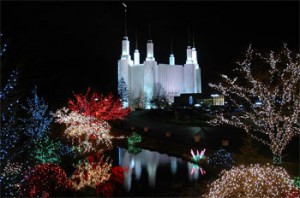
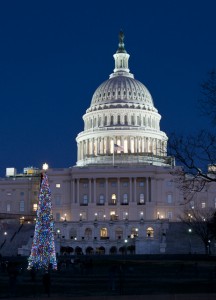
8. Shooting during twilight when the sky is a deep royal blue helps the lights stand out and makes an dramatic image. The twinkle twinkle look with a star effect around the lights can be achieved by using a smaller f-stop (f 16 or 22), you could also use a Star filter.
Like everything in photography, practice makes perfect. If you aren’t very familiar with low light photography don’t let a few blurry pictures discourage you, keep shooting and you’re sure to capture wonderful holiday photos you can enjoy year round.
