Achieving Depth In Your Landscape Photos
October 4, 2023 by Marie Joabar
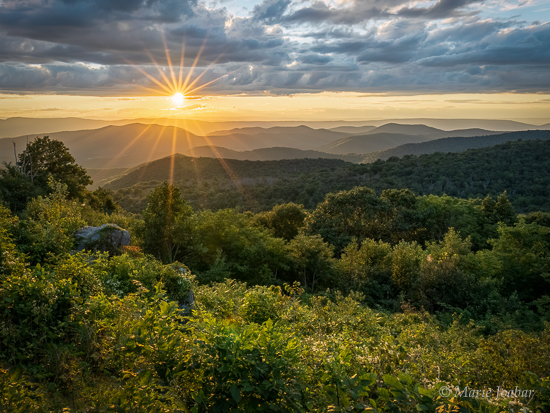
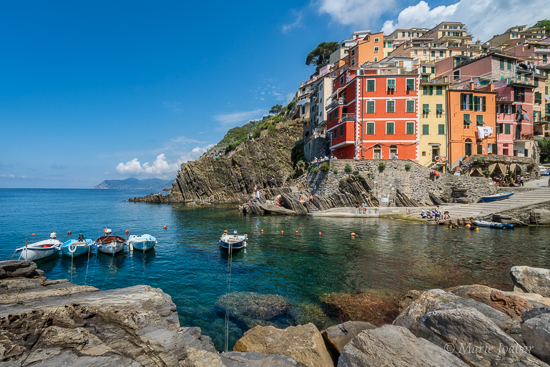
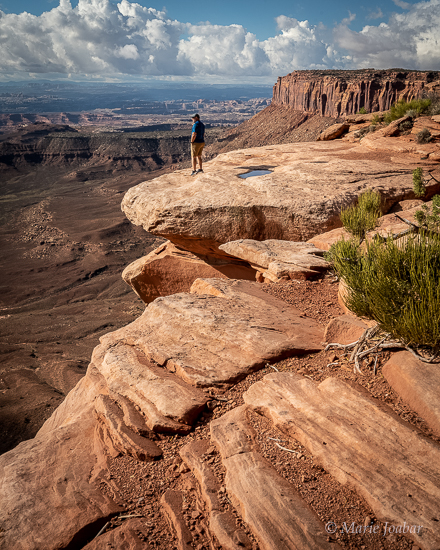
 The key to an engaging landscape image is to convey a sense of depth. Having something interesting in the foreground grabs the viewer’s attention and draws them into the scene where they can explore the middle area and the background. When there is interest in all three areas, it’s important to render all of them sharp.
The key elements used to capture great depth and have everything sharp are;
- The Aperture
- The Focal Length of the Lens
- Your Distance to the subject as well as the distance between the foreground and the background.
- Where you Focus
The Aperture controls the depth of field; how much appears sharp in front of and behind the subject you’ve focused on.
Using smaller apertures such as f11, f16, or f22 are needed when you have a nearby foreground element and want that and all the background sharp. However, if there is no foreground subject or there is little depth in the scene, f8 or 11 should work fine. So it’s only when you have nearby subject that the smallest apertures are needed.
Most lenses are optimized at the middle apertures (f8 typically) so if you can capture the depth you need at f8 or f11, use those and avoid automatically setting your lens to its smallest aperture of f22.
The Focal Length also plays an important role. To achieve maximum depth and have sharpness throughout, it’s best to use a wide angle lens such as 14mm, 18mm, 24mm, etc. These lenses are designed for landscapes so it’s easier to get great depth with them than the longer telephoto lenses such as 70mm, 135mm, 200mm, etc. Telephoto lenses compress space so depth is minimized.
Distance is another factor. The closer you are to the first subject in a scene, the smaller the aperture will need to be (f16 or 22). If there is nothing that close to you and everything is off in the distance, you can use a wider aperture, f8 or f11, and still get great depth of field.
Also, how far is your subject from its background? The further it is, the more depth there is in the scene and to make it all sharp, use f16 or 22. F4 or 5.6 will blur it. 
So a wide angle lens together with a small aperture and taking distance into consideration will give us sharpness throughout the scene. The question remains though, Where Should We Focus?
This is where using the “Hyperfocal Distance” technique comes into play. It may sound intimidating but it’s not, it simply means using the focusing distance that gives your photos the greatest depth of field.
There's and easy and more advanced way to determine this.
- EASY - Position your focus point on something a third of the way into the scene. This should give you one third in front of your focus point, and two thirds behind it sharp. Try it, it works pretty well most of the time as long as you are using a wide lens and small aperture.
- The more ADVANCED way is to find the hyperfocal distance for your lens, the focal length and aperture combination. Using a hyperfocal distance chart, you'll see how much will be sharp in front and behind your focus point.

See if your lens came with a hyper focal distance chart, if not you can find many online, better yet is to use an app. I like Simple DOF by Montana Media but there are many to choose from.
If you’d rather use the easier way, try the one third technique and see if your camera has a depth of field preview button*. Press on the DOF Preview button and it will close the aperture to the one you have dialed in allowing you to see the sharpness (or lack of) in your scene. If all is not as sharp as you need it, try focusing on something a bit nearer or further and again check what’s sharp using the DOF preview button.
One of the most important things you can do before leaving a scene is to check that you have what you want. In the Playback mode, zoom way into the frame and scroll side to side and up and down checking for sharpness throughout.
So to sum it up, for maximum depth and sharpness in an image, use a wide angle lens, set a small aperture of f11, f16 (f22 if needed), carefully select what you focus on. Try it, experiment and see how effective this method can be. 
Aperture and focal length used in images (from top to bottom).
1. Sunset - f16 with 14mm lens
2. Italian coast town - f16 with 12mm lens
3. Smithsonian Castle - f20 with 15mm lens
4. Red rock overview - f 16 with 35mm lens
5. Maine pond - f11 with 28mm lens
* The “Depth of Field Preview” button is located on the front of most DSLR and mirrorless camera bodies although not all cameras offer them. Normally when we look through the viewfinder, the aperture is wide open letting in the most amount of light making it easy to see what we are shooting. Using the depth of field preview button shows you the scene with the lens closed down to the aperture you’re using. It will appear dark as the aperture is letting in less light but once your eye becomes accustomed to it, you will be able to see what is in focus and what is not. It might be helpful to slowly change the aperture a little at a time giving your eye the chance to adjust and see the changes.
The first time you try this it would be best to look at a brightly lit scene so you can more easily see thru the viewfinder. Focus on a subject then press on the depth of field preview button.
