Shooting Color in Black and White
October 16, 2013 by Admin
A Guest Post By Photographer Wesley Schaefer

 With Fall upon us, we photographers have endless opportunities to capture the changing season. Red, orange, and yellow leaves swirl around us yet our excitement is dampened and we pout if nature provides us with a gloomy gray sky and horrible light to work with.
All is not lost. With flat light and a gray sky also comes the opportunity to tune our eye and photograph in black and white. Most DSLRs and many Point & Shoots give users the setting to shoot exclusively in black and white* and this is exactly what I recommend you do as an exercise for a day or two.
The lack of color options will help transition your eye from seeing bright vibrant colors to noticing the deep shadows, shades of gray, streaks of light, and patterned textures. All will help develop your eye and improve your vision when you go back to shooting in color.
While many people might ask “Can’t I just change it in post?” Of course you can and typically that’s the recommended way; capture in color and convert to black & white in post but this is about learning to ‘see’ and really looking at what you are capturing. The restriction of shooting exclusively in black and white might seem confining at first but ultimately it’s freeing.

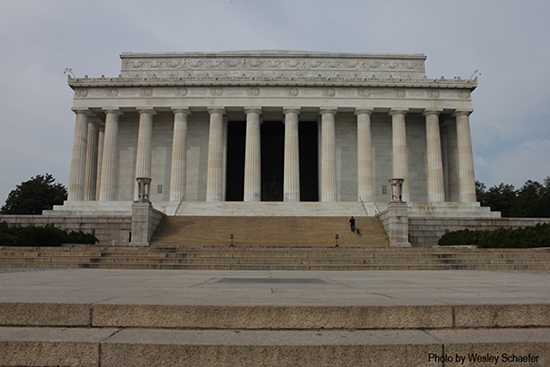
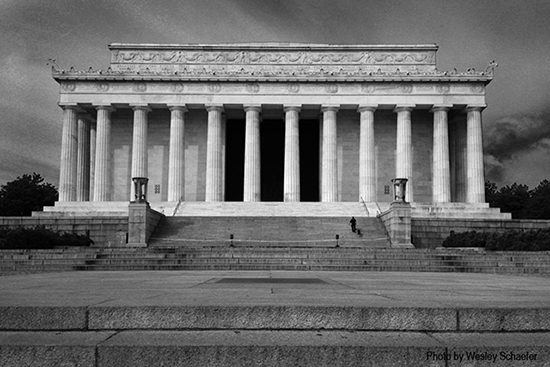
The examples I show were taken with decent light, nothing amazing, but useable. As you can see with a little dodging and burning, nothing more than what film photographers did in the darkroom, you can end up with a moody, eye-catching piece all without color. The key in my opinion is to concentrate on textures, which become more visible in monochrome, and the flat light can give you a blank canvas to later work with in black and white.
Once the image is downloaded, play with the different color channels as you would with colored filters in the film days, red will bring up contrast, work the blues darker to give the sky texture. From there dodge the highlights and burn the lowlights. Go gentle; lots of light brush strokes are better than a heavy hand. Use the tools you have at your disposal to bend the flat light into what you want. This is your chance to make the image you see, not to just accept the image that the light and the camera decided to make for you.
 While shooting exclusively in black and white may seem scary at first, imagine if you will the days of film photography. The roll of film you chose was what you had for the next 24-36 images. There was no adjustable ISO, and if you think way back, the option of color wasn’t even available yet many iconic images were captured perfectly without it.
If you are still sweating the chance that you may miss something because your camera is set on black and white, know that if you set it to Raw+JPEG, the JPEG will be in black and white and the Raw image will still have the color data for you work with if you decide to process the file in color.
I recommend giving it a try. The flat, gray light that normally shuts down an image will give nice tones and lots of potential if you switch to a more classic black and white.
* To find the options to set your camera to B&W, try looking under the Picture Styles or Creative Effects settings in your menu. B&W may be listed as Monochrome.
