Summer Photos With Fill Flash
July 17, 2024 by Marie Joabar
It's summertime and that means long days, vacations and sun. Many of us will be capturing memories of our kids at the beach or at historic landmarks during our vacations. While you might think bright sunlight means no need for flash, that's not always the case. Let's explore why and how to use fill flash to enhance your summer photos.
The Challenge of Harsh Sunlight
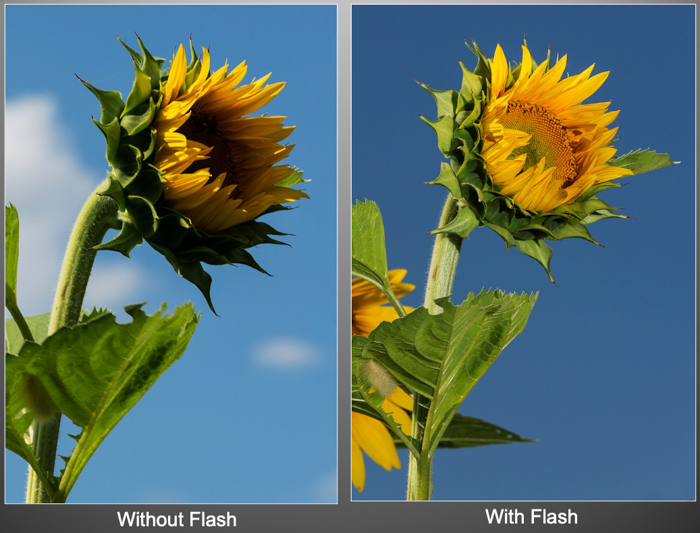
Bright sun often creates dark shadows, and unfortunately, our cameras can't properly expose for both in the same image. We can expose for the subject in the sun OR for the subject in the shade, but not both... unless we use fill flash.
This issue is particularly noticeable when photographing people wearing hats or visors, or any subject that's half in sun and half in shade. Backlit subjects also pose a challenge, often appearing as silhouettes.
The Power of Fill Flash
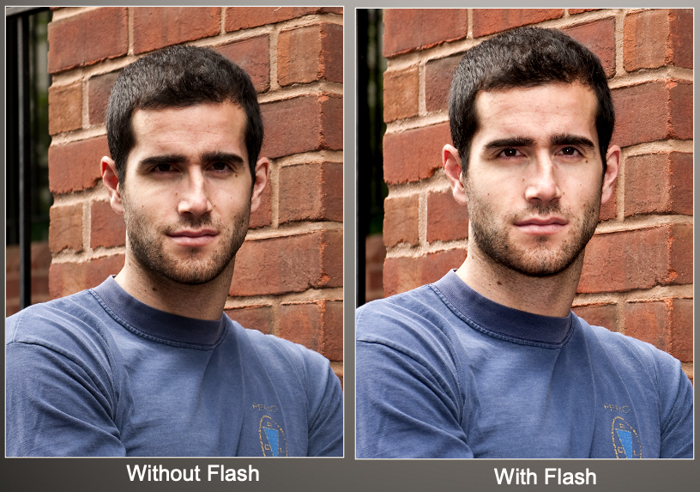
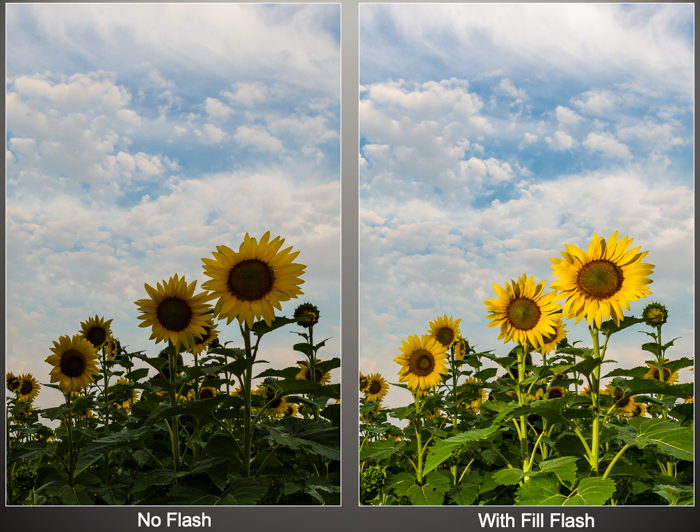
While moving your subject to more even light is ideal, it's not always possible. In these cases, fill flash becomes your best friend. Counterintuitively, bright daylight is one of the best times to use your flash. It balances the light, filling in shadows and exposing areas that would otherwise be too dark.
For your people pics, fill flash is especially useful for:
• Lightening shadows on faces
• Adding sparkle to eyes
• Allowing subjects to face away from the sun, reducing squinting
• If using the camera’s built-in flash, enable Red-Eye Reduction if available.
• Remember, most built-in flashes are effective only within 8-10 feet.
Fill Flash Is Not Just For People And Portraits, use it for:
• Filling in shadows that you want to be brighter
• Evening out harsh light
• Balancing overall light of the scene
Modern cameras have come a long way, but these tips still apply:
• Use a Aperture or Manual mode to enable flash in bright light. (Program Mode (P) would also work.)
• Most cameras have a Flash Sync Speed of 1/200 or 1/250. Before turning on your flash unit, set your exposure with a shutter speed no greater than your flash sync speed and then turn on your flash. Once you have more experience you might be able to go beyond your flash sync speed but if just starting out, stay with the sync speed.
• Use Flash Exposure Compensation (FEC) to fine-tune flash intensity.
 Advanced Techniques: Flash Exposure Compensation
FEC allows you to adjust flash strength. If you're close to your subject, decrease flash output to avoid overexposure. If shadows aren't adequately lit, increase it. Experiment with adjustments in 1/3 stop increments.
Modern cameras often have FEC controls in the quick menu or assignable to custom buttons. Consult your camera's manual for specific instructions.
Beyond Built-in Flash
For those looking to advance their skills:
• External Flash Units: These offer more power and flexibility.
• Diffusers: Soften harsh light from your flash.
• Reflectors: A budget-friendly way to fill shadows without flash.
• LED Panels: Continuous lighting options for both photos and videos.
Smartphone Photography
Most of this advice applies to smartphone cameras too. Many now offer:
• Night mode for low-light scenes
• HDR to balance highlights and shadows
• Portrait mode with simulated studio lighting
Experiment with your phone's Pro or Manual mode to gain more control over flash and exposure.
Post-Processing Solutions
Modern editing software and apps offer powerful tools to address lighting issues:
• Shadow/Highlight adjustment
• Local adjustments to brighten specific areas
• AI-powered sky replacement or portrait enhancement
 Conclusion
Mastering fill flash can significantly improve your summer photos. Experiment with these techniques, whether you're using a DSLR, mirrorless camera, or smartphone. Remember, the best camera is the one you have with you, so don't be afraid to use your flash creatively, even in bright sunlight.
