Tips For Better Portrait Photography
September 14, 2023 by Marie Joabar
 What makes a good portrait? To answer that it's helpful to think about what a portrait is.
When Aaron Clamage teaches our Getting Started in Portraiture class, he always asks the group their definition of a Portrait. He states that there’s no right or wrong answer but it’s interesting to hear what people’s idea of a portrait is.
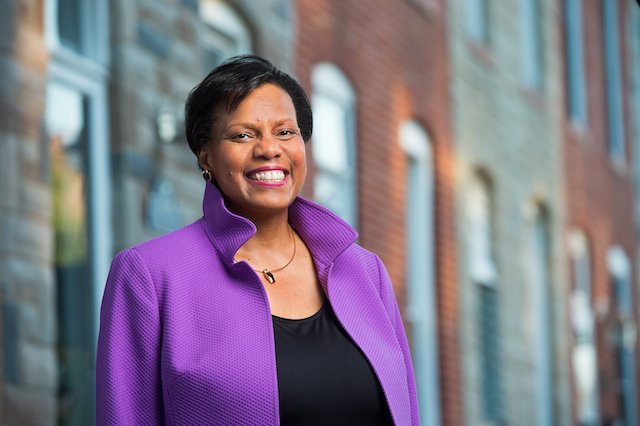
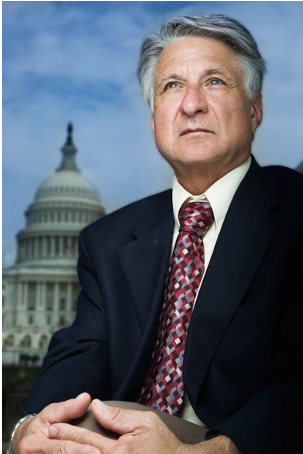
Some think of it as a formally posed photo of a person, others think of it more as a studio headshot, and others think of it as a way to capture the person's essence or tell a story about them (whether it includes their environment or not).
These are all correct but I think we can agree that the most important part of a portrait is capturing the person’s essence or conveying their story. Everyone can take a photo of another person but to capture their essence takes skill.
Based on what I hear when I assist at our portrait classes, when people are just starting out the most difficult things for them are;
- Talking with their subject to evoke an honest emotion or elicit that beautiful smile
- Directing and posing the subjects
- Projecting self-confidence
Like anything else, the more you do it, the more skilled and confident you’ll become.
These tips might help you get the most from your efforts.
First, it is important to know what the portrait is going to be used for so you know the end goal. You’ll shoot a headshot completely different than a storytelling shot.
To Build Your Confidence
- Consider practice sessions with your family or friends.
- Practice talking with them as you photograph them.
- To bring out the smile, have a few jokes in your bag or ask them silly questions such as “who did you have a crush on in grade school?”
General Exposure Settings
- Typically, a portrait should focus on the subject and avoid any background clutter. This can be accomplished by using a wide aperture, like f4 -5.6 to achieve a shallow depth of field (blurred background).
- As always, it’s good practice to use as low an ISO as possible to get the best picture quality.
- If hand-holding, make sure the shutter speed is 1/60 or faster to capture sharp images.
Camera Settings
- Use Continuous shooting (burst mode) especially in groups or at events.
- Take control of your focus and you choose where to put your focus point. For single subjects this should be the nearest eye. If your camera has eye detect you can use it to achieve quicker focus.
- Zoom in to an image in playback to check focus.
Posing
- Position your subject at a slight angle.
- Tilt the head, even if it’s slight it can help a pose feel more dynamic.
- Don’t cut off body parts: fingers, elbows, hands, feet, top of head, etc. OK to cut at mid arm or mid leg but not at ankle or wrist.
- Watch for reflections of flash on windows or eye glasses, angling the glasses down helps prevent this.
Framing
- Avoid the bulls-eye and place your subject in upper or lower third or off to one side.

- Fill the frame with your subject and avoid too much empty space above the person’s head.
- Notice distracting backgrounds.
- Notice how subjects are lit - Can you reposition them or yourself for better lighting.
- People look better in shade or window light. Avoid direct sun if possible, especially mid-day when the light is the most harsh.
- When shooting with mixed light (deep shade with bright light) consider moving everyone into the same light. The camera will expose better this way. Otherwise, use the flash to even out the light.
Lighting
In portrait photography lighting can be done on a scale from very simple to very complex. For total control, professional photographers typically use strobe lights but that’s not to say you can’t get great portraits without them.
- Try starting out with natural light. If indoors, find a window that lets in a good amount of light. Placed your subject at the side of it and have them have them face you. Now, use something to reflect the light to the other side of them. A reflector would be the best option but you can achieve similar results with something as basic as white cardboard, poster board or even aluminum foil.

- Using off camera flash units can give you the right amount of light, where and when you need it.
- The use of light modifiers like umbrellas and reflectors can be an inexpensive way of controlling light to get more precise results. The better your tools, the less work you have to do.
Editing
There are many software programs to choose from but Lightroom and Photoshop are the most common and allow you to put the finishing touches on your photograph.
- Quickly fix things like red-eye, blemishes or crop out distracting elements.
- Adjusting color, contrast and vibrance levels for a polished look.
- Skin smoothing is needed in most portrait shots to some degree.
To Recap; Try to capture your subject’s essence or tell their story. Second, use proper camera settings. Third, take time to pose and look at your framing. Fourth, consider your options for lighting. And last, remember that image editing will give your photo a professional look.
If you want to improve your portrait photography or get started in that field, consider taking one of our portrait or lighting classes listed here.
February 25, 2024, Exploring Headshot Photography
March 3, 2024, Portrait Editing - Tools and Techniques We excited to offer this new class taught by Laura Hatcher!
