Camera Picture Styles and Lightroom Profiles
November 15, 2018 by Marie Joabar
Whether we’re setting a Picture Style in our camera or using Lightroom’s Profiles, we can tap into these creative tools to make our images pop. Let’s look at each and discover how we might use them.
Camera Picture Styles
Our cameras give us some fun settings to affect the look of our image from really vibrant to more natural to black and white and using these can add a totally different feel to our photos.

These Picture Styles are designed to simulate different films. For example, when shooting portraits or weddings one might have used Kodak Portra or Fuji Astia film for less contrast, softer saturation and better skin tones. For landscapes one might have used Fuji Velvia film for more saturation and better contrast. Today, we can simply set our camera Picture Style to achieve the "look" we want.
 These are found in our camera shooting menus listed as:
- Nikon; Picture Control
- Canon; Picture Styles
- Olympus; Picture Mode
- Sony; Creative Style
- Pentax; Custom Image.
The most common presets with these are Neutral, Standard, Vivid, Portrait, Landscape, Faithful and Monochrome. Each affects color tone, saturation, sharpness and contrast differently and in most cameras we can further tweak them to fine-tune the preset we choose.
NOTE- These are only used when shooting in the JPEG format and the “style” is processed to the file in the camera. If shooting in the Raw format, we’ll be working with Raw data so the “style” is not applied to the file. However, since our camera LCD screen previews JPEGs, it would display what the image would look like if the style were applied.
This can be helpful to see the potential of what an image could look like and what we might aim for with our editing. For example, if the final image is to be black and white, we might set our camera Picture Style to the Monochrome setting to visualize how the image looks. Again, if shooting Raw, once the files are downloaded, they’ll be in color but then we can use the tools in Lightroom to make them black and white.
Lightroom Profiles
Lightroom has always provided Profiles in the Presets panel but Adobe has taken them to another level with LR Classic and have many more to choose from.
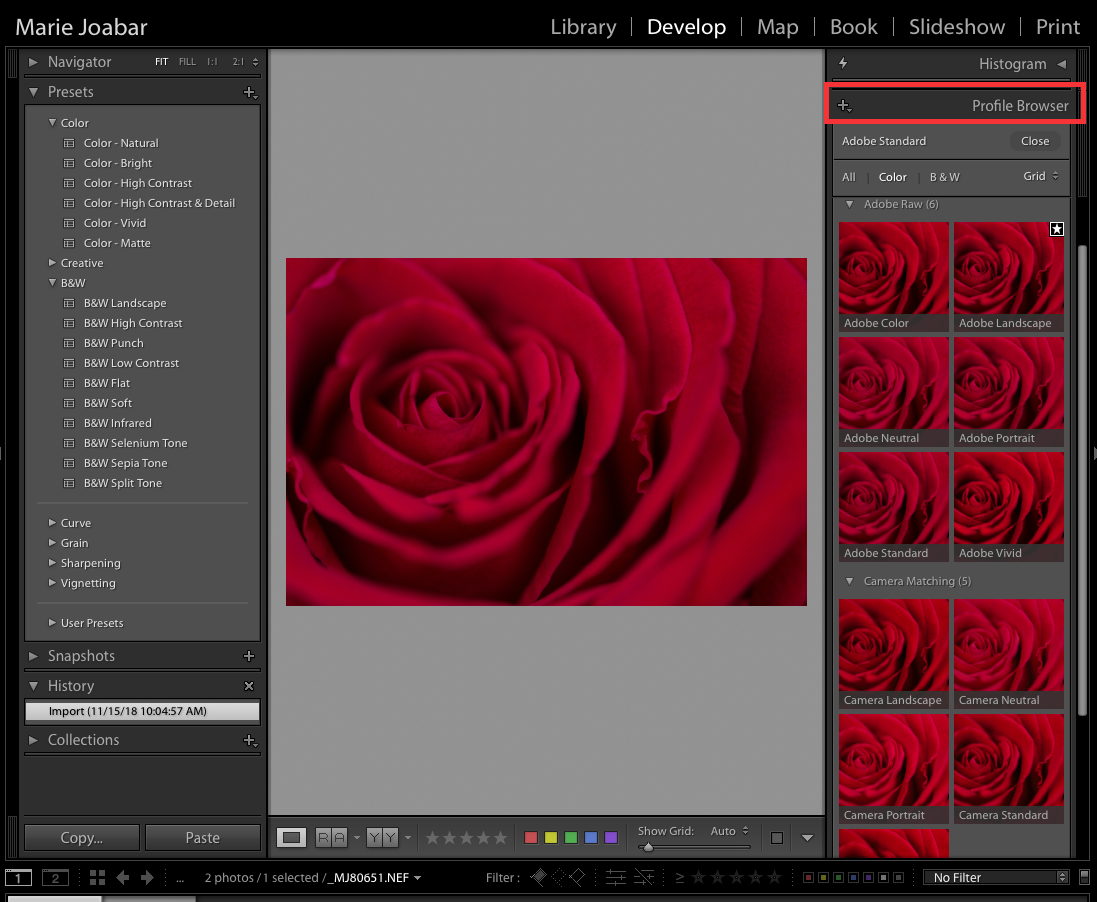
 The newest profiles are now found at the top of the Basic panel (in the Profile Browser shown above) which suggests Lightroom is indicating, this is a great starting point. Regardless of whether we’re shooting JPEG or Raw, we can choose between B&W profiles, Artistic, Vintage, and Modern profiles. If shooting Raw, there are 2 additional Profiles; Adobe and Camera Matching. The Camera Matching Profiles actually travel from our camera to Lightroom with the rest of the metadata so they vary based on camera manufacturer.
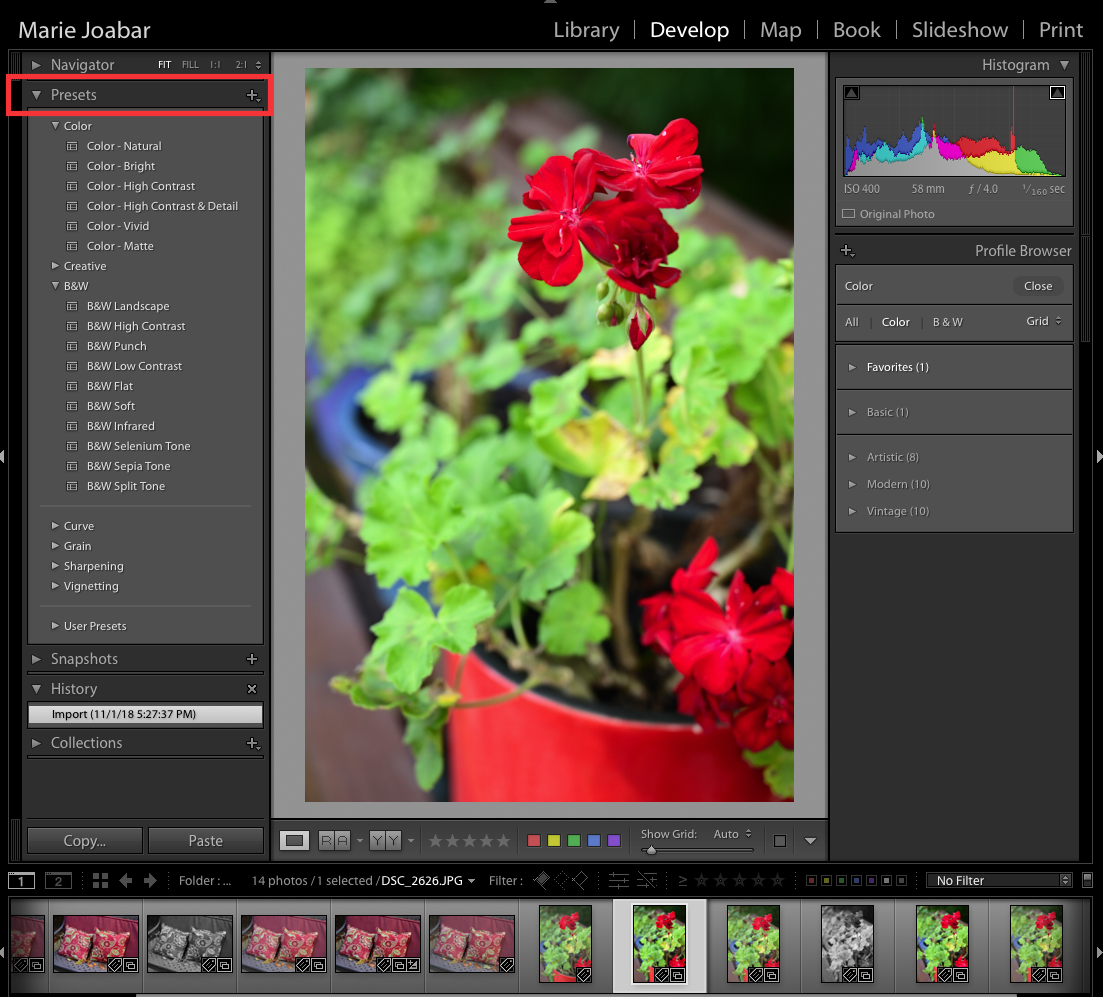
If all the profiles listed above aren’t visible in the Basics panel Profile Browser, it may be due to working with JPEGs, look instead in the Preset panel for similar looks (as shown below). 
After selecting a Lightroom profile we may find much of our editing is done. However, we can continue to edit further if we choose to. We’ll see our sliders set based on the profile we chose and we can easily adjust those if desired.
So let’s give these settings a look and explore if they might help us “see” better images as we capture or offer a better starting point for editing on the back end.
Learn more about these Lightroom profiles in any of our Lightroom classes.
- Lightroom in A Day covers the Library Module (organizing) and the Develop Module (editing).
- Lightroom Library Module In Depth – Learn importing, organizing, searching, keywording, collections, exporting and more.
- Lightroom Develop Module In Depth – Learn how to get the most out of your files with the powerful editing tools in Lightroom from adjusting the entire image to selecting just a portion of it for adjusting.
This link lists all of our Post Processing classes, just scroll by date.
