Snow Photography Tips and How to Capture White Snow
January 21, 2026 by Marie Joabar
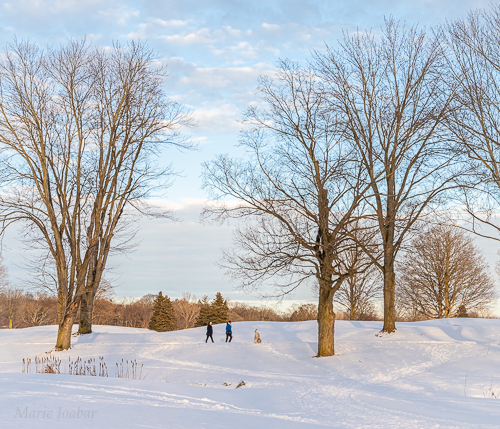
Photographing your favorite subjects in the snow is a wonderful way to create lasting winter memories. Whether you’re capturing your kids building a snowman, exploring icy details with a macro lens, or framing a quiet wooded trail after a fresh snowfall, snow has a way of making ordinary scenes feel magical.
That said, exposing for snow can be tricky.
Why Snow Looks Gray in Photos
Your camera’s light meter is designed to interpret the world as a medium tone (often referred to as “middle gray”). When it sees a scene filled with bright white snow, it assumes the scene is too bright and automatically reduces exposure.
The result is often underexposed images with dull, gray-looking snow — even though the scene looked bright and beautiful to your eyes.
Fortunately, this is easy to correct once you understand how your camera is metering the scene.
Four Ways to Capture Bright, White Snow
1. Use Exposure Compensation to Adjust Brightness

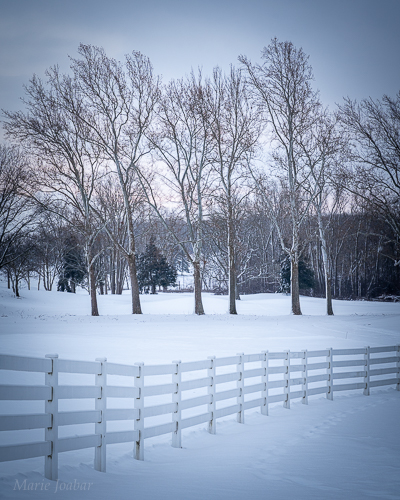
If you’re shooting in Aperture Priority, Shutter Priority, or Program mode, Exposure Compensation is the fastest fix.
- Look for the +/- symbol on your camera.
- Dial exposure toward the plus (+) side by 1 to 2 stops.
- As a reference:
- 0.3 = ⅓ stop
- 0.7 = ⅔ stop
- 1.0 = one full stop
This tells your camera to add light back into the scene so snow appears bright and white.
2. Lock Exposure on a Neutral-Toned Subject
Another effective option is Exposure Lock.
- Aim your camera at something neutral in tone (gray, tan, or even blue sky).
- Press and hold the Exposure Lock (AEL) button.
- While holding it, recompose your scene and take the shot.
This works best with spot metering, or by filling the frame with the neutral subject before locking exposure.
3. Shoot Snow in Manual Mode
If you’re comfortable using Manual mode:
- Spot meter the snow.
- Adjust shutter speed or aperture until the exposure scale shows +1 to +2 stops.
- Each tick on the meter typically represents ⅓ of a stop.
Manual mode gives you full control and is an excellent way to better understand exposure.
4. Use the Snow/Sand Scene Mode
If you’re shooting in Auto mode, check to see if your camera has a Snow/Sand scene setting. This mode is designed specifically for bright, reflective subjects like snow.
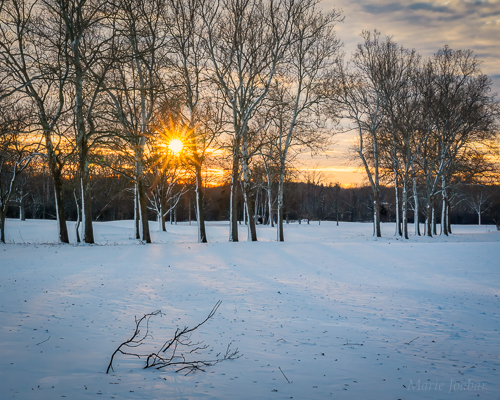
Additional Tips for Better Snow Photography
- Use a low ISO for Snowy Scenes
Snow is bright, so keep your ISO low — ISO 100 or 200 is ideal, especially on sunny winter days.
- Adjust Color Casts with White Balance
Use the camera's White Balance setting to evoke mood. On cloudy snowy days, images can take on a blue cast conveying a cold feeling.
- Try Cloudy White Balance to add warmth to a scene.
- Try Sunny White Balance for a natural look.
- If shooting at night with streetlights, consider Auto WB.
Experiment to see which works best for the scene.
- Protect Highlights with the Histogram and Alerts
- Enable your camera’s highlight alert (“blinkies”) to warn you if you’re overexposing bright areas. You may need to turn this setting on, look at your camera manual for how to.
- Use the histogram as well: Snowy scenes should lean toward the right side. Just make sure the data doesn’t pile up against the edge, which indicates blown highlights. If it does, slightly reduce exposure and retake the shot.
- Use a Flash to Capture Falling Snow Flakes
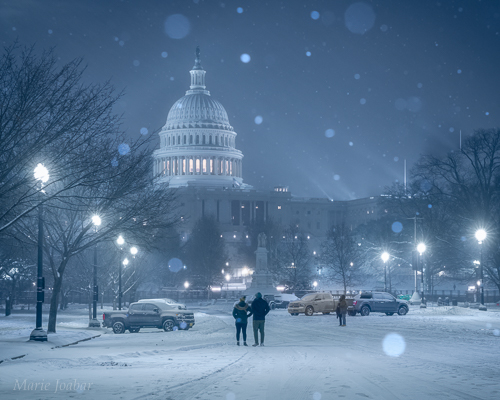
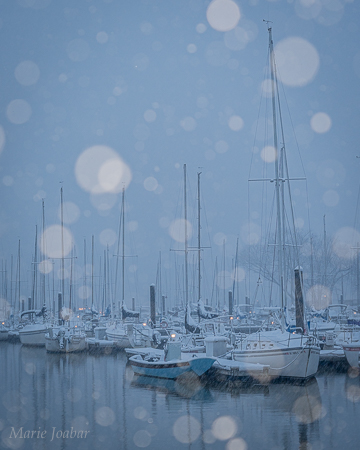
- Another fun technique is using your camera’s flash to photograph falling snow. The flash illuminates nearby snowflakes, turning them into soft, blurred white orbs that add texture, motion, and visual interest to an image.
- The effect can be playful lends a magical, snow-globe effect.
- If the flakes are too bright, try dialing down the strenght of the flash with the Flash Compensation setting.
- Look for Shadows, Shapes, and Black & White Opportunities
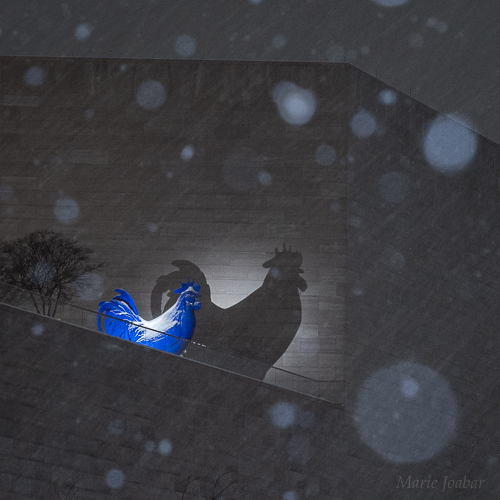
The lack of color can add drama and simplify compositions beautifully. Winter is a great time to focus on:
- Shadows and silhouettes
- Strong shapes and patterns
- Black-and-white photography
- Think Outside the Box and Capture Creatively
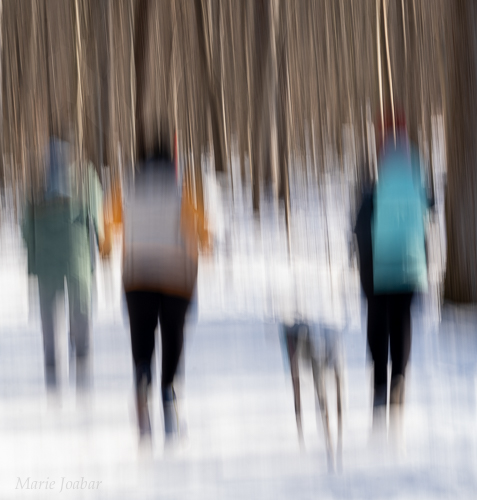
Try using Intentional Camera Movement (ICM) to create unique images that convey a sense of whimsy!
- Use a slow shutter speed to allow enough time to move the camera during the exposure.
- When using ICM in daylight, you may need a circular polarizer or neutral density filter to prevent overexposure while maintaining a slow shutter speed.
- Types of motion to try:
- Swipes: Move the camera vertically or horizontally.
- Zooms: Zoom the lens in or out during the exposure.
- Jiggles: Gently jiggle the camera for a soft, painterly effect.
Final Thoughts on Photographing Snow
Snow doesn’t last forever, and when it’s fresh and glowing, almost anything you photograph can feel special. Don’t let your camera’s meter hold you back — take control of your exposure, add light when needed, and enjoy creating beautiful winter images while you can.
8 Tips For Setting Meaningful Photography Goals
January 2, 2026 by Marie Joabar
Start the New Year With Purpose
The start of a new year offers a natural pause, a chance to reflect, reset, and reimagine what’s possible with your photography. Whether you’re picking up a camera for the first time or refining a long-established practice, setting your goals with intention can bring focus, and momentum to your journey.
Photography growth doesn’t happen by accident. It’s shaped by curiosity, commitment, and a willingness to evolve. This is your opportunity to let go of what no longer serves you, build on what does, and create a vision that excites and motivates you for the year ahead.
1. Reflect Before You Reset
Before setting new goals, take time to look back.
Review your images from the past year; both your favorites and the ones that fell short of your expectations. Ask yourself:

- What worked well and why?
- Where did you struggle technically or creatively?
- Are you photographing subjects you truly care about?
Mistakes and missed shots are just as valuable as successes. Identify the lessons they offer and as a learning tool. Growth begins with honest reflection.
2. Let Go, Then Lean In
As your skills evolve, some habits or pursuits may no longer challenge or inspire you. Letting go of comfortable routines can free up creative energy and make room for new exploration.
At the same time, lean into techniques, genres, or practices you’ve only experimented with before. Seek inspiration from photographers outside your usual interests. Growth often happens just beyond your comfort zone.
Celebrate milestones you’ve reached, reward yourself for progress made and the effort it took to get there.
3. Set Goals That Inspire Action
Vague goals like “take better photos” are hard to measure and easy to abandon. Instead, focus on specific, achievable intentions that encourage consistent practice.
Consider:
- Where do you want to improve technically or artistically?
- Are there software or post-processing skills that would elevate your work?
- Is new gear truly needed, or would mastering what you already own make a bigger difference?
Goals should stretch you but still feel attainable.
4. Commit to a Photography Project
One of the most powerful ways to grow is by committing to a personal photography project. Projects provide structure, direction, and motivation, while still leaving room for creativity.
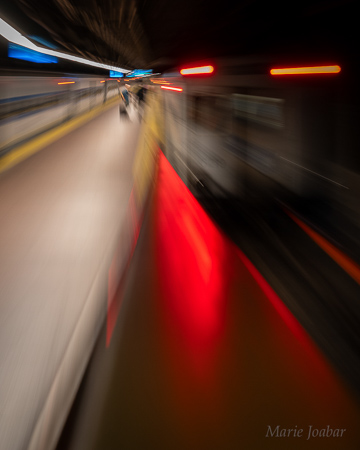
The beauty of a project is that you set the intention, scope, and timeline. Projects can be time-based or open-ended, location-focused or subject-driven, technical or purely creative.
Before starting, ask yourself:
- What inspires me right now?
- What skill or genre do I want to explore or master?
- Do I want to tell a specific story?
- Is there a passion, place, or cause I want to highlight?
Project Ideas to Get You Started
- 365 Project: Photograph every day for a year to build consistency and help you develop your technical skills.
- 52-Week Project: Shoot a different theme each week for variety and creative challenge.
- One Lens Project: Use a single lens for an extended period to fully understand its capabilities.
- One Location Project: Photograph the same spot throughout the year, documenting changes in light, season, and mood.
- Travel or Local Exploration Project: Chronicle day trips, road trips, or walks close to home.
- Shoot for a Cause: Document a community, organization, or issue you care deeply about.
- 5 Senses Project: Interpret the senses in your photography; capture sight, sound, smell, taste, and touch through imagery.
The key is to start, commit, and see where the project takes you.
5. Master Your Tools—Gear and Software Alike
Take inventory of your equipment. Clean and organize your camera bag. Identify items you no longer use and consider selling or donating them.
Make a plan to truly learn your gear:
- Each month, focus on a specific camera setting or feature.
- Revisit your camera manual or online tutorials.
- Identify technical challenges and intentionally work through them.
Your digital workflow matters too. Organizing, backing up, and editing your images efficiently will save time and reduce overwhelm. Make photo management part of your yearly plan.
6. Create a Sustainable Photography Routine
Consistency beats intensity. Build photography into your life in ways that feel realistic and enjoyable:
- Schedule regular photo walks or shooting days.
- Keep your camera accessible.
- Set aside time for learning and experimentation.
- Designate a small space at home for shooting or editing.
Treat photography like practice—the more often you show up, the more confident and capable you’ll become.
7. Learn, Connect, and Share
Photography thrives in community. Consider:
- Joining a camera club or photography association
- Taking a class or workshop in an area you want to improve
- Participating in critiques or competitions
- Sharing your work online or in person and welcoming constructive feedback
When you’re ready, challenge yourself to share your work more widely—through portfolios, exhibitions, publications, or personal projects. Each step builds confidence and clarity.
A Fresh Start
A new year is a blank slate. Release what no longer serves your creative growth and set intentions that excite you. Focus on progress, not perfection. Commit to the work, celebrate the wins, and trust the process.
Make 2026 the year you grow your photographer and continue learning and improving as a visual storyteller.
Our classes are designed to help you improve, give a look to the Upcoming Class List and find one that sparks your interest and helps you grow.
Consider the Year of CPC Photography as a way to keep your hand in photography throughout the year.

Your DC Area Guide To Festive Places To Photograph the Holidays
December 10, 2025 by Marie Joabar
If you love capturing the holidays, check out all the photo ops in this guide. December transforms our city and surroundings to an incredibly festive location! Here's where to point your camera or smartphone to get those magical holiday shots.
Special Displays
 U.S. CAPITOL CHRISTMAS TREE
Through Jan 6, 2026
Location: West Lawn of the U.S. Capitol
Decorated with thousands of hand-made ornaments and The Capitol building makes the perfect backdrop for stunning compositions with the illuminated Capitol dome. Capture it any time of day from early morning to evening, but the prettiest time is just after dusk (around 5-6pm) when sky has color and the tree is lit. Shoot from various angles on the West Lawn to capture different Capitol perspectives. Use a wide-angle lens (16-35mm) to capture both tree and Capitol dome. Weeknights typically less crowded than weekends. Consider shooting from Third Street for a wide Capitol view with the reflecting pool.
THE NATIONAL CHRISTMAS TREE & MENORAH
Through January 1, 2026, 10am - 10pm daily
Location: President's Park, White House Ellipse
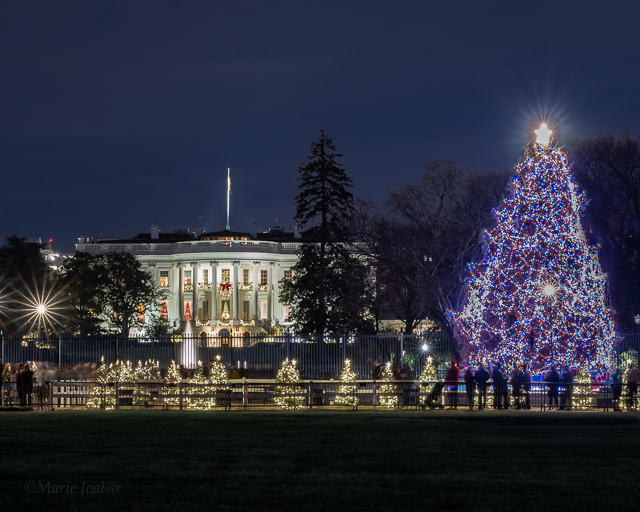
The iconic tree surrounded by 56 smaller trees (one for each U.S. state and territory) is peak Washington holiday imagery. Shoot the full scene with the White House in the background (bring a wider angle lens or use your phone's wide mode), individual state trees with their decorations, people enjoying the display, close-ups of ornaments, the perspective looking down the rows of state trees.
Arrive around 5-6 PM (blue hour) to catch that magical time when the sky is deep blue and the lights really pop.
CANADIAN EMBASSY CHRISTMAS TREE
Through early January
Location: 501 Pennsylvania Avenue NW, 20001
Just a few blocks from the Capitol Tree is the Canadian Embassy tree in a beautiful outdoor setting. Capture the tree by itself, then include the lights leading up to it, frame a shot with the Capitol visible thru the columns, and finally, get close and get some tight shots of the ornaments.
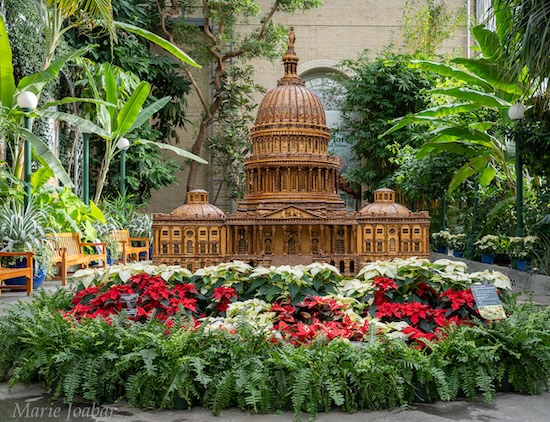 U.S. BOTANIC GARDEN - Season's Greenings Dino-Mite!
Through January 4, 2026, 10am - 5pm daily
Location: 100 Maryland Avenue SW, Washington, DC 20001
Free admission, no tickets required
Explore all the iconic D.C. landmarks models made from plant parts inside as well as hundreds of vibrant poinsettias. The Conservatory provides good natural light during day and evening hours (Dec. 9, 11, 16, 18, 23, 30, and Jan. 1) offer unique lighting and live music atmosphere.
The outdoor garden features plant-crafted dinosaurs and the popular model trains. For the trains, try using continuous/burst mode to capture trains in motion, or slow shutter (1/15-1/30 sec) for motion blur.
To avoid the crowds, consider weekday mornings, especially early December.
CITYCENTER DC HOLIDAY TREE
Through January 8, 2026
Location: Palmer Alley, City Center DC
Free
A 75-foot Christmas tree with 155,000+ lights and 4,500 ornaments is the centerpiece. Shoot it from different angles (look for interesting foreground elements to frame it), detail shots of ornament clusters, the reflection in store windows, people gathered around the tree, the lit-up alley perspective.
Visit after sunset when the tree is fully lit but the sky still has some color. The urban alley setting and modern buildings make for clean, architectural compositions.
ZOO LIGHTS AT THE NATIONAL ZOO
Through January 3, 2026
Location: Wisconsin Ave
Cost: $6 admission
Thousands of LED lights and glowing animal lanterns transform the zoo into a wonderland. The display creates unique opportunities for creative shots with color and light. This is a great place to practice creative techniques—slow shutter speeds for light trails, silhouettes of people against bright displays, abstract shots of colored lights.
MOUNT VERNON CHRISTMAS
Throughout December.
Location: George Washington's Mount Vernon Estate, Alexandria, VA
Cost: $28 adults, $15 ages 6-11, free for 5 and under
Special Event: Christmas Illuminations (December 20-21, 5:30-8:30 PM) offers evening tours with special lighting and holiday atmosphere.
This is an 18th-century holiday experience with authentic candlelight, lanterns, and bonfires creating warm, atmospheric lighting throughout the historic area.
Shoot the fireworks over the Potomac River with the mansion as foreground, candlelit mansion windows glowing in evening darkness and lantern-lit pathways through the historic area.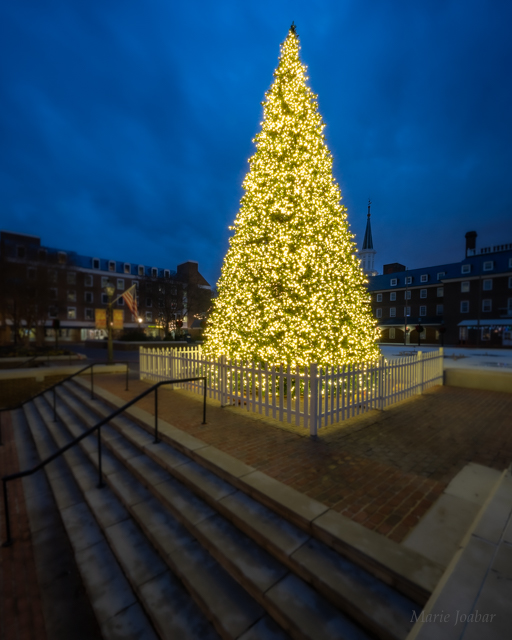
OLD TOWN ALEXANDRIA
Throughout December.
Location: King Street, Alexandria, VA
A stroll down King Street offers many beautiful photo ops, the best on being the beautiful tree and wreathes in the Market Square in front of City Hall. On the river end on King Street frame another holiday tree with the river in the background. Head to the other end and capture the Washington Masonic Temple lit with green and red Christmas colors. Frame King St in the foreground with shops and lit trees along the street with the Temple in the background.
WASHINGTON DC TEMPLE FESTIVAL OF LIGHTS
Through January 1, 2026
Location: Kensington, MD
Free
More than 500,000 lights illuminate the temple grounds, and the white temple architecture reflects light beautifully. This display is DESIGNED to be photographed. Bring a tripod if you have one, the brightness allows for cleaner shots at lower ISOs. Wide-angle lenses capture the scale, telephoto lenses compress the layers of lights.
Capture the lit-up temple as your anchor, pathways lined with lights creating perspective, the international-themed Christmas trees, the nativity scene, creative abstract shots of light patterns, silhouettes of visitors against the bright backgrounds.
GAYLORD NATIONAL RESORT & CONVENTION CENTER
Location: 201 Waterfront Street, National Harbor, MD
The ICE! experience features two million pounds of carved ice sculptures themed around The Polar Express—it's legitimately unlike anything else you can photograph in our area.
It's 9 degrees inside, so bring gloves (or mittens you can still press your shutter button with). The blue ice lighting creates a cool, surreal atmosphere and looks great in photos. Frame the ice sculptures from creative angles, capture people's reactions to the cold and the art, silhouettes against the blue ice, and detail shots of ice carving craftsmanship.
Nearby National Harbor features a fireworks display over the Capitol Wheel on Saturday evenings.
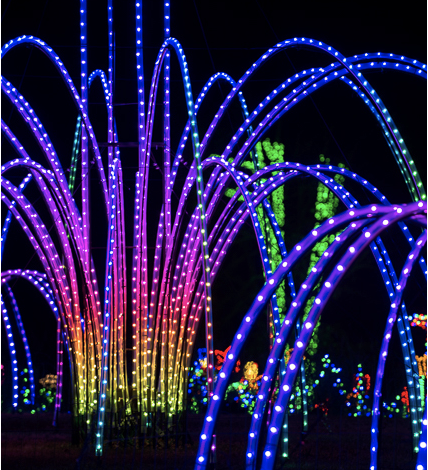 WINTER WALK OF LIGHTS AT MEADOWLARK BOTANICAL GARDENS
Through January 4, 2026
Location: Vienna, VA
Cost: $20.85 (free for children 2 and under)
This elegant garden trail decorated with thousands of sparkling lights creates a peaceful, enchanting atmosphere perfect for families. The natural setting provides beautiful backdrops for holiday photos. Bring your tripod and capture the wide variety of magically lit trees, sculptures and displays.
WINTER LANTERN FESTIVAL
Thursday-Sunday, daily from December 18-January 20, 5-10 PM
Location: Tysons II, 8025 Galleria Drive, Tysons, VA 22102
Cost: $19-$26
Dozens of glowing animal lanterns create an Asian-inspired light festival perfect for evening strolls and unique photo opportunities. The displays are spread throughout an outdoor paved area, giving you space to shoot from multiple angles. Capture glowing tunnel walkways creating leading lines and dramatic perspectives, massive illuminated animal sculptures (some over 20 feet tall), colorful reflection shots if there's been rain, silhouettes of visitors against bright lantern backgrounds, and detailed close-ups of intricate lantern craftsmanship.
Professional equipment and tripods are not permitted
BROOKSIDE GARDENS GARDEN OF LIGHTS
Through Jan 4, 2026, 5pm - 9:30pm
Location: Wheaton, MD 20902
Cost: $13.99 - $16.99
Over 1.5 million LED lights featuring a rainbow canopy, the Loch Ness monster, twinkling sky-high pine tree. New additions include flamingos with reflecting glow in the pond and color-changing jumping pads. New lighted archway choreographed to music. Walk the half-mile loop with intricate, nature-inspired light displays embedded within trees, flowerbeds, and manicured grounds. The best time to visit for photography is at dusk when the deep blue winter sky provides beautiful background contrast.
GAITHERSBURG'S WINTER LIGHTS FESTIVAL
Through December 31, 2025
Location: Seneca Creek State Park
Cost: $15-25 per vehicle
Drive through this spectacular light display featuring animated scenes and holiday vignettes throughout the park's winding roads.
Holiday Markets: Festive Backdrops & Warm Vibes
The variety of vendors creates a documentary-style opportunity, photograph the bustling market atmosphere, detail shots of handcrafted items, people interacting with vendors. Mix in some architectural shots from the surrounding historic buildings.
DC HOLIDAY MARKET AT DUPONT CIRCLE
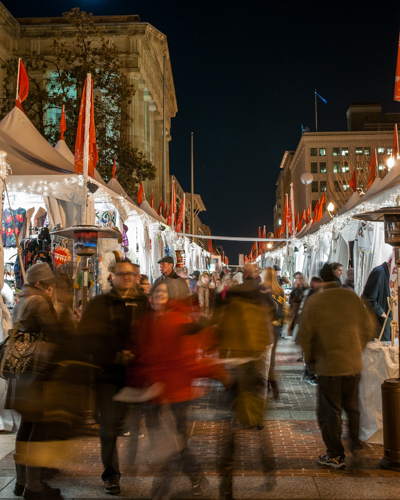 Through December 23, 2025
Weekdays 12-8pm, Weekends 11am - 8pm
Location: New Hampshire Avenue NW (just north of Dupont Circle)
Free admission
The market's bright white and red tents create clean, cheerful backgrounds that make your photos pop without being overwhelming. With 35+ vendor booths, you'll find lots of colors, textures, and holiday details to work into your shots.
DOWNTOWN DC HOLIDAY MARKET
Through December 23, 2025, Daily, 12-8pm
Location: F Street NW (between 7th and 9th Streets)
Free admission
This market stretches two blocks with 100+ vendors, giving you tons of variety.
HEURICH CHRISTMAS MARKET
December 13-14, 2025 (Friday-Saturday only)
Location: Heurich House Museum, Dupont Circle
Admission: $6 - 18
An intimate German-style market. The Victorian mansion as a backdrop offers a completely different aesthetic from the other markets. It's smaller which actually makes it easier to get clean shots without crowds in your frame. Go during the day for warm natural light on the mansion, or evening for a cozier atmosphere.
Ice Skating: Action Shots & Winter Scenes
Photography Tips: Position yourself at the rink's edge for close-up shots, or find a spot on the elevated areas around the perimeter for overhead views. go during evening sessions (7-9pm) when the lights really shine.
Capture skaters gliding past so capture motion shots of people skating, detail shots of skates on ice, couples holding hands. Use fast shutter speed to freeze skaters and slow shutter speeds for creatively blurring them. The bigger rink means more action to capture, people doing spins, couples skating together, kids learning. Capture wide shots showing the whole scene, close-ups of skaters moving through the lights.
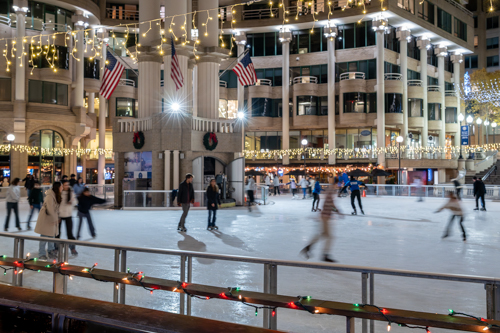 WASHINGTON HARBOUR ICE RINK
Through March 1, 2026, Sun-Thurs 11am - 8:30pm, Fri-Sat 11am -10:30pm
Location: 3050 K Street NW, Georgetown
Free to photograph but a fee to skate.
NATIONAL GALLERY OF ART SCULPTURE GARDEN
Through March 1, 2026
Location: Constitution Avenue NW & 7th Street NW
Free to photograph but a fee to skate.
THE WHARF ICE RINK
Through February 22, 2026 Wed-Fri 4-10 PM, Sat 12-10pm, Sun 12-8 pm
Location: 970 Wharf Street SW (Transit Pier)
Free to photograph but a fee to skate.
Hotels: Holiday Elegance
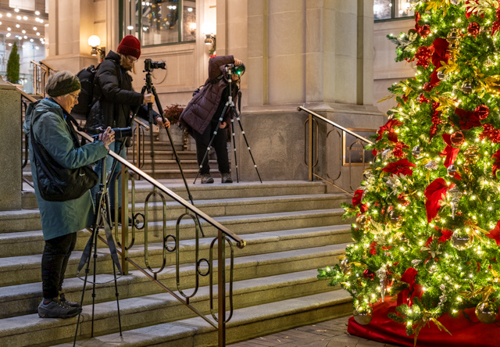 THE WILLARD INTERCONTINENTAL HOTEL
Location: 1401 Pennsylvania Avenue NW
The Willard's lobby is basically a free photography studio during the holidays. Multiple towering Christmas trees, elaborate garlands, marble columns, and crystal chandeliers, it's old-world luxury cranked up to 11. The gingerbread display features miniature National Mall landmarks you can photograph up close.
Photography Tips: The lobby is open to the public. Weekday mornings (9-11am) are quieter. The lobby has lots of natural light from windows plus chandelier lighting, so it works throughout the day. Look up! The ceilings and chandeliers are incredible. Capture the massive Christmas trees from multiple angles—straight on, looking up from the base, detail shots of ornaments. Wide-angle shots showing the entire lobby's grandeur.
Holiday Classes
Learn techniques for capturing all the the holiday photo ops as well as night photography tips at any of our Holiday Classes!
12/13 Smartphone Holiday Photo Walk
12/14 Holiday Lights at National Harbor
12/18 Holiday Field Shoot at the Library of Congress
12/20 Holiday Photos Around the White House
12/21 Holiday Photos Around the U.S. Capitol
We'd love to see what you've captured, tag CapitalPhotographyCenter on Facebook or CapitalPhotogCenter on Instagram so we can see and share!
It’s Time! The Mid Atlantic Photo Visions, Just A Week Away
October 22, 2025 by Marie Joabar
It's that time of year again, the Mid-Atlantic Photo Visions Expo is just a week away and we can hardly wait!!!
Plunge into a rich weekend of photography — from vendor exhibits and juried galleries to speaker presentations and immersive photo shoot. Whether you’re a beginner or seasoned shooter, there’s something at MAPV to light up your photographic passion.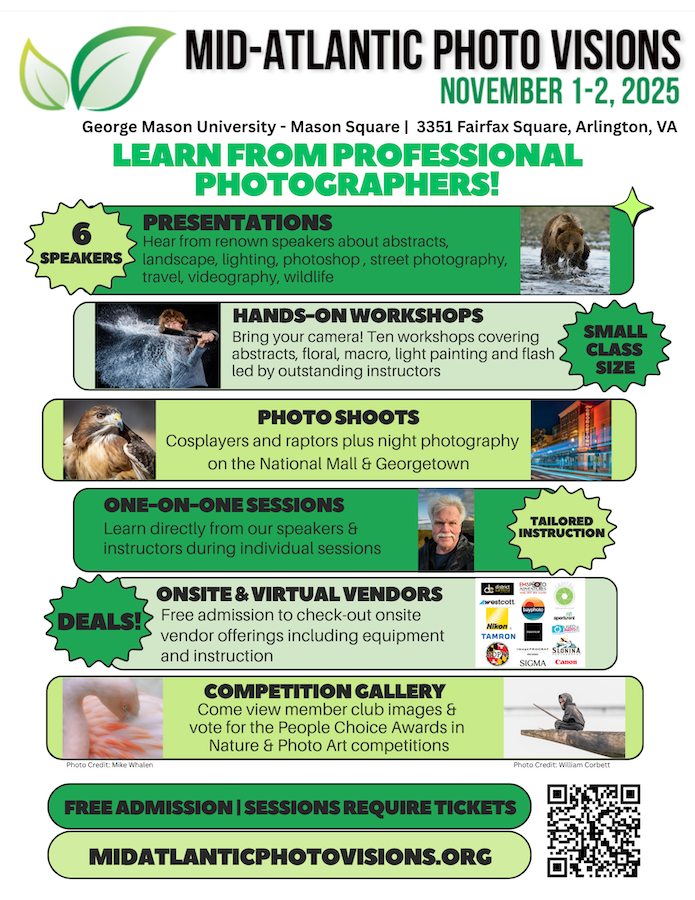
 The event is held in Arlington this year at George Mason University, Mason Square. It's Metro accessible so they're expecting a great turnout!
- Entrance to the event, its Vendor/Sponsor area, and the gallery of juried images is free.
- Presentations and workshops require tickets that can be purchased in advanced or at the door (provided tickets are still available).
Every year MAPV features an amazing lineup of renown speakers and this year is no different! Don't miss out, sign up for any of the inspiring speakers and get your creative juices flowing!
If you’re looking to move beyond watching to start doing, the Hands-On Workshops are where the real craft happens. Bring your camera and learn new skills. Sign up early as each one is limited in size; seats are sold first-come, first-served.
Our own Beth Haubach, Lori Saunders and Marie Joabar will be holding Hands-On sessions on Abstract Photography, Night Photography and Light Painting as Art (respectively).
They also have the popular Raptor Photo Shoots so all you bird lovers, don't miss the opportunity! The sessions begin at 9 a.m. on both days and end at 2:45 p.m. Secure Your Spot—Spaces Are Limited!
One of our favorite things about MAPV is the 500+ juried photos on exhibit from club members and students from area schools. These alone are worth the visit, they are incredibly inspiring!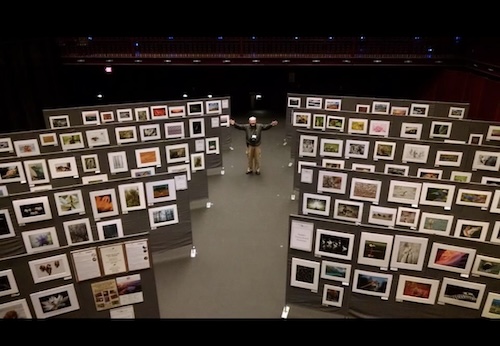
See the full shedule with descriptions
See all available seats on their ticket page
Download a PDF of the daily schedules (no descriptions)
Capital Photography Center will have a table there, please stop by to say hello and while you're there, enter the raffle for the Free Class Drawing!
We look forward to seeing you at this incredible event!
The Flip Side of the Govt Shutdown - Time For Photography
October 2, 2025 by Marie Joabar
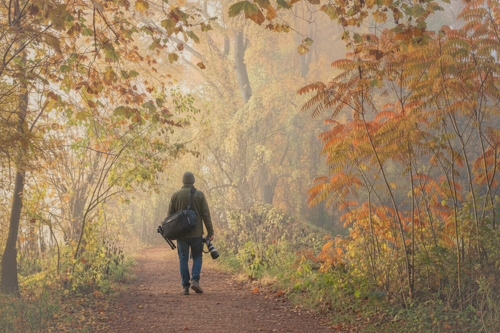
The flip side of the Government Shutdown is that many of us have been handed an unexpected gift: free time. Who hasn’t wished that a week had 8 days? Or that a day had 26 hours?
If you’ve found yourself affected by the shutdown (or forced retirement or job loss) you now have that extra day or those extra hours. Use it to refocus, recharge, and invest in something that brings joy and challenge: photography.
Use this time with intention. Create a goal. Make a plan. Whether it’s learning a new technique, refining your style, or simply staying creatively active, this can be a productive and inspiring time for your photography.
Here Are Some Ideas To Help You Get Started:
Improve Skills & Techniques
- Understand Your Camera Better: Dive into the buttons, dials, wheels, and menu settings. Know what they do and when to use them. Understanding your gear is key to making the most of it.
- Master Exposure: Move beyond Auto. Learn how to control exposure in manual or semi-manual modes. Practice adjusting exposure when your subject is brighter or darker than ideal.
- Sharpen Your Focus (Literally): Explore your camera’s autofocus modes and settings. Experiment to see what works best for your typical subjects, whether it's continuous focusing for action or single-point focusing for portraits.
- Organize & Edit Your Images: Got a backlog of images on your hard drive? This is a perfect time to sort, tag, rate, and edit. A clean and organized library is a gift to your future self.
Strengthen Composition
- Analyze Your Work: Look back through your own photos. What works? What doesn’t? Identify patterns in your compositions—then head out with a mission to improve.
- Get Inspired by Others: Study photos you love—whether your own or by other photographers. What draws you in? Try to replicate those compositional strengths in your next shoot.
Experiment with Light
- Natural Light Play: Even if you mainly shoot in natural light, there’s so much to explore - front lighting, side lighting, back lighting. Compare the quality of light in early morning and late afternoon vs midday.
- Try the Opposite: If you usually shoot indoors or in low light, head outside into the midday sun. Flip your usual routine and see what happens.
Rediscover Your Lenses
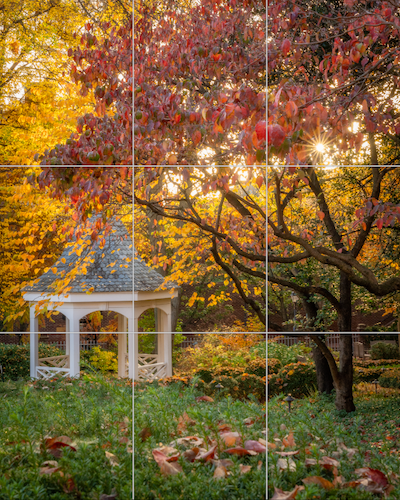
- Dust Off Old Gear: Got a lens that rarely sees the light of day? Pull it out and give it some love.
- Stick to One Focal Length: Try setting your zoom to 35mm and keep it there all day. On your next shoot, try 85mm or 120mm on the same subject and compare the results to understand how focal length affects perspective and composition.
Explore New Subjects
- Break Out of the Rut: If you always photograph the same things, now’s the time to experiment. Try landscapes if you normally shoot portraits. Try street photography if you love nature.
- Think Beyond Objects: What about photographing ideas? Try to capture:
- Texture
- Emotions: happiness, sorrow, fear
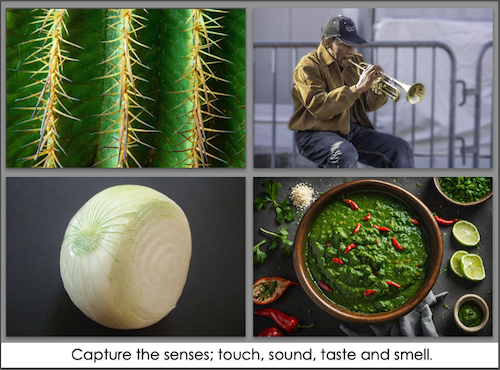
- The senses: taste, touch, smell, sound
(How would you visually convey those?)
Create a Schedule (If It Helps You)
You don’t need to rigidly schedule your time—but some structure can help maintain discipline. It might be as simple as “shoot every morning for 30 minutes” or “edit every Friday afternoon.”
Building a habit now will make it easier to maintain your creative momentum once your schedule returns to normal.
No Camera? No Problem!
Your phone camera is more powerful than ever. Even if you’re limited in manual settings or apps, you can still work on the fundamentals: composition, framing, light, and storytelling. Don't let a lack of gear be a barrier to practicing your skills.
Take Advantage of This Time
This unexpected free time could be a chance to grow—not just as a photographer, but creatively and mentally as well. Whether you aim to learn something new, rediscover forgotten gear, or simply stay sharp, use this time intentionally. Your creative spirit will thank you for it.
We hope the Shutdown will be short but no matter how long it lasts, have fun with this free time.
Happy shooting!
9 Tips for Exciting Night Photography
September 10, 2025 by Marie Joabar
It’s exciting to photograph at night and now that the days are getting shorter it's easier to shoot and still get home at a reasonable hour.
Downtown areas provide some of the best opportunities for night photography because they include colorful signs and funky neon signs that beg to be photographed.
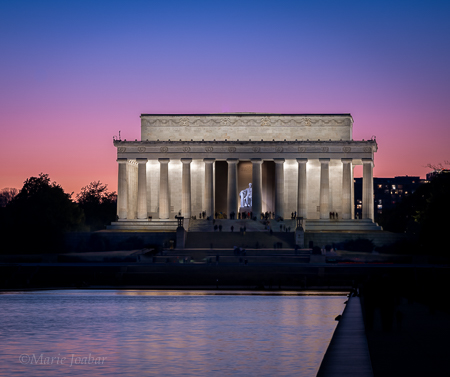
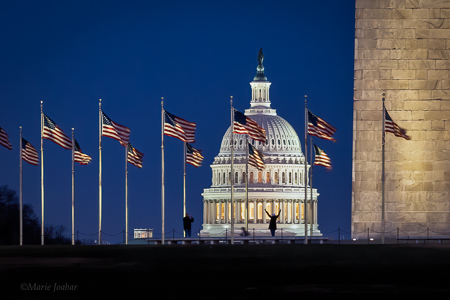
Memorials and Monuments also provide beautifully lit scenes that can convey powerful emotions or make dramatic statements when captured at night.
Consider these 9 tips for capturing exciting night scenes and cityscapes;
1. Shooting During Twilight provides a beautiful blue sky and any city lights will appear like gems.
- Civil Twilight is the time just after sunset when there is still light in the sky and we may see soft pink and purple hues. Clouds are a bonus providing the lovely colors something to bounce and reflect from.
- Nautical twilight follows. There is no more light in the sky but it is not yet dark. This is the magic blue hour and is the best time for night photography.
Depending on the season and the location, twilight can last from 15 to 40 minutes after sunset (and also before sunrise) so there is a short window to work in. Following this magic time, the sky becomes very dark, which can still be nice for shooting lights or lit scenes but it's just not as magical.
2. Use “The Photographer’s Ephemeris” App on your smartphone as a great resource for timing. Not only does it list the sunrise, sunset, moonrise, moonset times as well as the start and end times of the different twilights, it shows the direction of sunrise/moonrise, sunset/moonset at whichever location you dial in.
3. Scout Out Areas Ahead Of Time. Since there’s such a short window, time will be better spent photographing once the locations have already been determined. Notice opportunities when you’re driving home from work or make a scouting trip to areas you want to photograph.
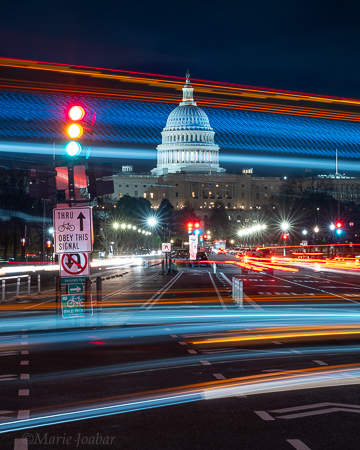
4. Use Manual Exposure Mode. Exposing at night can be tricky; the camera meter reads the darkness and determines a long exposure is needed which may cause the entire scene and especially the lights to be over exposed.
- ISO – Since you’ll be using a tripod, use a low ISO; 100, 200 or 400. If you want to be playful and use long exposures to blur cars or other motion, use 100 or 200 ISO. If you want a quicker shutter speed, use ISO 400.
- APERTURE – The aperture determines the depth of field (how much will be in focus in-front of or behind your subject) but this is usually less of a factor in the dark. If you want the lights to appear as starbursts, use f11, 16 or 22. Otherwise use f8.
- SHUTTER – With the ISO and Aperture set, simply use the shutter speed to control the brightness of the image. Use a faster shutter speed if the image is too bright, use a slower shutter speed if the image is too dark.
However, since the shutter speed controls motion, if there are moving elements you want to be tack sharp or purposely blur (such people or cars moving through the scene) you'll need to adjust accordingly.
5. The White Balance Setting helps you capture the color of the light you’re photographing.
- AUTO WB is usually a good place to start but try some of the other settings to see if you get better results.
- With the tungsten/incandescent WB setting, the yellow cast from the lights will be removed. It can also help to blue up the sky during twilight.
- With florescent WB setting, the green cast from the lights will be removed. It can also add a nice hint of pink shortly after sunset and just before the sky goes blue.
6. A Sturdy Tripod and a remote or cable shutter release are absolutely essential for any night shooting. If you don’t have a cable release or a remote shutter trigger, use the camera’s self-timer so you’ll have sharp photos.
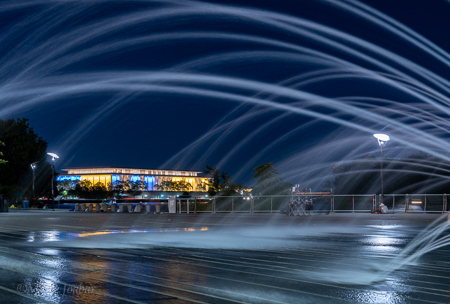
7. Focusing Can Be Difficult in the dark. Line up the focusing square on a point of contrast or an edge so there is something for the focusing system to grab on to. You may find it easier to focus manually.
One way to check that you have achieved focus it to look at the image in the playback mode and zoom in on it using the magnifier (look for an icon of a magnifying glass on one of the buttons on the back or top of the camera.)
8. Find Your Composition - Look for foreground elements that can act as leading lines. Find interesting ways to add interest for your viewer, such as blurring car tailights, the water in fountains, bodies of water or clouds.
9 Be Prepared
- Carry a small flashlight to see the controls on the camera, inside your camera bag, the tripod mount, etc.
- Check your camera settings and get your camera bag in order before heading out and trying to work in the darkness.
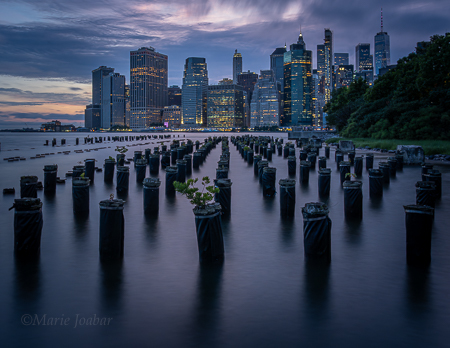
Whether capturing expansive cityscapes, iconic Memorials or downtown Main street, make the most of the twilight hours before or after daylight for some magical photos.
Learn hands-on how to photograph exciting night scenes! Join us for many of our night photography classes… upcoming are 2 Night Photography classes that Marie Joabar is teaching for Mid Atlantic Photo Visions on Nov 1 and 2. Night Photography On the Mall and Night Photography in Georgetown.
We'll also have the Nov 8 Light Painting class at a historic cemetery with Instructor Lori Saunders.
Stay tuned for our holiday classes to be announced soon, in most of these classes we’ll be photographing at night capturing the colorful holiday lights at various locations in the area.
How to Choose the Right Camera: From Your First Camera to Your Next Upgrade
August 13, 2025 by Marie Joabar
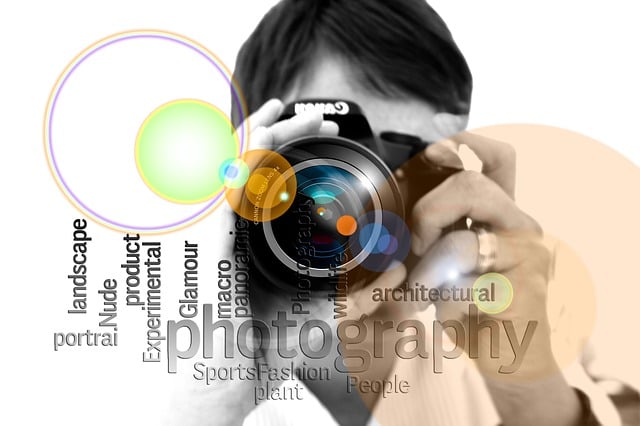
Whether you’re shopping for your very first camera or considering an upgrade, the choices available can feel overwhelming. Camera ads promise bigger sensors, more megapixels, and lightning-fast autofocus. YouTube reviewers have endless opinions. And if you ask a photographer friend, you might get five different recommendations for five different reasons.
Cutting through the noise, we’ll look at the basics for beginners, as well as more advanced considerations for hobbyists and intermediate photographers looking to make a strategic next step.
1. Start With Your Needs
Before looking at brands or specs, think about what you actually want to do with your camera.
Beginners:
- Ask yourself, What do I want to photograph? Are you drawn to travel, portraits, landscapes, wildlife, street photography, or maybe video?
- Also decide What are my goals with my photography? Decide if you want something simple and ready to use or something you can grow into over time.
Hobbyists/Intermediates: Don’t upgrade just because a new model came out—upgrade to solve a limitation or to open new creative possibilities.
- Identify what’s limiting your current setup. Do you need better low-light performance? Faster autofocus? Higher resolution for large prints? More frames per second for sports or wildlife?
- Your answers will help you hone in on the cameras that will have better performance and eliminate those that don’t.
2. Know the Main Camera Types
- Bridge cameras: DSLR-style bodies with fixed lenses and long zoom ranges—versatile but limited for upgrades. Aperture range may be more limited.
- DSLRs: Interchangeable lenses, great image quality, optical viewfinder, long battery life. Bulkier than other options.
- Mirrorless cameras: More compact and lightweight than DLSRs, with electronic viewfinders, advanced autofocus, and strong video performance.
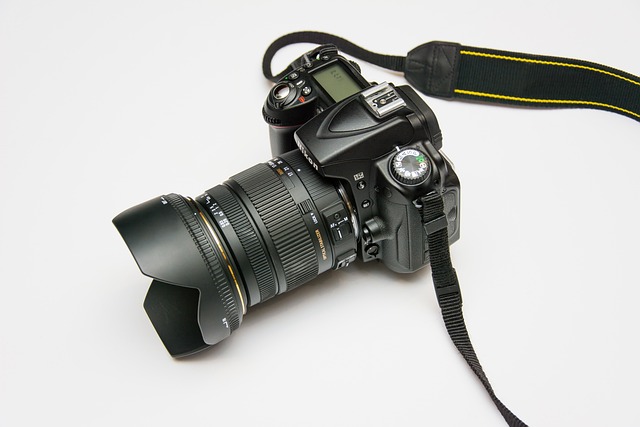
3. DSLR vs Mirrorless — Beyond Size & Weight
The Mirrorless vs DSLR choice: Camera manufacturers are getting away from producing DSLRs and most are going forward with only Mirrorless cameras. However, DSLRs are still a great value for certain photographers and have huge used lens markets.
Here are a few trade-offs:
- Viewfinder experience:
- DSLR: Optical viewfinder, zero lag, natural view, but no live preview of exposure.
- Mirrorless: Electronic viewfinder, live exposure preview, more data overlays, but slightly more battery drain.
- Autofocus:
- Most Mirrorless cameras offer advanced eye detection and subject tracking, and excellent video AF. They also have a larger focus area.
- DSLRs don’t have as wide of a focus area but that may not be important based on what you shoot. If not doing birding or sports, it may not be an important feature.
- Battery life: DSLRs generally last longer per charge.
- Lens availability:
- DSLRs have vast used lens markets
- Mirrorless is catching up with newer and often sharper lenses.
4. Features That Matter
When comparing cameras, focus on features that actually affect your photography:
- Ease of use: Are menus intuitive? Are controls easy to reach? Does it feel good in your hand and work well when you look thru the viewfinder?
- Size and weight: The best camera is the one you’ll actually carry. Most Mirrorless cameras are lighter than DSLRs.
- Sensor size: Bigger sensors generally mean better image quality and low-light performance
- Full-frame cameras (35mm size) offer bigger sensors but are priced higher.
- APS-C or Crop Sensor cameras (24 mm size) are the most common and affordable.
- Micro Four Thirds Sensor cameras (1-inch size) Still a good size sensor, smaller than APS-C.
- Megapixels: More isn’t always better, 20–24MP is enough for most uses, including large prints. However, the more pixels you have, the more you can crop into your image and still have a good size file.
- Lens compatibility:
- Will you be able to add lenses that match your interests? Do you already have lenses?
- Will they fit on the new model (adaptors are available if going from DSLR to Mirrorless)
- Autofocus performance: Important for action, wildlife, or video. Most mirrorless cameras have wider focus area and can be faster to lock on than most DLSRs. Additionally, most offer eye tracking for various subjects, 3D tracking, AI subject detection.
- Low-light capability (ISO performance): Essential for night or indoor work. If this is important for what you photograph, choose a camera with high ISOs.
- Video specs: Resolution, frame rates, and stabilization matter if video is a priority.
- Advanced features you might want to consider: High frame rate & buffer for sports/wildlife, Weather sealing for outdoor and travel photography, Dual card slots for event shooters, IBIS (In-Body Image Stabilization) for low-light handheld shooting.
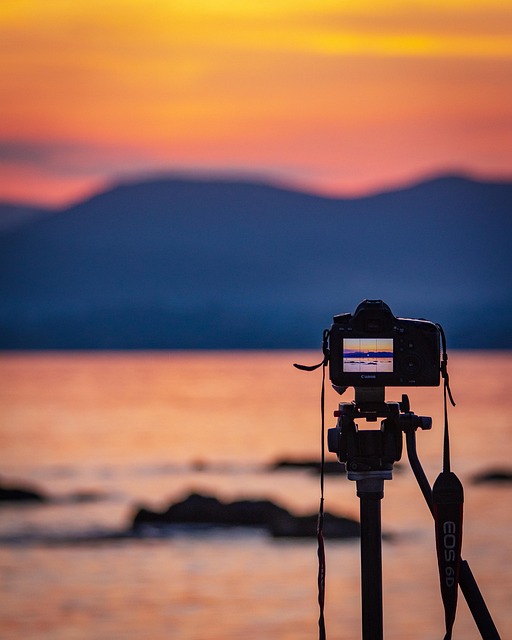
5. Think About the Whole System
Your camera body is just one part of your gear, consider the additional options like lenses and such.
- Beginners: Look for systems with a healthy selection of affordable lenses and accessories so you can grow into without replacing everything.
- Hobbyists/Intermediates: Research brands tiers, and whether the system supports the specialized lenses or tools you might want in the future.
6. When to Upgrade
- Beginners: Upgrade when your current camera truly can’t do something you need—like fast action shots or low-light performance.
- Hobbyists/Intermediates: Upgrade when you’re consistently hitting a technical wall and you know the new body will solve it. Avoid upgrading just because a new model is out.
7. Try Before You Buy
Nothing beats hands-on experience:
- Visit a local camera store to test ergonomics. Explore last-generation models, you may find a better price as newer models replace the previous ones.
- Rent or borrow before committing.
8. Camera Recommendations
Beginners:
- Entry-level Mirrorless: Canon EOS R50, Nikon Zfc and Z50, Sony ZV-E10, Fujifilm X-T30 II
- Entry-level DSLR: Canon Rebel T7i and T8i, Nikon D3500 (if available)
Hobbyists/Intermediates:
- Advanced APS-C: Fujifilm X-T5, Canon R7, Sony a6700
- Full-frame: Canon EOS RP, Nikon Z5, Sony a7III, IV, a7RIII and RIV
- Action/wildlife: Nikon Z8, Canon R6 Mark II, Sony a9 II
When purchasing, consider how the camera is bundled. Do you need just the body? Will you need lenses to be included with your purchase? That’s where whether visiting a local camera store can help; they’ll know about special pricing on bundles and also if there are any manufacture’s rebates or discounts available.
For beginners, your first camera is your entry ticket into the creative world of photography. For hobbyists, your next camera should be a purposeful step toward expanding your creative possibilities.
For either level, the RIGHT camera is the one that helps you capture the moments that matter most and pushes you toward your photographic goal.
Capturing the Best of NYC – Workshop Recap!
July 17, 2025 by Marie Joabar

What a fun time we had exploring New York City. From the World Trade Center to Central Park and even Brooklyn, we captured some amazing images and enjoyed the camaraderie of each other.
The Iconic Locations We Visited
Little Island – This creative spot used to be an old pier, and now it's a fun park where families enjoy events and live music. For photographers, the best approach is shooting from a distance to frame the unique architecture against the NYC or New Jersey skyline.
Central Park always delivers, and we made the most of the early morning light around Bethesda Fountain and Bow Bridge. There's something special about having these famous spots mostly to ourselves before the city wakes up.
The Vessel was so much fun to photograph! We shot it from every angle imaginable. The tight shots reminded us of an M.C. Escher drawing.


Manhattanhenge was absolutely packed! Only the tallest folks in our group could get their cameras above the crowds, but the rest of us still captured this amazing phenomenon right on 42nd Street near Times Square. Traffic was crazy, but everyone came away with some fun images.
Brooklyn Bridge at sunrise – We had to get up pretty early for this one, but it was worth it. We caught the bridge during that beautiful blue hour, then explored different angles by shooting it from below too.
Manhattan skyline from Brooklyn – We spent a late afternoon through twilight photographing the skyline. The changing light kept giving us new opportunities for different shots.
We wrapped up at the World Trade Center and the stunning Oculus building.
Photo Techniques Used
- Blue Hour/Night Photography – Shooting when the city lights come on creates some really magical images
- Exposure Bracketing – This technique helped us capture scenes where both the bright sky and darker buildings were well exposed
- Neutral Density (ND) Filters – These allowed us to do long exposures to smooth out the rivers framing the city.
- Intentional Camera Movement (ICM) – Moving the camera deliberately for some creative, artistic shots
- Panning – Following cyclists in Central Park was a blast and created some dynamic motion shots
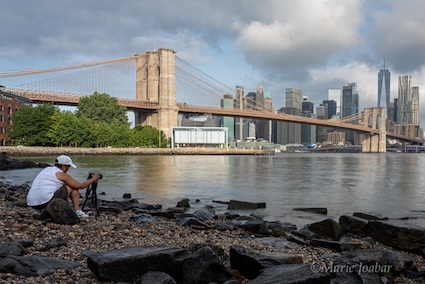

NYC offers something for every photographer – from incredible architecture to peaceful park scenes – and it was such a pleasure experiencing it with a great group of photographers!
Enjoy some shots of the group on our NYC Student Showcase but check back as we post the students photos soon!

Magical Cinque Terre – Photo Workshop Recap!
June 19, 2025 by Marie Joabar
Magical Cinque Terre, Italy
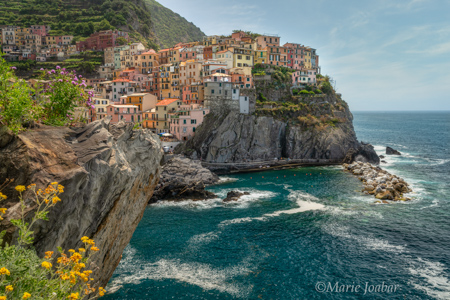
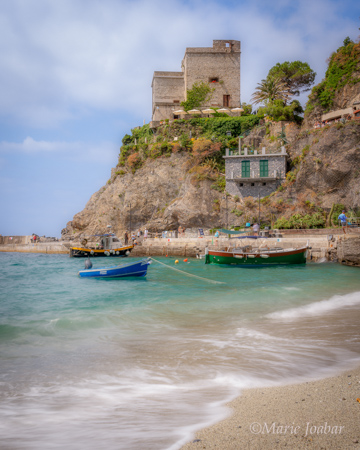
We’ve just returned from an unforgettable week photographing the enchanting Cinque Terre region of Italy—five colorful villages perched along the Ligurian Sea. “Cinque Terre” translates to “Five Lands,” and each one offers its own unique flavor and charm.
Discovering the Spirit of the Five Villages
Originally fishing communities, these villages have evolved into popular vacation destinations, rich with local flavor. Though they share similarities—winding alleyways, blooming bougainvillea, coastal views, fresh seafood, and, of course, limoncello—each town has its own distinct personality:
- Monterosso, our home base for the workshop, is the largest and most resort-like, known for its beaches and laid-back, vacation vibe.
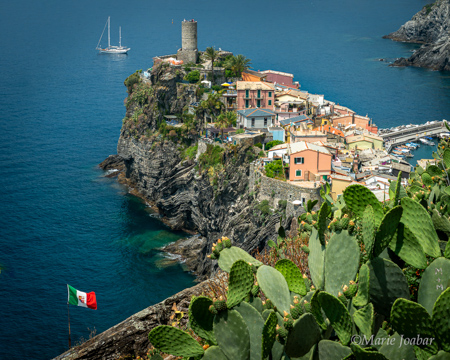
- Vernazza is quite photogenic, with two iconic viewpoints. It also has reputation as a hiking hub for the trails between the villages.
- Corniglia, perched high on a cliff, feels the most relaxed and removed—quiet, nonchalant, with its own charm.
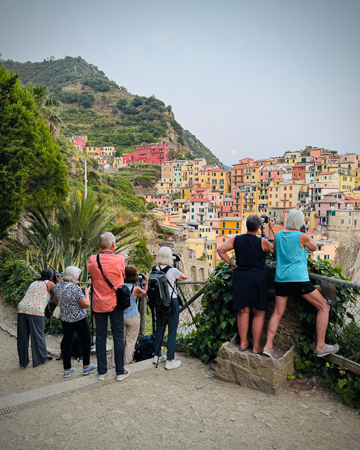
- Manarola is a cheerful gem, surrounded by a scenic wine trail and splashed with yellow flowers. It offers breathtaking views both day and night.
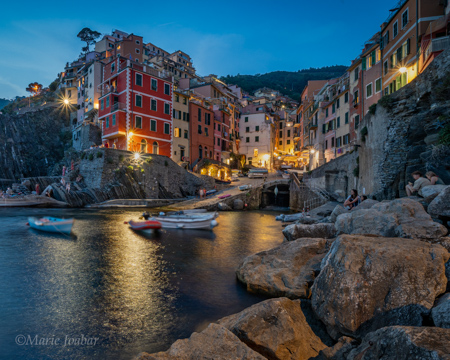
- Riomaggiore spills straight down into a picturesque harbor, and offers a beautiful blue hour opportunity.
Workshop Flow: Light, Color & Creative Exploration
- Each morning, we set out early to take advantage of the soft morning light, exploring one of the five towns before the crowds arrived.
- Afternoons were reserved for well-deserved rest, classroom time, or gelato breaks.
- In the evenings, we’d enjoy a dinner together and then head out to shoot the magical blue hour in one of the towns.
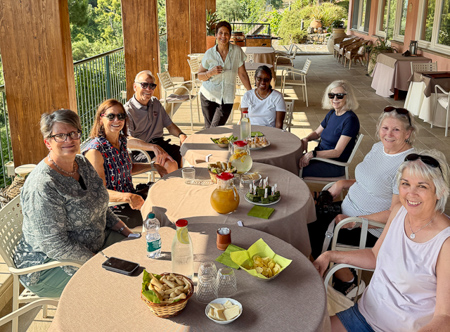
We had a wonderful group this year—talented, enthusiastic, and genuinely fun to travel with. Watching everyone capture their own interpretation of Cinque Terre was one of the best parts of the trip and I can’t wait to see more of their photos.
Highlights from the Week
Here are a few special activities that provided us with unique experiences and photo ops;
- A scenic boat ride along the coast to view the villages from the water—new perspectives all around!
- Shooting the full Strawberry Moon rising over the sea—an incredible photo opportunity.
- Gorgeous blue hour and night photography sessions in multiple towns.
- An outstanding lunch at a nearby vineyard— delicious authentic Ligurian cuisine, excellent wine, and many beautiful photo opportunities
- An afternoon swim in the sea for those willing to brave the (refreshing!) water.
Photo Techniques in Action
This region is a playground for photographers. Beyond landscapes and seascapes, we explored a range of techniques to enhance our creative storytelling:
- Blue hour/night photography to creating magical images that only the nighttime offers.
- Moon photography to capture the full Strawberry Moon rising over the Ligurian Sea.
- Exposure bracketing to capture the full dynamic range of the bright skies and shaded foregrounds.
- Neutral Density (ND) filters for long exposures of crashing waves.
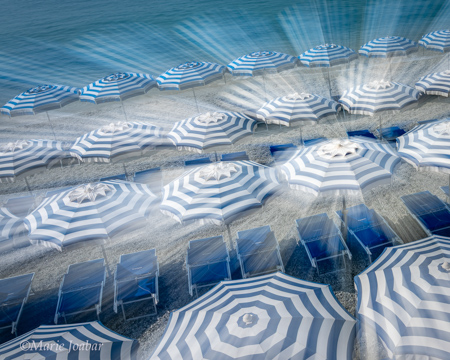
- Intentional Camera Movement (ICM)— which was so much fun to play with, especially on the brightly striped beach umbrellas.
Until Next Time…
Most of us are back home now but Cinque Terre has a way of lingering in our minds. I’m still wandering those sunny villages, mentally composing shots, enjoying my favorite gelato and afternoon espresso, and looking forward to the day we'll return.
We have a few photos on the Showcase but do check back as we update it later this month with a gallery of stunning images from the students. We can't wait to share their incredible work with you.
Demystifying Memory Cards: Types, Speeds & Camera Compatibility
June 2, 2025 by Marie Joabar
Not long ago, buying a memory card was easy—there were only a few options, and the technology was fairly basic. Today, things have changed. With a wide range of formats, speeds, and capacities, choosing the right memory card for your camera and photography style can be confusing and even overwhelming.
In this article, we'll break down the key differences in card types, capacity, and speed ratings to help you choose your next memory card with confidence .
Let's take a look at the following topics:
1. Memory Card Types & Technology
2. Important Features
3. Memory Card Readers
4. Memory Card & Camera Compatibility
5. Memory Card Brand Recommendation
6. Memory Card Best Practices
1. MEMORY CARD TYPES
- SD (Secure Digital) Cards
SD cards are the most widely used type of memory card in digital cameras. They come in three varieties. The larger the capacity, the more images you can fit on the card.
SD: Up to 2GB of storage (rare today)
SDHC (High Capacity): 4GB to 32GB
SDXC (Extended Capacity): 64GB to 2TB
SD Card Speed Classes to Know:
Speed Class (e.g., Class 10): Minimum sustained write speed (good for still photography).
UHS-I / UHS-II / UHS-III: Ultra High Speed - faster for video, burst shooting and transferring large files quickly to your computer.
UHS-I Up to 104 MB/s
UHS-II Up to 312 MB/s
UHS-III Up to 624 MB/s
V Class (e.g., V30, V60, V90): Optimized for video recording, particularly 4K and 8K
- Note - UHS-II cards are backward-compatible with UHS-I slots, they will work but only at UHS-1 Speeds.

- CFexpress Cards
CFexpress cards are the latest and fastest format, using both PCIe* and NVMe technology.* They’re reliable and offer extremely high write speeds, perfect for 4K/8K video and ultra-fast burst photography.
CFexpress Type A: Used in some Sony Alpha cameras
CFexpress Type B: Used in some Canon, Nikon, and Panasonic high-end models
CFexpress Type C: Not widely adopted yet, but large capacity and speed
*PCIe Peripheral Component Interconnect Express. allows very fast data transfer between the memory card and the camera or computer.
*NVMe Non-Volatile Memory Express. NVMe works on top of PCIe and helps unlock the full potential of PCIe by minimizing delays and speeding up data access.
- XQD Cards
XQD cards were developed for high-performance stills and video recording. They’re faster and durable, using PCIe technology*. Used by some Nikon DSLRs and mirrorless cameras.
- microSD Cards
microSD cards are tiny and mainly used in smartphones, drones, and action cameras like GoPros. However, with an adapter, they can also be used in standard SD slots on cameras.
- CompactFlash (CF) Cards
CompactFlash cards are larger and were once the gold standard for professional DSLRs. Though still used in some high-end DSLRs, CF cards are being phased out in favor of newer formats like CFast and CFexpress.
- CFast Cards
CFast cards look like CompactFlash cards but are a completely different technology. They're designed for professional video and high-speed photography applications. (Not backward compatible with CF cards)
2. IMPORTANT FEATURES
When selecting a memory card, consider these three factors based on your photography requirements.
- Compatibility: Always check your camera’s manual for supported card types and formats.
- Speed: Look at both read and write speeds, especially if you shoot video or high-speed bursts. Write Speed is how fast the camera can receive images from the camera buffer. Read Speed is how fast the images can be downloaded to your computer.
- Capacity: Higher megapixel images and 4K/8K videos need more space, go bigger if needed.

3. MEMORY CARD READERS
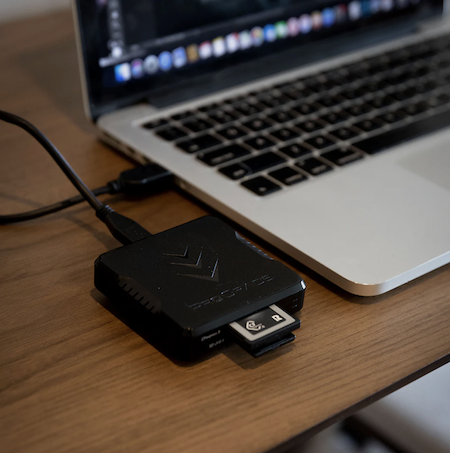
Choosing the right memory card reader is just as important as picking the right memory card. A poor-quality or slow reader can bottleneck your workflow, especially when transferring large photo or video files. Choose a reader with a fast connection (USB 3.0 or higher). Choose a good brand; a slow or unreliable reader can corrupt files.
Using the camera to download images is slow, readers provide a faster workflow.
Match the reader with the memory card(s) you use:
- SD / SDHC / SDXC - Almost all readers support this.
- CFexpress Type A/B - Needs specific reader (Type A or Type B). Choose one that matches the type.
- XQD - Needs a dedicated reader, often from Sony or Lexar.
- microSD - Look for a built-in microSD slot or one that supports adapters.
- CompactFlash - Needs a special CF slot.
- Choose a reader with the right USB connection interface (speed matters) This affects how fast files transfer from the card to your computer:
- USB 2.0-~60 MB/s - Basic documents, very slow
- USB 3.0 / 3.1 Gen 1-~5 Gbps (625 MB/s) - Most photography needs
- USB 3.2 / 3.1 Gen 2-~10 Gbps (1250 MB/s) - 4K/8K video and high-volume work
- USB-C / Thunderbolt 3/4-~40 Gbps (5000 MB/s) - Professional workflows
If you’re using high-speed cards like UHS-II, XQD, or CFexpress, get a USB 3.2 or Thunderbolt reader to actually take advantage of the speed.
- Card Reader Brand Recommendations
Lexar – Good multi-card readers
ProGrade Digital – Known for CFexpress, XQD, and SD readers
SanDisk – Great all-around, especially for SD and microSD
Sony – Excellent XQD and CFexpress Type A readers
4. MEMORY CARD & CAMERA COMPATIBILITY
Here's a breakdown of which memory cards are compatible with the Canon, Nikon, and Sony cameras as well as some Fuji and Olympus cameras.
SONY
Most Sonys use SD cards and some can use CFexpress Type A too.
Sony a7 III / a7R III - 2 SD slots (1 UHS-II & 1 UHS-I)
Sony a7R IV - 2 SD slots, (both UHS-II)
Sony a7 IV - 2 slots, (1 CFexpress Type A & 1 SD UHS-II)
The following cameras have 2 Hybrid slots that can accept either SD UHS-II or CFexpress Type A in the same slot, these are true hybrid slots built to handle both types of cards.
Sony a7S III
Sony a7 IV
Sony a7R V
Sony a1
Sony A9 III
Sony FX3 / FX30 / FX6
CANON
Canon Mirrorless cameras
Canon EOS R - 1 SD slot (UHS-II)
Canon EOS RP - 1 SD slot (UHS-I or UHS-II)
Canon EOS R6 / R6 II - 2 SD slots (both UHS-II)
Canon EOS R5 / R5 C - 2 slots (1UHS-II and 1 CFexpress Type B)
Canon EOS R3 - 2 slots (1 SD UHS-II and 1 CFexpress Type B)
Canon DSLR cameras
Rebel series - 1 SD slot (UHS-I)
77D / 80D / 90D - 1 SD slot (UHS-I or II)
6D / 6D Mark II - 1 SD slot (UHS-I)
5D Mark III - 2 slots (1 CF and 1 SD UHS-I)
5D Mark IV - 2 slots (1 CF and 1 SD UHS-I)
7D / 7D Mark II - 2 slots (1 CF and 1 SD UHS-I)
1D X - 2 CF slots
1D X Mark II - 2 slots (1 CFast 2.0 and 1 CF)
1D X Mark III - 2 CFexpress Type B slots
NIKON
Nikon Mirrorless cameras
Nikon Z5 - 2 SD slots (UHS-II)
Nikon Z6II / Z7 II - 2 slots (XQD or CFexpress Type B)
Nikon Z6 / Z7 - 1 XQD slot - can use CFexpress Type B but only with an firmware upgrade
Nikon Z8 - 2 slots (1 CFexpress Type B or XQD, and 1 SD UHS-II)
Nikon Z9 - 2 slots (CFexpress Type B or XQD)
Nikon Z fc / Z30- 1 SD slot (UHS-I or UHS-II depending on model)
Nikon DSLR cameras
D3100 / D3200 / D3300 - 1 SD slot (UHS-I)
D5100 / D5600 - 1 SD slot (UHS-I)
D7000 / D7100 / D7200 - 2 SD slots (UHS-I)
D7500 - 1 SD slot (UHS-I)
D750 - 2 SD slots (UHS-I)
UHS-II cards will also work but won’t provide full speed.
Dual Slots Cameras with XQD/CFexpress Options
D780- 2 SD slots (UHS-II)
D500 - 2 slots (1 SD UHS-II and 1XQD (or CFexpress B w/ firmware update)
D850 - 2 slots (1 SD UHS-II and 1XQD (or CFexpress B w/ firmware update)
D4/D4s - 1 XQD slot
D5 - 2 slots (XQD or CF (depends on version)
D6 - 2 CFexpress Type B slots
FUJI X-T Cameras
X-T1 SD UHS-I only
X-T2, X-T3, X-T4, X-T5 SD UHS-II
OLYMPUS
The OM-D series (and newer OM System models) use SD. Most models support UHS-II, though older ones are limited to UHS-I.
The OM-D E-M10 Series (All Models) UHS-I. UHS-II cards will work but won’t run at full speed.
The following cameras can use UHS-II
OM-1
OM-D E-M1X
OM-D E-M1 Mark II, Mark III
OM-D E-M5 Mark III

5. MEMORY CARD BRAND RECOMMENDATIONS
Delkin Devices - CFexpress Type B (Power series), V90 SD cards
Lexar 2000x
Lexar 633x
Lexar Professional CFexpress B
ProGrade Digital
SanDisk Extreme UHS-I V30
SanDisk Extreme PRO UHS-II V60/V90
Sony TOUGH CFexpress B
6. MEMORY CARD BEST PRACTICES
- Before using a new memory card, format it in your camera.
- After downloading and backing up your images, format the card in your camera before using it again.
- If you have more than one camera, even if they are the same brand, don't share cards between them.
- Avoid touching the gold colored strips on the back of SD cards. This is where the data is stored and the oils from our skin may cause problems.
- if your camera has 2 slots, consider using the second card for backup of the first card, or for overflow.
-Always carry extra cards. If a card fails or gets filled, you'll have a spare.
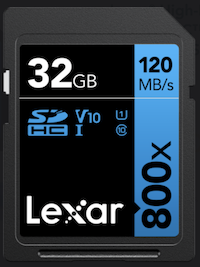
Choosing the right memory card doesn’t have to be a guessing game. By understanding the different types, features, and compatibility options, you’ll be better equipped to find memory cards that meet your needs and support your photography shooting style.
Limiting Your Gear Might Make You a Better Photographer
May 15, 2025 by Marie Joabar
In a world saturated with the latest cameras, endless lenses, and high-tech accessories, it’s easy to fall into the trap of thinking better gear equals better photos. While quality equipment can certainly help, there’s a strong case to be made for doing more with less. In fact, limiting your gear might be one of the best things you can do to improve as a photographer.
The Myth of “Better Gear = Better Photographer”
We’ve all been there—scrolling through Instagram or Facebook, convinced that a new lens or upgraded body will instantly elevate our work. But while new gear can be exciting and even inspiring, it often becomes a crutch. Instead of mastering technique, composition, and storytelling, we we're still fixated on the equipment.
The truth? A skilled photographer can take a compelling image with a smartphone, while an inexperienced one can still miss the mark with a $5,000 camera.
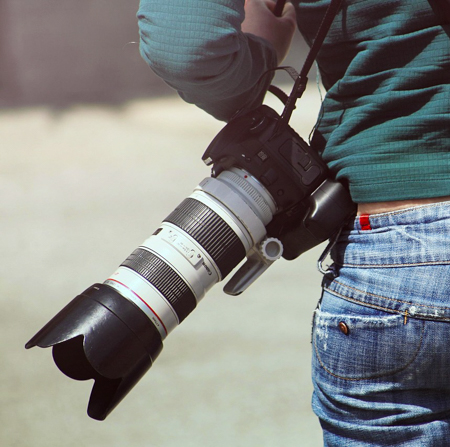
The Freedom of Constraints
Creativity thrives under limitations. When you reduce your gear options, you’re forced to work within constraints and that’s where real growth can happen. For example, using a single prime lens challenges you to move your body, change your perspective, and really consider your composition. Without zooming, you’ll start thinking more deliberately about framing and subject placement.
Limiting gear can simplify your workflow as it forces you to:
- Focus on storytelling rather than technical perfection
- Understand your camera settings more in depth
- Be present in the moment instead of caught in a gear loop
The Power of Familiarity
Instead of wondering which lens to use, you already know what your kit is capable of, and that knowledge leads to better, more consistent photos.
Real-World Examples
Some of the most celebrated photographers—Henri Cartier-Bresson, Vivian Maier, Daido Moriyama—shot with a single camera and lens for most of their careers. Their limitations didn't hinder them; it sharpened their focus and gave them a consistent visual style.
Even modern street and documentary photographers often rely on one body and one lens. Why? Because it lets them blend in, move quickly, and concentrate on capturing life as it unfolds.
Minimal Gear, Maximum Creativity
Here are a few ways you can challenge yourself creatively by limiting your gear:
- The One-Lens Challenge: Spend a month shooting with just one prime lens (like a 35mm or 50mm).
- One Camera, One Subject: Pick a theme (e.g., shadows, hands, bicycles) and document it using just one camera and lens combo.
- Limit the Editing: Strive to get it right in-camera; move closer in the field instead of relying on cropping, reposition yourself to eliminate objects you don't want in the frame, etc, etc.
Final Thoughts
It’s tempting to believe that new gear will solve your photographic frustrations but often, it only adds more decisions, more weight, and more distractions.
Limiting your gear won’t limit your creativity. On the contrary, it will sharpen your eye, refine your skills, and reconnect you with the art of photography.
So next time you’re packing your camera bag, ask yourself: Do I need all of this? Or is less… actually more?

Remembering Bryan Peterson, A Photography Legend
April 24, 2025 by Marie Joabar
Some of you may have heard about the recent passing of one of the most incredible photography instructors I’ve ever had the chance to learn from: Bryan Peterson. Truly, the photography world lost a legend.
A Passion for Teaching
Not only was Bryan an amazing photographer, he was truly passionate about teaching and helping others learn.
Bryan led Photo Workshops in the US and internationally. While many of the locations were well-known, Bryan always had a knack for guiding participants to the lesser-known corners—the kind of places most people would overlook.
If photographing an iconic scene or landmark, Bryan would show us how to create an image of it that most people probably would not have thought of. He was extremely talented for finding unusual perspectives and one-of-a-kind shots. His gift was seeing the world in a way most of us didn’t... and then helping us see it that way too.
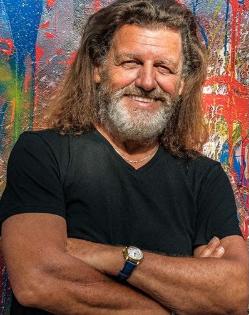
Learning Through His Books
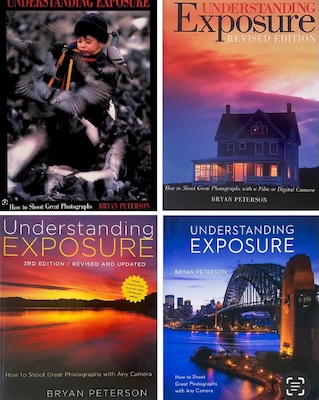
Long before I had met Bryan, I learned so much about photography from his book, “Understanding Exposure.” It became my bible and it gave me such a strong foundation to build on. Written during the days of film, Bryan later updated it to include digital photography.
The way he explained things made so much sense that I ended up buying many of his books; “Exposure Solutions,” “Understanding Composition Field Guide,” “Learning to See Creatively,” “Understanding Flash Photography,” just to name a few.
Each one expanded my knowledge and helped shape how I approach a scene to this day.
Workshop Experiences: Seeing Through New Eyes
Eventually, I took two of his photo workshops—one here in D.C. and another in New York. I learned hands-on how to see differently and look for photos even in the mundane. Bryan encouraged us to always ask, “What haven’t I seen yet?” “What photo opportunities are right here in front of me?”
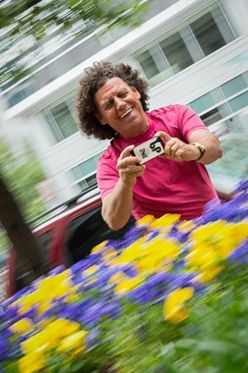
Learning Live: Humor & Knowledge
I also had the chance to sit in on one of Bryan’s presentations. He wasn’t just teaching photography; he was teaching us how to see the world through our lens differently and more creatively. Not only did I walk away with a ton of practical knowledge, I also laughed—a lot. His humor made learning fun and his charisma was contagious.
He was humble and so personable and I’m sure he touched millions. Despite his popularity and his huge following, he would often reply to the comments on his social media sites or leave thoughtful feedback on your posts. That generosity is rare, especially for someone of his stature.
Bryan’s Legacy Lives On
Bryan will surely be missed, but I know he holds a special place in the hearts of anyone who listened to one of his talks or participated in one of his photo workshops. He made an indelible mark on the photography community and I can’t help but think of how fortunate I was to have had the benefit of learning from him. His brilliance lives on, not only in his words and images but in every photographer he helped shape.
His books are still for sale and I highly recommend them to photographers at any skill level. My all-time favorite is still “Understanding Exposure.”
Bryan knew photography like the back of his hand and he had the creative vision to go along with it. Lucky for us, he had the skill and the passion to share it!
As he was known for saying, “You keep Shooting!”
Bryan’s Articles on the CPC Blog
Years ago I had asked Bryan if I could share some of his articles with my readers on the CPC Blog, he was thrilled and more than happy to share! Though these are several years old, when you read them, you'll see the principles are timeless… as was Bryan!
Learning to See... by Bryan F. Peterson
The Language of Seeing... by Bryan F. Peterson
Correct Exposures VS Creatively Correct Exposures... by Bryan F. Peterson
From Layoffs to New Beginnings
April 23, 2025 by Marie Joabar
Helping Federal Workers Move Forward
 The recent wave of layoffs and furloughs affecting federal workers has sent ripples through our community. As the number of job losses increased, I began thinking about what Capital Photography Center could do to help those affected navigate through such challenging times.
Creating a Community Response
I reached out to my instructor, the exceptionally talented photographer Laura Hatcher, and the generous team at Eaton House Coworking, and together we came up with a plan to offer support and a sense of empowerment: "Life After Public Service – Empowering the Next Step." This two-day event was designed specifically to provide tangible assistance to former federal employees as they transition to their next chapters.
A Two-Day Event
The event offered attendees complimentary professional headshots, essential for job applications and LinkedIn profiles, day passes to Eaton House Coworking to provide a productive space for their job search efforts, and discounts on a future photography class. Nando's restaurant also joined our efforts and generously provided free lunches for all attendees.
 This effort would not have been possible without the generosity and collaboration of our community:
- Marie Joabar/Capital Photography Center, took charge of administrative coordination, registration, logistics, and communication, ensuring a seamless experience for all.
- Eaton House DC graciously hosted the event, offering a welcoming and professional co-working space for attendees to include 5 free passes.
- Laura Hatcher Photography, brought a full portrait studio to give each attendee a complimentary professional headshot, helping them refresh their LinkedIn profiles and job applications with confidence.
- Sun Lee, Laura’s former intern extraordinaire provided invaluable on-site support, managing the image editing & review station and capturing behind-the-scenes moments.
- Nando's Restaurant ensured that no one left hungry, providing tasty box lunches each day.
Impact and Outcomes
The gratitude expressed by those who attended was overwhelming. As I greeted each person, they consistently voiced thanks and appreciation for this gesture of community support.
 What emerged was far more than just a service event. The space transformed into a hub of activity: some participants stayed after their photo sessions to work on resumes, others engaged in spontaneous networking, while many simply appreciated the chance to reconnect with former coworkers in a positive environment.
A Powerful Experience of Community
The experience was simultaneously heartbreaking and heartwarming—a stark reminder of how sudden job loss affects real people with families and responsibilities, yet it was incredibly moving to see the resilience and hope that emerged from the community coming together to support one another.
In times of uncertainty, these simple acts of community can provide not just practical help, but also the equally important message that no one faces these challenges alone.
The gift of support, understanding, and empathy requires relatively little from those who give, yet it can make a profound difference to those receiving it.
Reflections from Our Team
 This collaborative effort wouldn't have been possible without the dedication and vision of several key contributors. Below, Laura Hatcher, her assistant Sun Lee, and the team at Eaton House Coworking share their perspectives on the event and what it meant to them:
Eaton House: "At Eaton House, supporting our recently terminated federal workers was a deeply personal endeavor for us. It wasn’t just about offering a physical space but about creating a welcoming haven where those impacted could breathe, connect with others who understood their journey, and envision a new future with hope and support. Witnessing people coming together, sharing their stories, and uplifting one another was a powerful reminder that no one should face uncertainty alone. While the event provided a modicum of encouragement for those in attendance, it is only the beginning. As part of our mission, Eaton DC and Eaton House are committed to continuing to be a third space, a sanctuary beyond home and work, where people are welcome to gather, heal, and rebuild amidst a community that believes in your next chapter.
Of course, none of this would be possible without the support of our inspiring partners Capital Photography Center, Laura Hatcher Photography and Nando’s who truly embody the spirit of community through their generosity and care."
Laura Hatcher "This event was about showing up for people when they needed it most—something I understand firsthand from my own career transition after military service. Suddenly having to reinvent yourself can feel overwhelming, isolating, and uncertain.
The occasion became more than just a resource; it turned into a networking space where attendees shared stories, found camaraderie, and supported one another. The gratitude and positivity exchanged over these two days were a powerful reminder that even small acts of kindness can create lasting ripples of impact.
 To those who attended, we hope you walked away with more than just a headshot—we hope you left feeling seen, supported, and empowered for your next chapter.
If this story resonates with you, I encourage you to pay it forward. Whether it’s offering a resource, making an introduction, or simply reminding someone of their worth, every gesture counts."
Sun Lee: "What actions can we take to heal and repair our community? How can we offer service to those disproportionately affected by what is happening?
Supporting “Life After Public Service” as an emerging photographer taught me how we could harness the power of photography to serve a community. In a time of need, we were able to offer fresh headshots done with care and a space to gather & network, share food, and find solace in one another.
This was by far one of the most meaningful opportunities I was a part of—I got to witness creativity and collaborative businesses in action, something I hope I can practice as a photographer in the future.
It was so powerful to learn that you don’t have to have endless resources to take even the smallest of actions—and that you don’t have to do it alone. I am incredibly grateful.
A very special thanks to Eaton House Coworking, Laura Hatcher Photography, her amazing assistant Sun Lee, and Nando's Restaurant.
10 Tips for Stronger Spring Compositions
March 13, 2025 by Marie Joabar
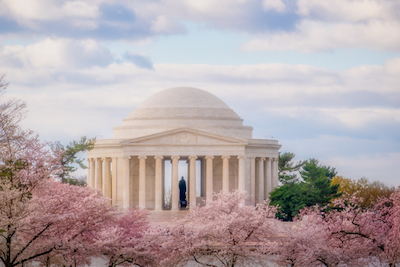 With spring just around the corner, we're all eager to get outdoors with our cameras. If we haven't been photographing much over the winter, we may be a bit rusty and need some inspiration to get our creative juices flowing again.
From composition techniques to creative approaches, here are some fun ideas to help you capture spring's beauty in fresh new ways.
1. Look for Patterns & Repetition
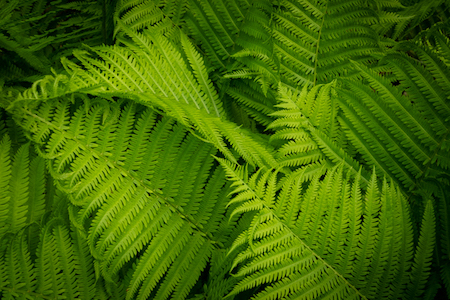 Spring is full of patterns - rows of tulips, lines of tree trunks, or interesting shadows from a nearby building. Train your eye to spot these patterns and once you do, play with the angles - get low, get up high, move to one side and then the other to show the pattern at its best. This simple exercise helps you see differently and create unique images.
Quick Tip: Try different angles - get down low, climb up high, or move to the side to show patterns in the best light. Early morning or late afternoon sun can really bring out textures in these shots.
 2. Play with Opposite Colors
Framing opposites on the color wheel draws interest from the viewer and can make a powerful image. Frame a red flower against a green field, get low under the yellow forsythias and frame them against the blue sky, or position yourself to capture spring's new green leaf growth against a background of pink redbuds.
Two colors work best... sometimes three. A jumble of colors can be fun as well but won't make the same statement as a simple composition with just two opposite colors.
Quick Tip: Use a wide aperture (small f-number) to make colorful subjects stand out against a softer background.
 3. Control Your Focus Points
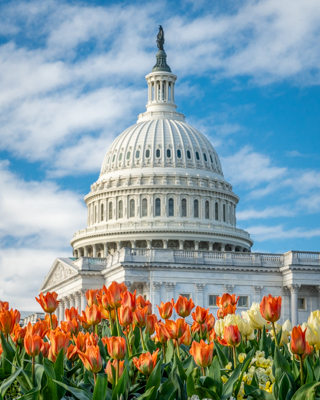
Take control of where you focus to guide the viewer's eye:
- Focus on a subject at the front of the scene and blur the middle and back.
- Then focus in the middle, blurring the front and back.
- Finally, try focusing in the back, making the front and middle blurred.
The best way to make this work is to use a wide aperture such as f/2.8, 3.5 or 4 and also get close to your nearest subject. If you can't get close with your feet, use a telephoto lens. All these things will increase the amount and softness of the blurring.
Quick Tip: To move your focus points, check your camera manual under "Focus Area." By default, most cameras choose where to focus, but you can change it so YOU choose where. It might be listed as AF-S, Single Point, or Flexible Spot M. It could also be a touch screen option allowing you to tap where you want to focus - each camera is different.
4. Get Close and Fill the Frame
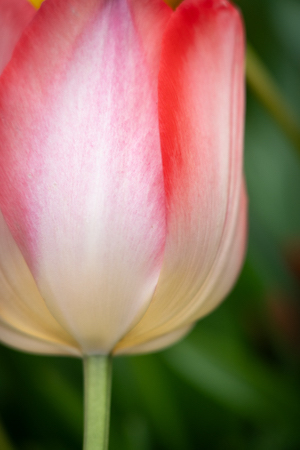
Don't be shy - move in closer to your subject and fill the frame. Frame spring's tiny details - a dewdrop, the veins of a new leaf or a portion of a colorful field of flowers - fill your entire frame and show off spring's beauty.
Quick Tip: If your camera won't focus very close, try using a macro lens or clip-on phone macro attachment.
5. Try Intentional Camera Movement
Use a longer exposure and move the camera while shooting. This gives you a very creative and abstract looking image. Try these approaches:
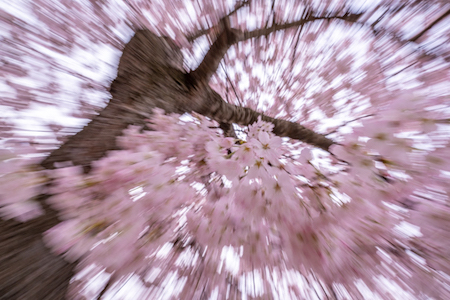 Set a slower shutter speed (1/15 to 1 second)
- Move your camera up and down when shooting flower fields or trees
- Try circular movements for blooming trees or garden scenes
- Experiment zooming in or out slightly during the shot for a cool effect
These techniques turn ordinary spring scenes into dreamy images that capture the feeling of the season.
6. Experiment with Flash
Using flash as 'fill', we can light up blossoms that are in shade. The trick is to gently fill with flash - if using the pop-up flash, try backing up if it's too bright. With an external flash unit, adjust the power or use Flash Compensation and dial it up or down as needed.
Try these approaches:
- Use flash at reduced power (-1 to -2 stops) to gently illuminate shaded subjects
- Position your flash off to the side for more depth and dimension
- Use a small diffuser for softer light
- Consider using a small reflector instead of flash for a more natural look
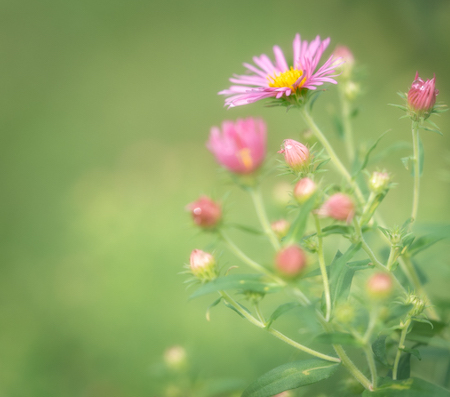 7. Use Empty Space Effectively
Try making simple spring photos where most of the frame is empty, highlighting just one subject. A single tulip against a plain background or one budding branch against the sky can create powerful images that really stand out and showcase spring’s promise of renewal.
8. Make the Most of Early Morning Light
There's something magical about photographing spring in the early morning hours. Set your alarm a bit earlier and you'll be rewarded with the ideal conditions that disappear as the day progresses:
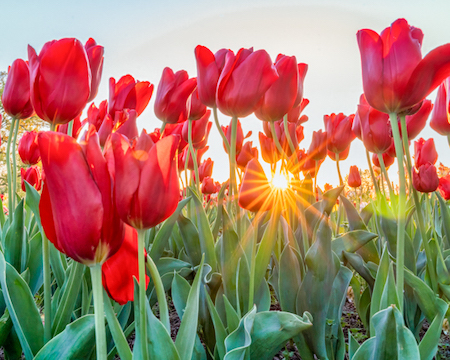
- The soft, golden light creates a warm glow that makes colors pop without harsh shadows
- Morning dew adds sparkle to flower petals and also reveals spider webs
- The stillness of early morning also means less wind -perfect for capturing delicate flowers and leaves without blur.
- You might find magical light rays coming thru leaves or petals
- Most birds and wildlife are more active in the morning and may add a nice element in your frame.
- Locations are usually less crowded
Quick Tip: Prep your gear the night before and check sunrise times. Arrive at least 20 minutes before sunrise to catch the beautiful pre-dawn color palette of blues, pinks and purples.
9. Document Spring’s Changes
Take photos of the same location throughout the spring season. This approach not only gives you beautiful individual images but also tells the complete story of the season's transformation when viewed as a collection.
10. Setting Simple Goals
It’s hard to hold back our excitement to capture spring but take a minute and instead of just taking random spring photos, try having a plan or giving yourself assignments:
- Pick one subject (like a certain flower) and shoot it in five different ways
- Challenge yourself to only photograph opposite colors for a day
- Photograph the same location at different times of day
- Follow one plant from first bud to full bloom
Quick Tip: Share these goals with friends or online to keep yourself accountable and on target.
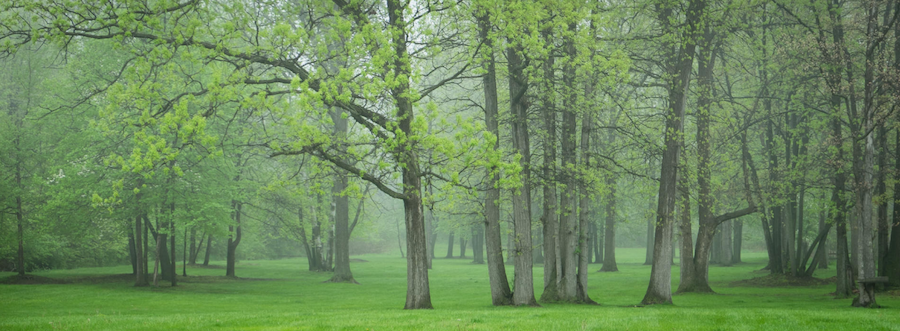 Get creative with these ideas and come up with a few of your own to add to the list. Remember that while technique is important, the best photos come when you connect with what you're shooting.
Follow what catches your eye and makes you smile and have fun as you head out for some spring photography!
Lightroom Comparison: Cloud vs Classic
February 13, 2025 by Corey Hilz
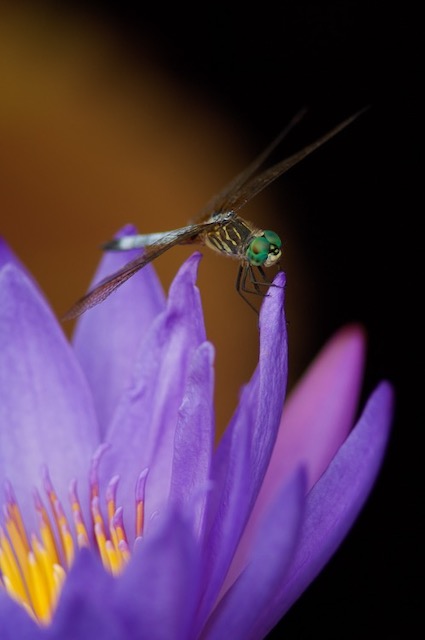 Lightroom is available in two flavors which Adobe calls “Lightroom” and “Lightroom Classic”. Before we get to the differences between them, even the naming makes it confusing to know which version of Lightroom someone is talking about. For clarity I’m going to refer to the two versions as Lightroom Cloud and Lightroom Classic.
This article will give you an overview of the fundamental similarities and differences between Lightroom Cloud and Lightroom Classic. The two versions of Lightroom are not designed to be used interchangeably. You’ll want to pick one version and stick with it. There are ways to move your photos and their edits between them, but it’s not a simple process, and not how the applications are designed to be used.
Lightroom Cloud (“Cloud”) and Lightroom Classic (“Classic”) have the same core function: organize and edit your photos. So you’re not choosing between them based on their primary purpose. The biggest difference to be aware of is that Cloud offers you the option to access your photos on multiple devices (laptop, desktop, smartphone, tablet).
Organization summary
Both Cloud and Classic have the ability to store your photos on your computer. Cloud offers the additional option of storing photos in the cloud which makes them accessible on multiple devices.
Lightroom Cloud organization
Where can you store your photos? Two options: in the cloud or on your device
- Cloud storage: When you add your photos to the Cloud then those photos (and their edits) will be accessible on any of your devices on which you have Lightroom Cloud installed.
- Local storage: Your photos will only be on your device (ex: laptop) and not accessible from other devices. To access local storage, you are browsing the folders on your computer through Lightroom. You can mark folders as Favorites for faster access to them.
You do not have to choose only cloud, or only local storage. You can do both! Maybe you don’t need access to all your photos on other devices. Perhaps you put your favorite photos in the cloud and leave the rest of your photos local. Or put everything in the cloud! It’s up to you.
Be aware that photos stored in the cloud count towards the cloud storage capacity that comes with your Adobe account. Check your account information to see how much this is. It could be anywhere from 20GB to 1TB depending on your subscription plan.
For photos stored in the cloud there is a feature called Albums which you can use to organize your cloud photos.
- By default, your cloud photos have no organization, they’re simply in a chronological list.
- You can use Albums to arrange them into smaller groups.
- A photo can be added to multiple albums, giving you flexibility with your organizing.
- You can also share albums with other people.
Lightroom Classic organization
In Classic you begin by importing selected photos, or folders of photos into Lightroom. Those are the only photos or folders you see in Classic - the ones you’ve chosen to import.
- In addition to folders, Classic has Collections which serve the same purpose as Albums in Lightroom Cloud. Your photos will always stay in their folders, but you can also add them to Collections for an additional level of organization.
- A photo can be added to multiple Collections, giving you flexibility with your organizing.
Ranking and rating photos
Cloud and Classic have similar tools for ranking or rating photos.
- They both have a star system where you can assign a photo one to five stars.
- They both also have a flagging system where you can mark photos as a Pick or as Rejected.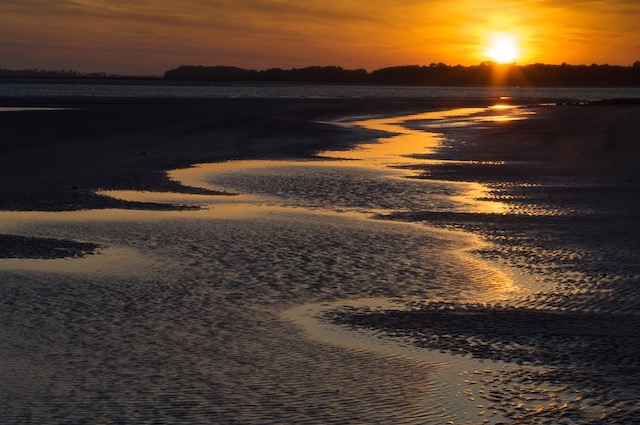
- Classic offers the ability to assign color labels to photos, giving it one more labeling option than Cloud.
You can use these systems to identify your favorite photos and/or create a tiered system indicating the quality of the photo.
Keywords and copyright information
Cloud and Classic allow you to add keywords to your photos, and to have your copyright information added to each photo. You can search for keywords you’ve added, making it easier to find specific photos. Beyond basic keywording there are some differences between Cloud and Classic.
Lightroom Cloud search
For photos stored in the cloud you can use AI search which means you don’t need to enter keywords for individual photos. You simply type in a word, such as “waterfall” or “lion”, and it will show all your matching photos. It’s pretty convenient and saves you from keywording many types of subjects.
Lightroom Classic keywords
Classic has features that go beyond the basics of keywords. For instance, it will suggest keywords to use. You can also save groups of keywords that you use regularly so you have easy access to them. Finally, there’s a list of all the keywords you’ve used and how many photos are assigned to each keyword.
Editing summary
The photo editing features are pretty much the same in Cloud and Classic, there are no major differences in the features/tools. Therefore, instead of describing differences I’ll give you a summary of the types of adjustments you can make so you know what Lightroom is capable of.
- Tone adjustments (exposure, shadows, highlights, contrast)
- Color adjustments (saturation, vibrance, targeting individual colors for adjustment)
- Enhancing or softening details (clarity, texture)
- Sharpening
- Noise reduction
- Removing chromatic aberrations and distortion
- Simulate a shallow depth of field by blurring foreground and/or background elements
- Convert to black and white
- Cropping and straightening
- Retouching (light to moderate complexity)
- Masking to selectively adjust areas of your photo
- Send a photo to Photoshop for editing
Presets
An editing preset is a saved set of adjustments making it faster to apply one or more adjustments with a single click. Cloud and Classic both include pre-installed editing presets. You can also create your own presets, or add ones you have received from other people. One difference is that Cloud also gives you access to presets from the Lightroom Community which lets you use presets other people have created.
 Exporting
Exporting is saving a copy of your photo outside of Lightroom. This is done when you need to use your photos for something that doesn’t involve Lightroom, such as email, website or social media. Cloud and Classic have the Export feature and include similar settings (image size, quality, etc). One notable difference is that Classic has the ability to create your own Export presets. If you are exporting for the same purpose frequently, an Export preset can be a time saver. Cloud includes a few default presets, but you cannot create your own.
Slideshow
Cloud and Classic both offer the ability to play a slideshow of select photos, but the features are vastly different. The Cloud slideshow is very basic: you choose the photos then start the slideshow. The only options are how long each photo is shown and whether the slideshow loops. Classic on the other hand has extensive settings from choosing colors and layout, to adding music and fine tuning the playback experience.
Web Gallery
Cloud and Classic both include the ability to create a Web Gallery as a way to share your photos. For Cloud this is done using the Adobe Portfolio feature which is part of your Adobe subscription. You can choose from different layouts and themes, as well as have information shown on the screen with the photo. You can then send a link for others to view the gallery. In Classic you have similar design choices, but in order to post the gallery online it has to be uploaded to an existing website that you control. It is not as user friendly unless you already have your own website/domain.
Classic Only Features
Finally, there are a few additional features that are only available in Lightroom Classic. These are not editing or organizing features, so they may or may not be important to you.
Book: Layout and order a book through the Blurb book printing service.
Print: Print your photos directly from Lightroom to your printer. Choose from various layout styles and design options.
Map: Photos that have GPS info (geotagged) will be displayed on a map.
Which is best for you?
If you’re not currently a Lightroom user, consider which version best meets your needs. If it’s important to access your photos on multiple devices then Lightroom Cloud is a good match for you. On the other hand, maybe it’s the Classic-only features of book layout, maps, and printing that are a “must have” for you.
However, if you don’t need the Classic-only features I think Cloud is the one to go with. It covers your organizing and editing needs, plus you can store your photos in the cloud and/or on your computer.
Are you already using Classic? You probably don’t need to consider switching to Cloud. Unless accessing your photos on multiple devices is very important to you. If you are thinking about a switch you will want to look into the steps required to move your photos + their edits from Classic to Cloud.
Join Corey at one of his classes soon! See the full list of Lightroom and other post processing classes.
Understanding ISO: From Film to Digital
January 23, 2025 by Marie Joabar
Whether you're shooting your child's soccer game or capturing the Milky Way, understanding ISO is a crucial part of the exposure equation.
Simply put, ISO controls how sensitive your camera is to light. Use low ISOs for bright conditions or bright subjects. Use high ISOs for low light, dark scenes or dark subjects.
Every photographer faces the challenge of shooting in less-than-ideal light. Once limited by film sensitivity, today's digital ISO capabilities have transformed what's possible in challenging light.
ISO's Film Origins
In film photography, ISO (International Organization for Standardization) indicated film sensitivity to light. Lower ISO films (50-200) required more light (think bright sunny days) and produced cleaner images, while higher ISO films (400-3200) could shoot in darker conditions but showed visible grain. Photographers had to commit to one ISO for the entire roll of film, typically 24 or 36 frames.
Digital Revolution: ISO Reimagined
Digital cameras transformed ISO from a physical roll of film to an amplification of the sensor's signal. This fundamental change brought two major advantages:
- Adjustable ISO for each shot rather than an entire roll
- Significantly improved high-ISO performance through advanced sensor technology
Modern ISO Capabilities
< Today's cameras offer remarkable ISO ranges. Entry-level cameras typically range from ISO 100-25,600, while professional models can reach ISOs up to 102,400 or higher. More importantly, the "usable" range has expanded dramatically. Images shot at ISO 6400 on newer cameras often show less noise than ISO 1600 photos from cameras a decade ago.
Low Light Performance Evolution
Additionally, digital camera sensor improvements have revolutionized low-light photography:
- Larger photosites (pixels) capture more light
- Enhanced signal processing reduces noise
- Dual gain ISO technology provides cleaner high-ISO images
- Back-illuminated sensor designs increase light sensitivity
What was once impossible is now routine: shooting handheld in dim churches, capturing evening sports events, or photographing wildlife at dusk.
Common Shooting Scenarios and ISO Selection
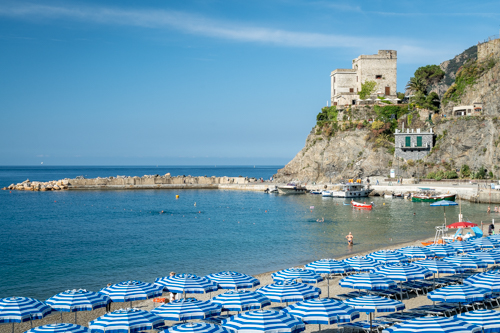
Bright Outdoor Settings (ISO 100-400)
- Sunny beach portraits, very bright scenes: ISO 100
- Overcast landscape photography: ISO 200-400
- Sports in bright daylight: ISO 400-800
Indoor and Low Light (ISO 800-3200)
- Indoor events without flash: ISO 1600-3200
- Concert photography: ISO 1600-3200
- Museum photography (no flash allowed): ISO 800-1600
- Indoor sports: ISO 1600-6400
Challenging Light Conditions (ISO 3200-6400+)
- Blue hour cityscapes: ISO 3200
- Indoor ceremonies in dimly lit churches: ISO 3200-12800
- Theater performances: ISO 3200-6400
- Wildlife at dusk: ISO 3200-12800
Extreme Low Light (ISO 6400+)
- Milky Way photography: ISO 3200-12800
- Northern Lights: ISO 3200-6400
- Night street photography: ISO 6400+
- Indoor basketball in poorly lit gyms: ISO 6400+
Note that these ranges are general guidelines - your specific camera's capabilities, lens choices and the exact lighting conditions will greatly influence the optimal ISO choice.
Auto ISO as an Option
Many photographers shooting in in Manual and Aperture Priority Modes use Auto ISO for ease of use and a quicker response to rapidly changing lighting.
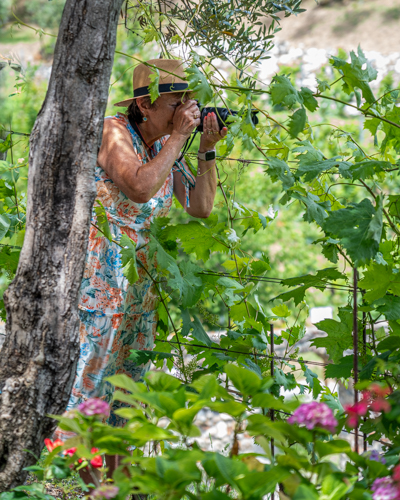
Advantages:
- Maintains desired shutter speed while optimizing exposure
- Quickly adapts to changing light conditions
- Prevents accidental underexposure
- Allows one to focus on composition rather than settings
Disadvantages:
- May choose higher ISO than necessary
- Can lead to inconsistent noise levels across a series
- Might not recognize artistic intent for darker exposures
- Could hit ISO limits without warning
- If you’re just learning about exposure, using Auto ISO might hinder your understanding of how ISO works and fits in the exposure triangle.
Tips If Using:
- Set Auto ISO minimum to base ISO (base is the lowest the camera offers)
- Define maximum ISO based on your camera's capabilities and personal noise tolerance
- When using Auto ISO, monitor the chosen values to ensure they align with your goals
- Consider turning off Auto ISO for studio work or when consistent noise levels are crucial
Remember: while modern cameras handle high ISOs admirably, using the lowest ISO possible for your shooting situation will always yield the best image quality.
Managing Digital Noise in Post-Processing
Modern software offers powerful solutions for handling noise in high-ISO images. Use caution, reducing or removing noise can make an image look plastic if not applied well. Remember that some noise can add character to an image - the goal isn't always to remove it completely, but rather to manage it effectively for your creative vision.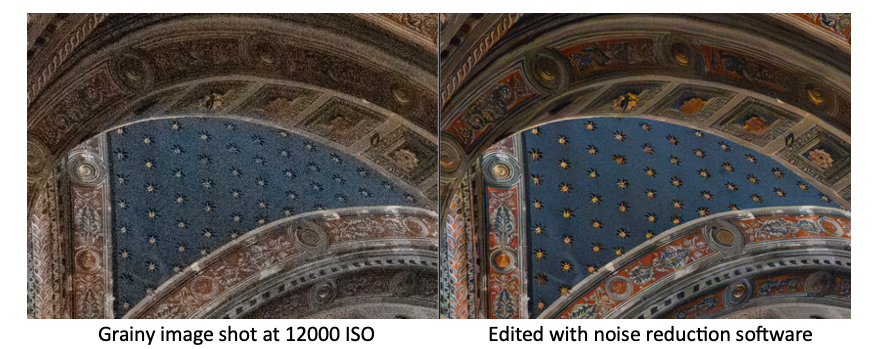
Popular Software Options
- Adobe Lightroom and Capture One provide integrated noise reduction within their raw processing workflows
- Specialized AI-powered tools like Topaz DeNoise AI, Topaz Photo AI, and DxO PureRAW excel at preserving detail while removing noise
Key Techniques
- Apply noise reduction early in workflow
- Find the balance between noise reduction and detail preservation
- Use selective editing to maintain detail in important areas. Apply stronger reduction to shadows. (Noise loves shadows)
- Zoom to 100% while adjusting settings
- Use separate luminance noise reduction and color noise reduction
- Consider keeping some noise for natural look
Common Pitfalls
- Over-smoothing leading to plastic look
- Losing detail in attempt to remove all noise
- Applying too much color noise reduction
Understanding ISO is key to mastering exposure. While it may seem technical at first, today’s cameras and post-processing tools have made working with ISO more intuitive than ever.
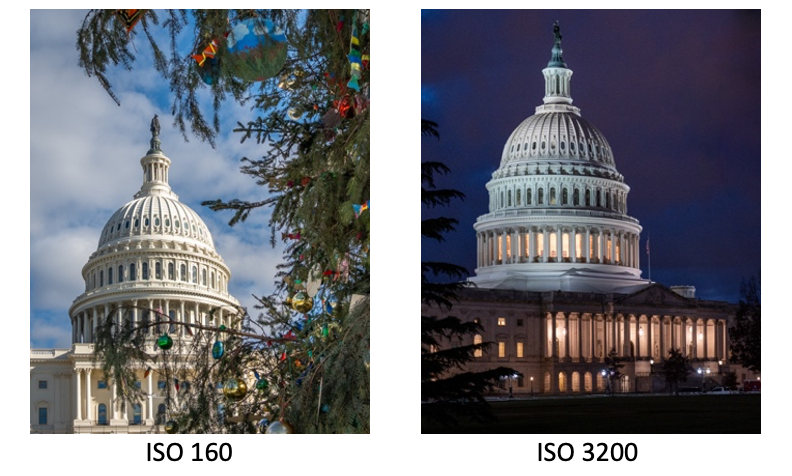
The key is understanding when to embrace higher ISOs for capturing moments that might otherwise be impossible, and when to prioritize the cleanest possible image at base ISO. With practice, managing ISO will become second nature, allowing you to focus on what truly matters – creating compelling images that tell your story.
9 Tips For Setting Your Photography Goals for 2025
January 1, 2025 by Marie Joabar
As we step into 2025, it's the perfect time to set meaningful goals for your photography. Whether you're just starting out or looking to refine your craft, here are 9 tips to help make this year the best yet.
 1. Review your 2024 Images
Review your favorite photos from 2024 but don’t stop there. Also review the ones you wish you could have captured better.
Define the areas you need to work on and techniques you need to learn or improve on.
2. Set Projects For Yourself
Rather than setting broad goals, focus on specific projects that can help motivate you and provide steady momentum throughout the year. Consider a weekly or monthly challenge: explore night photography, experiment with portraiture, or capture the changing seasons. Each new technique you master helps expand your photo tool box.
3. Master Your Equipment
Each month, take time to learn a new feature of your camera. Whether it's the buttons for exposure settings, back-button focus, exposure bracketing, or playback tools, understanding your equipment's capabilities will give you confidence to capture exactly what you envision.
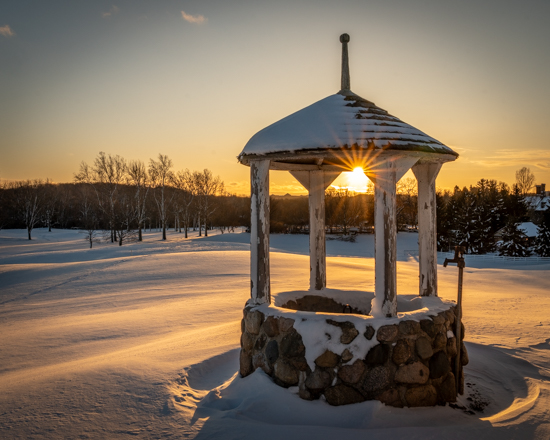 4. Find Your Unique Style
In today's visual world, personal style sets you apart. Study photographers whose work resonates with you. Notice what draws you to certain images, then incorporate these elements into your own unique vision. Don't just imitate – analyze. What attracts you to their images?
5. Create A Photo Routine
Photography shouldn't feel like a chore. Create routines that make photography a natural part of your life:
- Designate a time for practice and experimentation
- Consider setting up a small home studio space, even if it's just a corner with good natural light
- Keep your camera accessible for unexpected moments
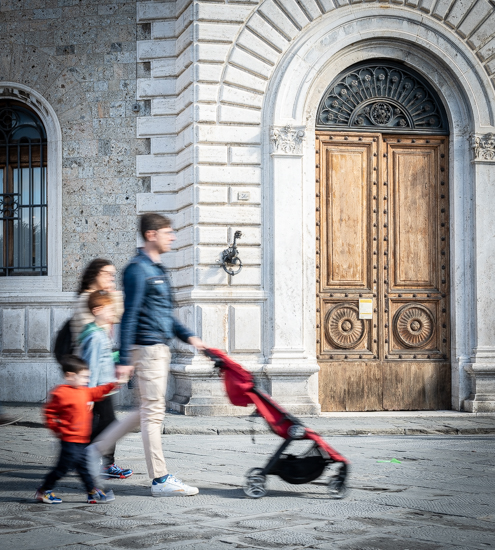
- Schedule weekly or monthly photo walks at different locations
- Join a local photography group for support and camaraderie
6. Welcome Feedback
Growth happens outside our comfort zone. Share your work regularly, whether on social media, photography forums, or in-person critique sessions. Learn to accept feedback gracefully while staying true to your artistic vision.
7. Track Your Progress
Keep a photo journal to track your development. Note the technical aspects of your memorable shots and what you learned from less successful ones. List techniques you want to continue improving on. Looking back on your journal throughout the year will provide motivation during creative slumps.
8. Set Goals for Sharing Your Work
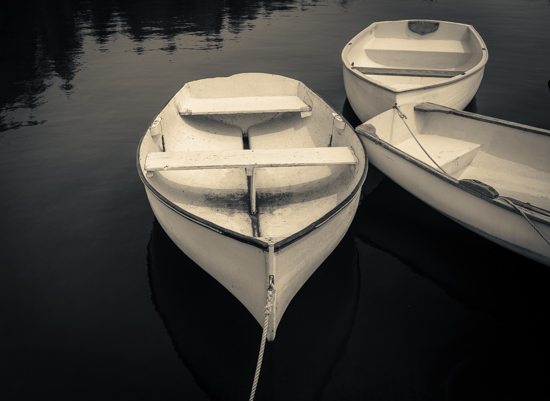 Once you’ve gained confidence in your body of work, challenge yourself to share your it more widely. This could mean:
- Create a professional portfolio
- Enter competitions
- Contribute to photography publications
- Submit to galleries and exhibitions
9. Stay Inspired
Creative blocks are natural, but they don't have to derail your progress. Have some resources to get you back on track:
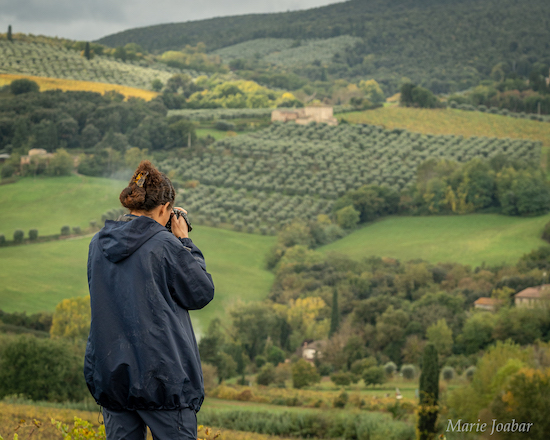 Maintain a collection of inspiring images
- List interesting locations to photograph
- Review your journal for creative ideas you may have forgotten about
- Follow respected photography blogs and YouTube channels
- Join a local camera club
- Attend photography classes and events
Your camera is a powerful tool for capturing your view of the world. Make this the year you fully embrace that potential. Focus on consistent progress rather than perfection.
Let 2025 be the year you push your creative and technical boundaries and develop your unique photographic voice!
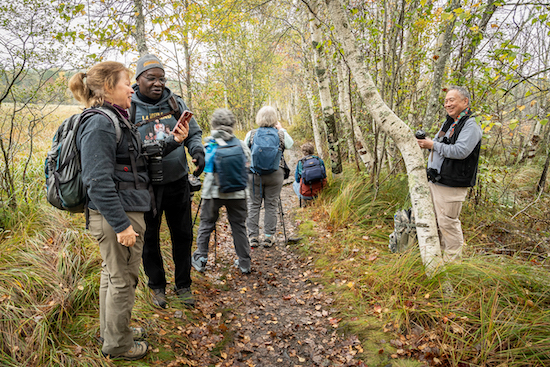
5 Tips For Festive Holiday Photos
December 19, 2024 by Marie Joabar
As you prepare to take photos this holiday season, consider some of these tips to add a little creativity in your shots.
1. Play With Perspective
Look for unique angles and points of view when taking photos to add visual interest. Get low to the ground, shoot from a balcony, try framing through branches or holiday decorations. Experiment with angles people don’t usually see.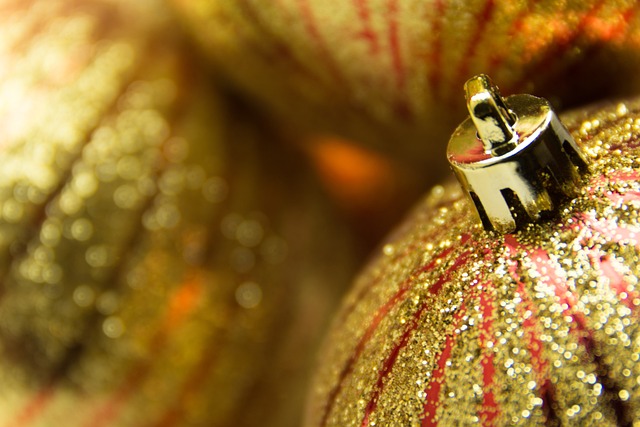
2. Capture Candid Moments
Try to take lots of candid shots to get natural expressions and unposed interactions. Capture the delight when opening gifts, laughter over holiday meals, a private glance shared between loved ones. These real moments tell the story of the holidays.
3. Highlight Holiday Atmosphere
Use lighting, textures, and smaller details to showcase the holiday atmosphere. Capture sparkling decorations with lens flares, the flicker of candlelight on faces, the fuzz on a festive sweater. Get up close with food, drinks, flushed cold cheeks.
4. Frame with Foreground
Use holiday decorations or natural features in the foreground to frame backgrounds creatively. Shoot through branches, a garland or lights with loved ones in the distance to add depth and context. Create layers through thoughtful composition. 
5. Isolate Color Schemes
Purposefully frame shots to isolate one or two colors for dramatic, graphic shots. Zero in on just red and green elements from a blue background, or capture a nighttime scene using light golds and rich blacks. Stylize with selective color.
The key is to wander around during holiday outings and gatherings with an eye for special moments, details and seasonal ambiance to tell the visual story of season and time spent with loved ones. Moving around allows you to capture a good variety.
Wishing you and yours a happy and festive Holiday Season!
Under the Tuscan Sun
November 7, 2024 by Marie Joabar
Tuscany was amazing! We came. We ate. We drank... And we photographed it all!
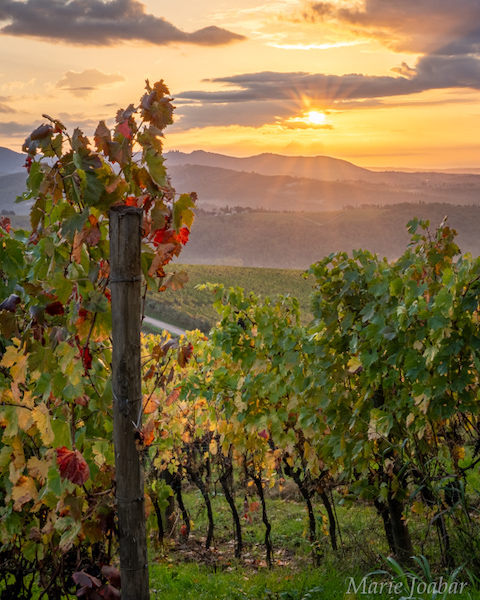 If asked what was my favorite thing about the workshop, I'd have to say that it was spending the week with such a great group of participants! By the workshop's end, many friendships had formed and countless special memories were made.
Our Home Base
We stayed at the Dievole estate, a 900-year-old working vineyard. Besides taking photos, we got to learn about winemaking, olive oil production, and of course, we took full advantage of the delicious Tuscan food.
The old stone buildings, rows of vines, and the beautifully landscaped grounds gave us plenty to photograph right where we were staying.
October turned out to be ideal. The light was warm and beautiful, the temperatures were mild and we could still see some grapes on the vines.
On the first morning we gathered before dawn, cameras ready, watching the vineyard emerge from darkness. The sky put on quite a show - soft pinks and peaches with hints of yellow. When the sun finally came up through the morning fog it lit up the rolling hills and dewy vines beautifully. Now that’s how to start the day!
Getting Out and About
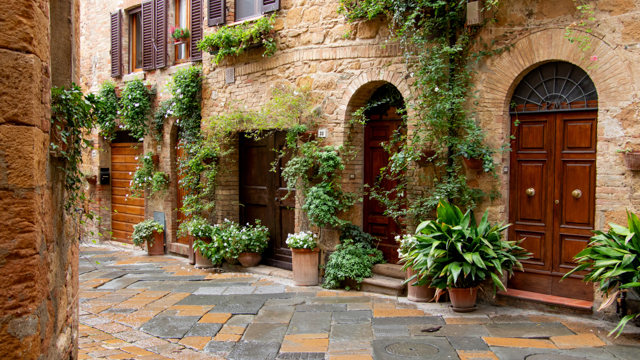 We visited some fantastic spots:
- Siena with its impressive Duomo and lively Piazza del Campo
- San Gimignano's medieval towers
- The charming streets of Pienza
- The Val d’Orcia area for some iconic landscape shots
- Several hilltop towns with their own hidden corners
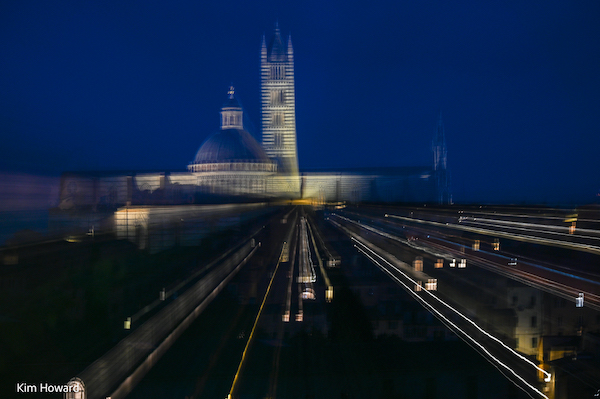
The Photography
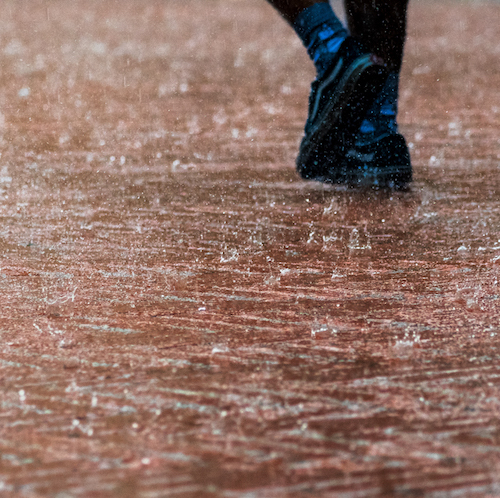 We made the most of the golden Tuscan light and framed up some amazing vineyard landscapes.
- In the towns and villages we visited, some of us photographed the ancient architecture and cathedrals, others captured life unfolding in the main square, and some captured the shop windows and street scenes.
- We had a few days of rain but we found ways to make even that look good.
- On the days that it didn’t rain, we’d start with a sunrise shoot over the vineyards.
More Than Just Photography
 Each day brought something special. We had opera appreciation classes before our authentic Tuscan dinners, we enjoyed a traditional harvest-season pig roast, and had a memorable dinner in the old wine cellar.
The wine tasting tour taught us all about what makes Chianti wines of Dievole so special.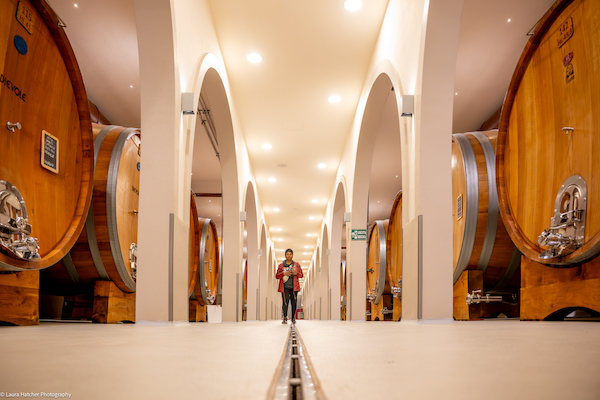
Great Company
By the end of the week, we had memory cards full of beautiful Tuscan scenes and had experienced this amazing region the way photographers do - taking our time, noticing details, and capturing the beauty of everyday moments.
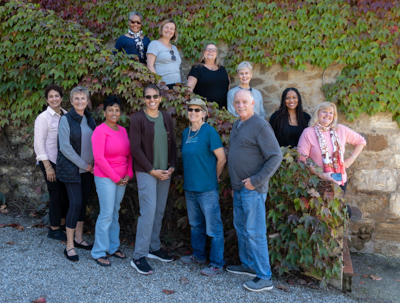 The best part of any workshop is the people, and this group is no exception! It was truly a joy to spend time together exploring this beautiful and historic region of Italy!
VIEW THE PARTICIPANT'S PHOTOS ON OUR TUSCANY STUDENT SHOWCASE!
This workshop was run together with Il Chiostro Workshops. Many thanks to them for helping plan an excellent experience for the instructors and students!
10 Tips for Fall Captures
October 16, 2024 by Marie Joabar
Peak fall color is just around the corner here in the DC area. Explore some of these tips to help improve your fall captures.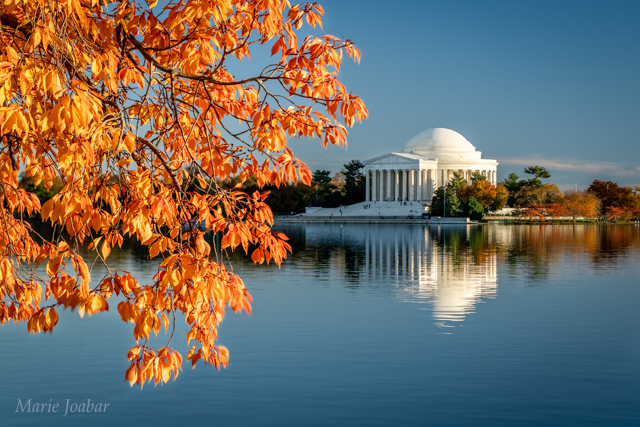
 1. Play with opposite colors ion the color wheel. Orange leaves against a blue sky, purple asters mixed with yellow mums.
2. This is a perfect time to think about textures; close ups of crisp leaves, intricate seedpods, leaves carpeting the forest floor, etc.
3. It’s a great time to capture friends or family. Plan a group photo session with a lovely fall scene in the background.
4. Look for scenes that can be beautifully framed with fall foliage.
5. Play with your White Balance setting. Try using Shade even when its sunny to give your fall frames a warmer, more vibrant look.
6. A circular polarizing filter will help to remove glare on the leaves, even on a cloudy day. They’ll also add increased saturation and contrast.
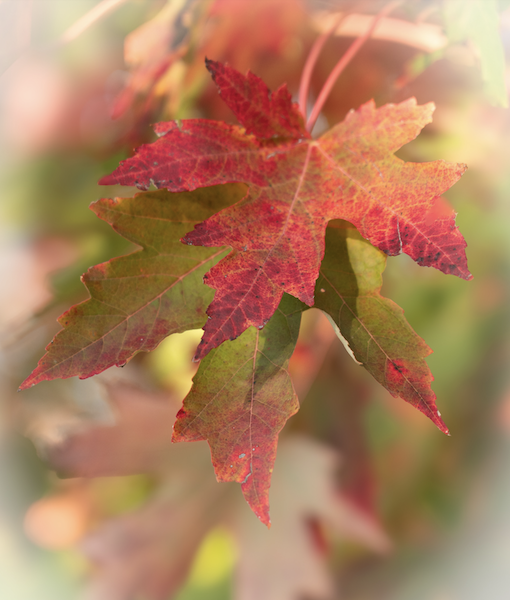 7. Watch the weather. On a sunny day, early morning and late afternoon are going to give you the prettiest lighting opportunities. Cloudy days are great for soft, even light and give you the flexibility to shoot at any time of the day.
8. Get the wide shots but continue getting closer to get the tight details.
9. Get Creative! Try intentional camera movement for some abstract colorful shots filled with reds, yellows and oranges.
- While shooting, zoom the lens, turn the camera, or move it up or down.
- Set a small aperture (f16 or 22) and a low ISO so you can use a slow enough shutter speed for the intended movement.
- You may need a polarizer to help prevent overexposure.
10. We all seem to be busier these days but don't despair if you can't take advantage of all the photo ops, just make yourselves a note of the places you'll try to enjoy next year.
Let's see your best shots! On Instagram, tag @CapitalPhotogCenter. On Facebook; tag, CapitalPhotographyCenter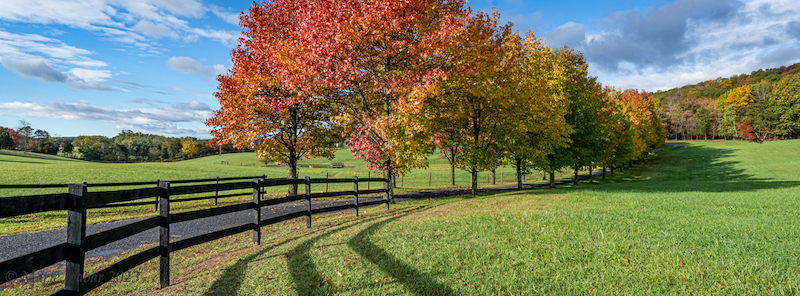
Mid Atlantic Photo Visions 2024
October 8, 2024 by Marie Joabar
 This is a Mid Atlantic Photo Visions event that Capital Photography Center is happy to support.
The LIVE and IN–PERSON Mid–Atlantic Photo Visions (MAPV) event featuring so many great speakers, workshops, vendors, and gallery of incredible images is almost here! The big event is to be held on Saturday–Sunday, November 2–3, at the Hylton Center in Manassas, VA.
Here’s what is happening:
- There is an amazing lineup of renown speakers to inspire us with their exciting presentations on a wide variety of topics from landscape to portraiture to architecture and everything in between.
- The 20 presentations are headlined by the Nikon Canada Ambassador Michelle Valberg who gives the Saturday and Sunday Keynote presentations and the legendary Art Wolfe returning as a special guest.
- Bring your camera and enjoy any of the 35 Hands–On Workshops photo shoots and 1–on–1 sessions. These sessions are limited in size for ease of shooting and close instruction. Register soon –– many sessions will sell out.
- Camera Manufactures reps, photography vendors, and a local camera store will be open for business.
- 2 free Zoom Presentations on 10/27 as a prelude to the Expo. (Registration is required.)
- Two free in-person presentations on–site at the Hylton Center. (Registration is required.)
- View the 500+ juried photos on exhibit from club members and students from area schools.
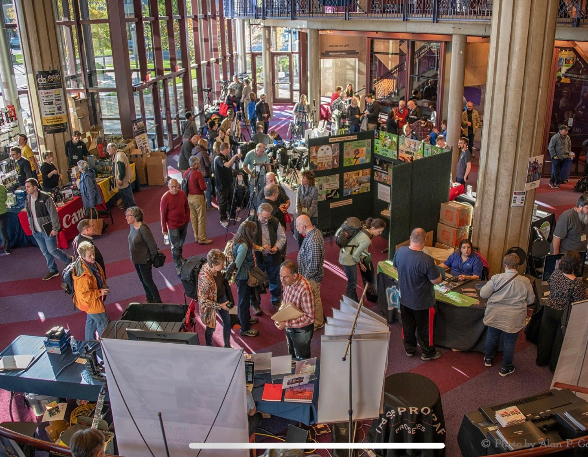
There is an EASY–TO–READ PDF MAPV Brochure which includes the event schedule that you can download and print as you consider all of your options.
THE PHOTO GALLERY will feature an incredible selection of printed juried images in the six categories in each of the Nature and Photo Art Competitions. Be sure to cast your votes for the People’s Choice Awards while you’re viewing all of the incredible prints that will be on display in the gallery at the Expo!
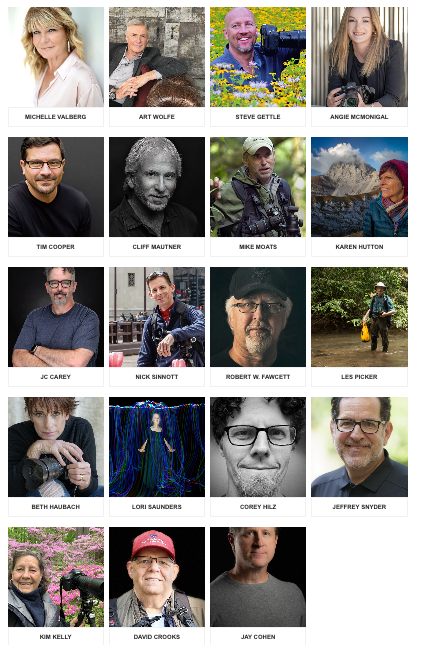 ENTRY IS FREE to the vendor hall, the free Zoom and in–person presentations, and for the three juried exhibits of photography by adult and student photographers.
Here’s what is included with each of the various types of presentation passes*
- All Presentations Pass ($230*): Attend any of twenty live presentations, of which fifteen will be recorded for later viewing online. (Hands–on workshops, photo shoots and 1–on–1 sessions are not included.)
- Saturday Presentations Pass ($175*): Attend any of eleven live presentations on Saturday, November 2. (Recordings, hands–on workshops, photo shoots and 1–on–1 sessions are not included.)
- Sunday Presentations Pass ($155*): Attend any of nine live presentations on Sunday, November 3. (Recordings, hands–on workshops, photo shoots and 1–on–1 sessions are not included.
- Choice of 4 Presentations Pass ($145*): Attend any four presentations on Saturday–Sunday, November 2–3. (Recordings, hands–on workshops, photo shoots and 1–on–1 sessions are not included.)
- Single Presentation Pass ($75): Attend any one speaker presentation on Saturday or Sunday
- Free Presentations: Online registration is required for the one FREE Zoom presentation and two FREE live presentations.
Hands–on Workshops, Photo Shoots, & 1–on–1 Instruction Passes are priced separately from the presentation passes (prices vary from $60 to $90): Bring your camera! Choose from 35 workshops, photo shoots and 1–on–1 instructional sessions. Each one is limited in size; passes are sold first–come, first–served. No speaker presentations or recordings are included.
Come join us there, Capital Photography Center will have several of our instructors participating;
Beth Haubach will be doing a Hands-On-Workshop on Abstracts, Corey Hilz will be offering 1-on-1s and Image Reviews, Jeff Snyder will be giving a presentation on Sports Photography, and Kim Kelly will be giving a Free presentation on Flower Photography.
We look forward to seeing you all at this incredible event!
The Joy of Teaching Photography
September 25, 2024 by Marie Joabar
Combining a love for teaching with a passion for photography creates an incredibly rewarding experience as a photography instructor. We have the unique opportunity to share not just our technical knowledge, but also our love for the art form itself.
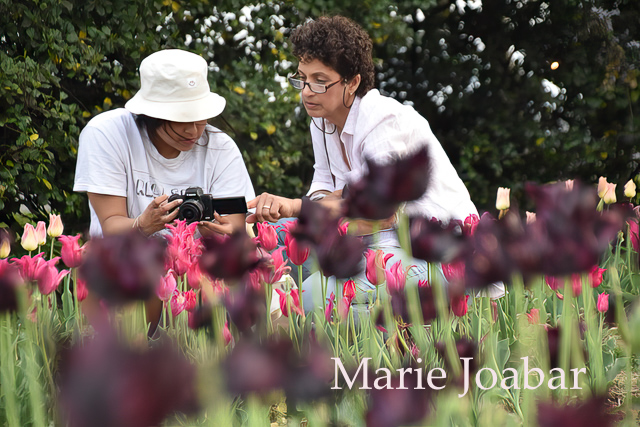 The Joy of Sharing Knowledge
 As CPC instructors, we're more than just teachers, we're enthusiasts eager to pass on our expertise. We find joy in:
- Sharing our passion for the subject
- Imparting knowledge to eager learners
- Watching the growth and development of our students
Understanding Our Students
As teachers, we see a wide range of students, each with their own aspirations and challenges:
- Some are eager to learn but confused about certain aspects of photography
- Others lack confidence in their abilities
- Many feel overwhelmed by the learning curve
Our role is to guide them through these obstacles, helping them take their photography to the next level. It's exciting to see a student grasp a concept, master a new technique, or become more comfortable with their equipment.
Empathy in Teaching
 No one is born a photographer. We all had to learn the craft, and remembering our own struggles helps us become better instructors. By recalling our journey, we can:
- Relate to our students' challenges
- Develop effective teaching methods
- Create a supportive learning environment
A Gift of Photography Education
 I remember my early days working at Penn Camera. Despite my love for photography, when digital photography emerged, I was intimidated and faced a steep learning curve.
I sought help from everyone around me but it was Elliot Stern (the Nikon rep at the time) who spent time with me one afternoon and gave me a solid foundation in digital photography, explaining complex concepts in a way I could understand. His training sparked my excitement for this new technology and a passion to share it with others. I am thankful for his skill as a teacher and the gift of knowledge he gave me that day.
Continuous Learning and Growth
Teaching photography keeps us on our toes. It:
- Motivates us to stay informed about the latest trends and techniques
- Challenges us to master new skills so we can effectively teach them
- Encourages us to explore different aspects of photography
Without the need to train others, we might not push ourselves to expand our own knowledge and skills as much. The responsibility of educating others drives us to continually improve our own craft.
The Reciprocal Nature of Teaching
While students often express gratitude for our instruction, we owe them equal thanks. Our students:
- Keep us motivated to stay at the forefront of photographic knowledge
- Fuel our passion for sharing and teaching
- Provide us with the satisfaction of seeing their growth and success.
Without students, we would lose our inspiration and the pleasure we get from helping others learn and grow in their photographic journey.
Conclusion
The art of teaching photography enriches both the student and the instructor, creating a beautiful symbiosis of learning and creativity.
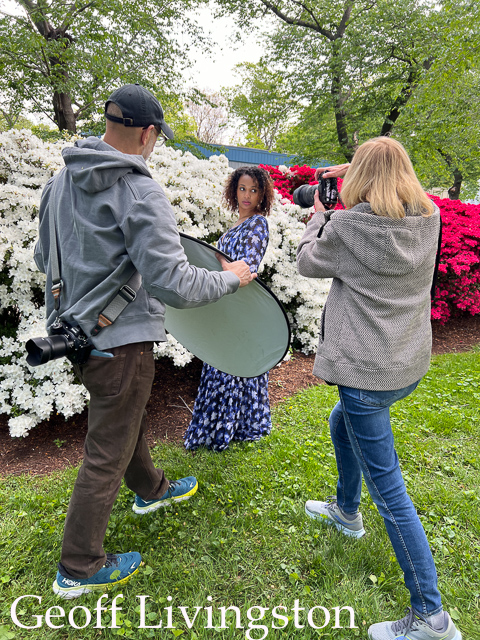 We hope to have the pleasure of working with you at one of our classes soon!
Note - not all instructors are shown.
DSLR vs Mirrorless Cameras
August 8, 2024 by Marie Joabar
Let’s explore the differences between them, lens considerations, and improvements in mirrorless cameras over the years.
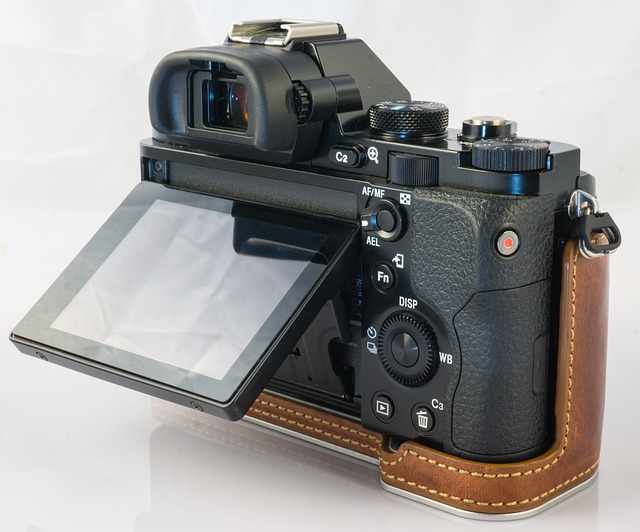
The Main Differences Between DSLR And Mirrorless:
-
Size and weight: Mirrorless cameras are generally smaller and lighter.
-
Autofocus: Modern mirrorless cameras often have faster and more accurate autofocus systems. Most use different AF methods, like eye-tracking or subject recognition and offer focus peaking (a visual confirmation of what’s in focus) as an option.

-
Electronic viewfinder (EVF): Mirrorless cameras use EVFs, which show a real-time preview of exposure and other settings.
-
Battery life: DSLRs typically have better battery life due to optical viewfinders and larger batteries.
-
Lens selection: DSLRs have a wider range of native lenses, but mirrorless systems are catching up. Many systems offer lens adaptors allowing use of native lenses on the newer mirrorless cameras.
-
Image quality: Both can produce excellent images, with differences mainly in specific models rather than the technology itself.
-
Customization options: Mirrorless cameras often offer more customization, which can be overwhelming at first but beneficial once mastered.
-
Stabilization: Many mirrorless cameras offer excellent in-body image stabilization.
-
Silent Shooting mode and the lack of sound from the mirror slap (optional in some mirrorless cameras) can take a while to get used to leaving the photographer to wonder if they actually took a photo.
-
Video: Many of the newer Mirrorless cameras have more advanced video features than DSLRs.
Will DSLR Lenses Work On Mirrorless Cameras?
If you have a substantial collection of DSLR lenses, this is an important factor to consider when thinking about potentially switching to a mirrorless system. Here are some key points to consider: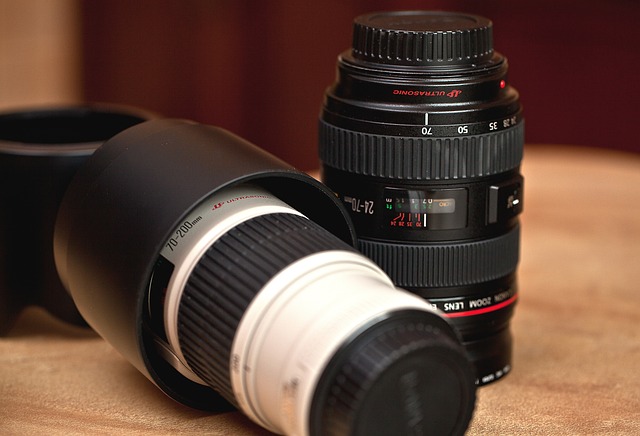
-
Adapters: Many manufacturers offer adapters that allow you to use DSLR lenses on their mirrorless bodies. This can be a cost-effective way to transition.
-
Size advantage: Using large DSLR lenses on a mirrorless body can negate the size and weight advantages of mirrorless systems.
-
Native lenses: Native mirrorless lenses often perform better on mirrorless bodies, but building a new collection can be expensive.
-
Gradual transition: You could switch to a mirrorless body while gradually replacing DSLR lenses with mirrorless equivalents over time.
-
Performance: While adapters work, they may affect autofocus speed and accuracy, especially with older lenses.
-
Specific lens characteristics: Some DSLR lenses may have unique characteristics not yet replicated in mirrorless lines.
-
Resale value: Consider the current market value of your DSLR lenses. Some may retain value well, while others might depreciate quickly.
Differences Between Older Mirrorless Cameras And Newer Ones?
-
Sensor technology:
-
Newer models often have higher resolution
-
Improved low-light performance and dynamic range
-
Better color science
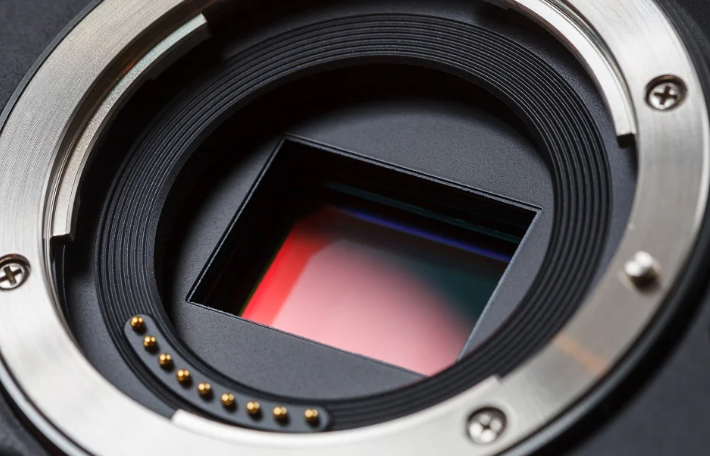
-
-
Autofocus capabilities:
-
Faster and more accurate AF systems
-
Advanced subject recognition (e.g., eye AF, animal AF)
-
Improved tracking performance
-
-
Image processing:
-
Faster processors for quicker operation and buffer clearing
-
More sophisticated in-camera processing and JPEG engines
-
-
Controls:
-
More customizable buttons and dials
-
-
Electronic viewfinder (EVF):
-
Higher resolution displays
-
Improved color accuracy and dynamic range
-
-
Video capabilities:
-
Higher resolution (4K, 6K, or even 8K in some models)
-
Better frame rates and bitrates
-
More advanced video features like 10-bit color or RAW video output
-
-
In-body image stabilization (IBIS):
-
More effective stabilization systems
-
Some older models may lack IBIS entirely
-
-
Improved Battery life
-
Improved Weather sealing
Summer Photos With Fill Flash
July 17, 2024 by Marie Joabar
It's summertime and that means long days, vacations and sun. Many of us will be capturing memories of our kids at the beach or at historic landmarks during our vacations. While you might think bright sunlight means no need for flash, that's not always the case. Let's explore why and how to use fill flash to enhance your summer photos.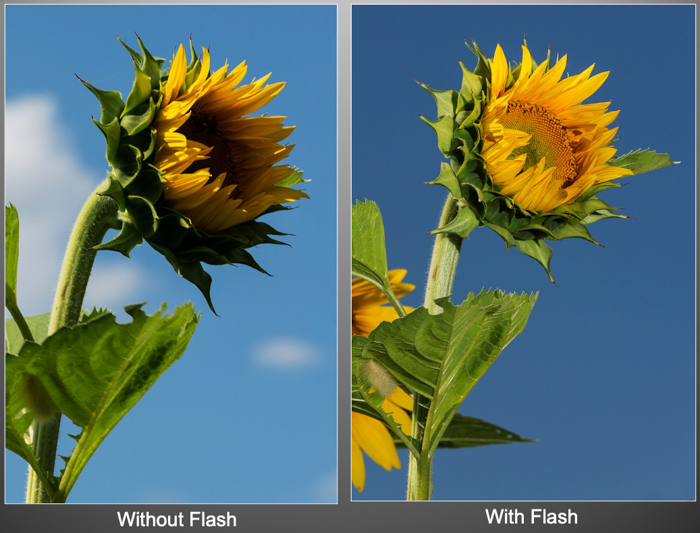
The Challenge of Harsh Sunlight
Bright sun often creates dark shadows, and unfortunately, our cameras can't properly expose for both in the same image. We can expose for the subject in the sun OR for the subject in the shade, but not both... unless we use fill flash.
This issue is particularly noticeable when photographing people wearing hats or visors, or any subject that's half in sun and half in shade. Backlit subjects also pose a challenge, often appearing as silhouettes.
The Power of Fill Flash
While moving your subject to more even light is ideal, it's not always possible. In these cases, fill flash becomes your best friend. Counterintuitively, bright daylight is one of the best times to use your flash. It balances the light, filling in shadows and exposing areas that would otherwise be too dark.
For your people pics, fill flash is especially useful for:
• Lightening shadows on faces
• Adding sparkle to eyes
• Allowing subjects to face away from the sun, reducing squinting
• If using the camera’s built-in flash, enable Red-Eye Reduction if available.
• Remember, most built-in flashes are effective only within 8-10 feet.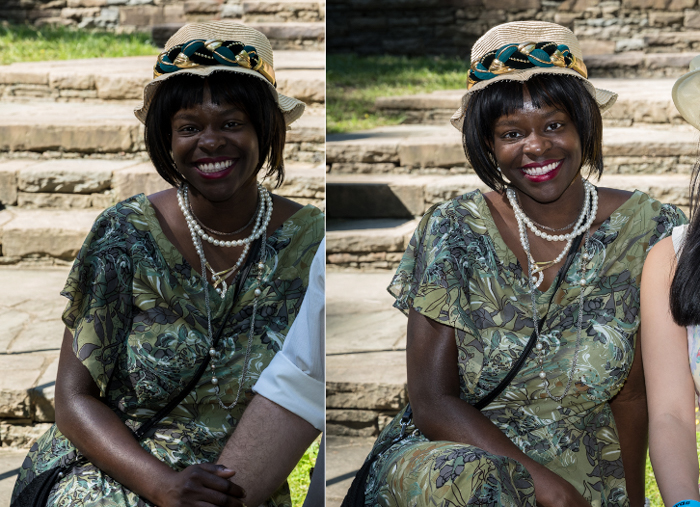
Fill Flash Is Not Just For People And Portraits, use it for:
• Filling in shadows that you want to be brighter
• Evening out harsh light
• Balancing overall light of the scene
Modern cameras have come a long way, but these tips still apply:
• Use a Aperture or Manual mode to enable flash in bright light. (Program Mode (P) would also work.)
• Most cameras have a Flash Sync Speed of 1/200 or 1/250. Before turning on your flash unit, set your exposure with a shutter speed no greater than your flash sync speed and then turn on your flash. Once you have more experience you might be able to go beyond your flash sync speed but if just starting out, stay with the sync speed.
• Use Flash Exposure Compensation (FEC) to fine-tune flash intensity.
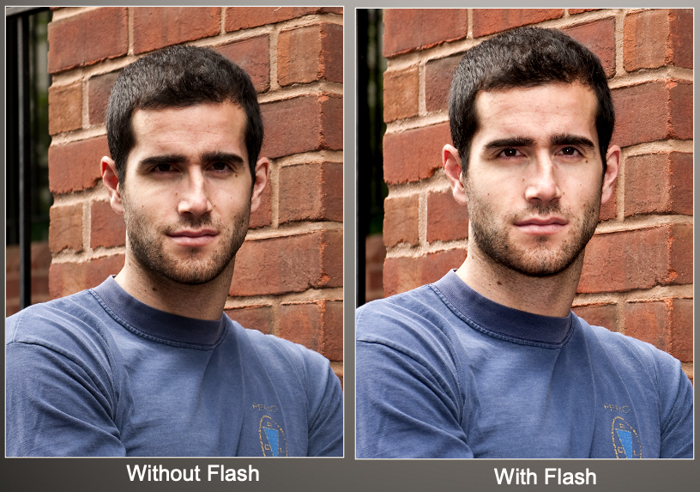 Advanced Techniques: Flash Exposure Compensation
FEC allows you to adjust flash strength. If you're close to your subject, decrease flash output to avoid overexposure. If shadows aren't adequately lit, increase it. Experiment with adjustments in 1/3 stop increments.
Modern cameras often have FEC controls in the quick menu or assignable to custom buttons. Consult your camera's manual for specific instructions.
Beyond Built-in Flash
For those looking to advance their skills:
• External Flash Units: These offer more power and flexibility.
• Diffusers: Soften harsh light from your flash.
• Reflectors: A budget-friendly way to fill shadows without flash.
• LED Panels: Continuous lighting options for both photos and videos.
Smartphone Photography
Most of this advice applies to smartphone cameras too. Many now offer:
• Night mode for low-light scenes
• HDR to balance highlights and shadows
• Portrait mode with simulated studio lighting
Experiment with your phone's Pro or Manual mode to gain more control over flash and exposure.
Post-Processing Solutions
Modern editing software and apps offer powerful tools to address lighting issues:
• Shadow/Highlight adjustment
• Local adjustments to brighten specific areas
• AI-powered sky replacement or portrait enhancement
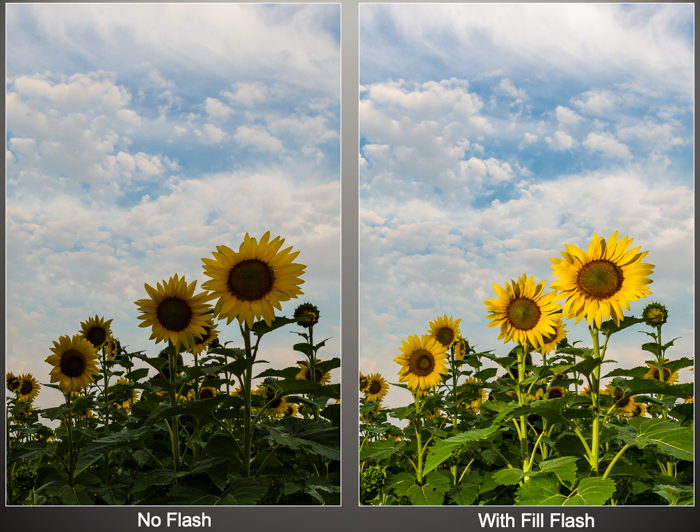 Conclusion
Mastering fill flash can significantly improve your summer photos. Experiment with these techniques, whether you're using a DSLR, mirrorless camera, or smartphone. Remember, the best camera is the one you have with you, so don't be afraid to use your flash creatively, even in bright sunlight.
7 Tips for Photographing Fireworks
June 30, 2024 by Marie Joabar
1.) FIND THE BEST LOCATION
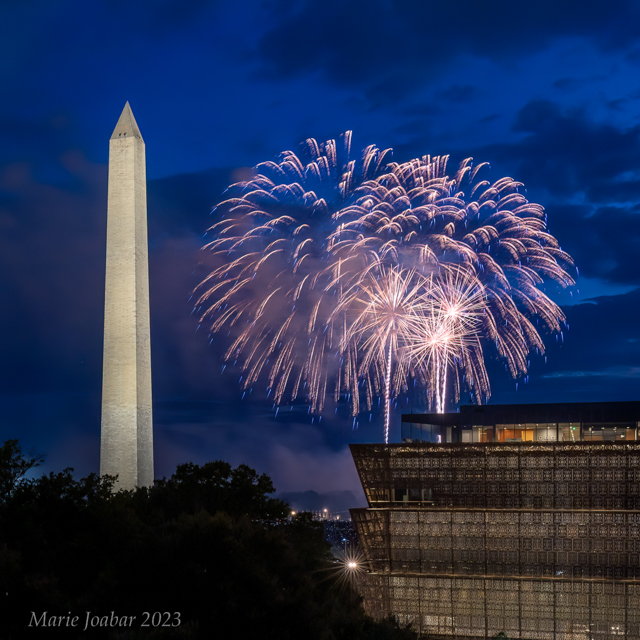 - Take some time before the fireworks to scout out a good spot to shoot from.
- Since it’s best to photograph fireworks using a tripod, think about where you can position yourself with enough room for this.
- Look around the area for any landmarks you might want to include in your photos; an iconic statue or monument, people watching the display, etc.
- One of the most popular displays in our area is the Fireworks on the National Mall on July 4th. Many communities offer their own firework displays. Check out yours to see if they offer any.
2.) EXPOSURE SETTINGS
- Fireworks require long exposure times but the key is to capture the intensely bright streaks of light without washing out the vivid color they display.
- Use the camera’s Manual Mode - Set your ISO to 200 or 400, adjust your aperture between ƒ/8 and 11 and the shutter to between ¼ second to 1 second as a starting point. Take a shot and adjust these if necessary.
- If the bursts are washed out, take away some light by setting a smaller aperture (f16) or using a faster shutter speed.
- To get multiple bursts in one exposure, get some black foam core or cloth and using the Bulb setting*, begin the exposure when the fireworks start with the foam core or cloth in front of the lens. Each time a burst is fired, move the foam core or cloth out of the way for a quick second or two to capture it. You'll end up with a frame filled with several colorful bursts!
* With Bulb, the shutter remains open as long as you keep the shutter button depressed.
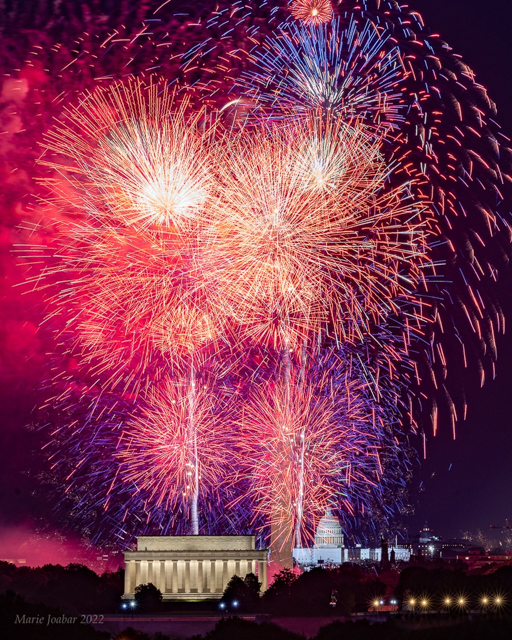 Single bursts
• ISO – 200 or 400
• Aperture f8 to f11
• Shutter to ¼ second to 1 second
• If too bright, use a faster shutter speed
Multiple Bursts
• ISO – 200 or 400
• Aperture f8 to f11
• Try 2 to 6 seconds
Multiple Bursts w Bulb
• ISO – 200 or 400
• Aperture f8 to f11
• Shutter set to BULB
• Cover lens between bursts with black cloth or foam core
3.) USE A TRIPOD
- Mounting your camera on a sturdy tripod is especially important because of the long exposure time. If you don't have a tripod, try placing your camera on a solid platform, such as a fence post, a railing, or the top of your car. This will give you sharper images than if you try to hand hold. Depressing the shutter button can cause the camera to vibrate so use a cable release or the camera’s self timer.
4.) FOCUS
- Since it’s difficult for cameras to find focus in the dark, try setting the focus to infinity, then turn off the Auto Focus. Once it’s set, you shouldn’t need to re-focus for each shot.
- if you have foreground elements, focus on those. 
5.) COMPOSITION
- Take photos both horizontally and vertically.
- Try composing images with foreground elements and multiple bursts in a horizontal frame. Long, narrow bursts look great in with a vertical frame.
- Make the most of the first few explosions. Fireworks leave behind smoke and by time the display is half way through, the smoke will be visible and will probably show in your photos.
6.) BE READY
- Fireworks displays usually only last about 20 minutes so make sure you're ready when they start.
- It’s helpful to set up your camera as much as you can ahead of time and then make some final adjustments as needed when the fireworks go off. Since you are going to be shooting at night in the dark, a small flashlight can be helpful.
7.) EDIT YOUR PHOTOS
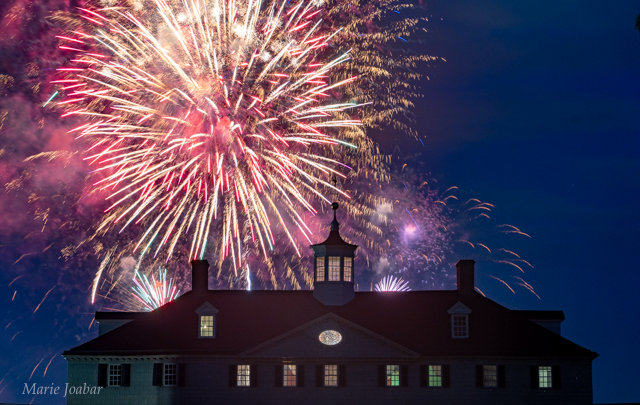 Depending on your composition, you may find your foreground too dark or your bursts slightly washed out. Most fireworks images will benefit from some minor editing in Lightroom.
Here are adjustments to try;
- Add exposure or perhaps raise the shadows to brighten the foreground
- Take down the highlights to make the bursts more colorful
- Adjust White Balance to taste. Try pushing the slider toward the blue to get some color in the sky.
- Adjust Vibrance or Saturation if needed
- Dehaze can help remove smoke from the fireworks and can also add nice contrast

Capturing Americana - A Photographer’s Guide
June 26, 2024 by Marie Joabar
As Independence Day approaches, we have a great opportunity to capture the essence of Americana. From small-town parades to roadside diners, Americana photography offers a nostalgic glimpse into the heart of our culture.
Consider These Americana Opportunities
- Small-town Main Streets
- Classic diners and neon signs
- County fairs and carnivals
- Vintage cars and roadside attractions
- Rural landscapes and farms
- Patriotic displays and parades
Tips For Americana Photography
- Seek out local events and lesser-known locations: While iconic locations have their place, the true spirit of Americana often lies in lesser-known spots. Research local events and explore off-the-beaten-path locations for unique shots.
- Focus on details that evoke nostalgia: Sometimes, the smallest details tell the biggest stories. Zoom in on vintage signage, weathered textures, or personal objects that speak to American history and culture.
- Experiment with warm color palettes: Americana often evokes a sense of warmth and nostalgia. Consider using warm color tones in your editing process or shooting during golden hour to enhance this feeling.
- Use natural light to enhance mood: The quality of light can dramatically impact the mood of your photos. Experiment with different times of day to capture the right atmosphere for your subjects.
- Incorporate people to add life to your scenes: While Americana subjects can be compelling on their own, including people in your shots can add depth and relatability. Capture candid moments of people interacting with their environment.
- Tell a story with your composition: Consider how you can frame your shots to tell a broader story about American life. Use leading lines to draw attention to iconic elements, look for symmetry or juxtaposition to create compelling narratives within your images.
- A wide-angle lens can be great for capturing expansive landscapes or tight interior spaces, while a mid-range zoom lens might offer more flexibility and be better for candid shots of people.
- Don’t forget the tight shots: Consider a long telephoto or a macro and capture the detail work on vintage items, textures of old signs or buildings, etc.
- If you enjoy history, do some research: Understanding the history behind your subjects can help you capture them more meaningfully. Take time to learn about the places and traditions you're photographing.
- When it comes to editing, aim to enhance the mood of your images without oversaturating or making them look artificial. Subtle adjustments to warmth and contrast can go a long way.
- For a vintage look, apply film grain and slightly desaturate colors.
- Play with color, use warm tones for a 1950s feel, cool tones for early 20th century.
Remember, Americana is not just about flags and fireworks. It's about capturing the everyday moments that make up the American experience. From the quirky to the profound, these images tell the story of a diverse and complex nation. We hope you’ll explore this genre and capture your own collection of Americana over the summer.
Share Your Faves With Us On Social!
Tag #CPCAmericana so we can see and share!
On Facebook at CapitalPhotographyCenter
On Instagram at @capitalphotographycenter
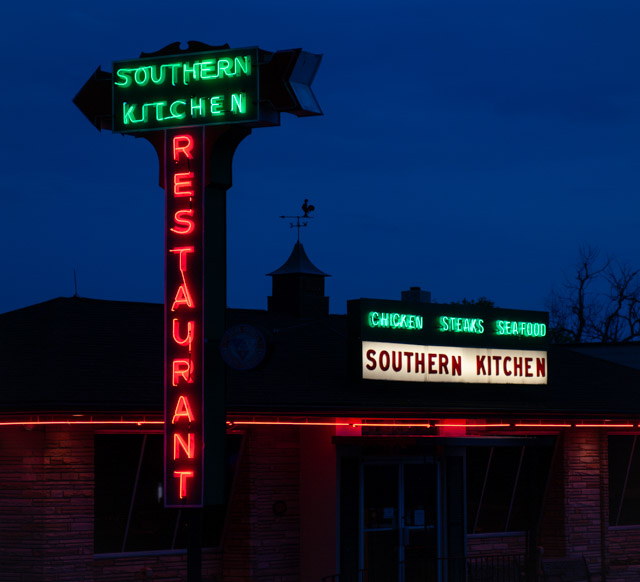
Tips for Choosing a Tripod
June 6, 2024 by Marie Joabar
 Choosing the right tripod might seem overwhelming when faced with so many options but it doesn’t have to be. Let’s look at some important features to consider when shopping for yours.
Most people I know, including myself and a few of our instructors, purchased our first tripod without knowing how important they would be to our work. Some of us chose a lower priced tripod not realizing that an inexpensive one would be too flimsy, would not be as ridged as we needed, wouldn’t support the weight of our gear, would be difficult to use, would be too short, and the list goes on.
With that in mind, if you’re going to invest in a tripod, do so once! Spend some money the first time you buy one and you’ll never need to shop for another one again. Skimp on price and know that you will be buying buying another one down the road.
MATERIALS – Aluminum or Carbon Fiber will dictate the weight and price of tripods.
- Aluminum is heavier but less expensive than carbon fiber but a heavy tripod is likely to be left at home.
- Although pricey, carbon fiber is very strong yet very lightweight. If you can afford one, it’s well worth it.
HEIGHT – When choosing a tripod, choose one that comes up to your neck when the legs are extended.
- Spare your back and avoid choosing a tripod that is too short.
- Forget about extending the center column, that is the least stable part of a tripod and should only be used if really necessary.
- When shopping, look at the specs for the height when center column is down.
 - Also consider how low to the ground a tripod can go. Shooting at ground level can offer a whole new view of the world and many subjects call for that angle. Some tripods allow you to remove the center column or extend it and move it vertically. Decide if this is a feature you need.
-Three-leg section tripods are usually more rigid and stable than a four-leg section one because of the diameter of the lowest leg section.
- The mechanism for extending the legs is a personal preference. Some people prefer clamps, others prefer the twisting locks.
MAX LOAD – This term refers to how much weight the tripod can hold. Consider your gear, especially your longer lenses. Putting heavy gear on a flimsy tripod will cause the photos to be blurry as the tripod will vibrate. A strong, sturdy tripod will be rigid and won’t have this problem.
BRANDS – There are many brands and models but check out what some of our instructors use (below). We’ll see Gitzo, Manfrotto, Benro, MeFoto, Leofoto and others.
- Gitzo (a Manfrotto brand) is top of the line and their tripods are only available in carbon fiber. They are super strong and sturdy. Their prices range from $600 to $1300 but they’ll last a lifetime and then some.
- For quality, service and support look at the Manfrotto brand (previously called Bogen). Their tripods come in many price points from $180 to $500 based on material, height and the other features that they offer.
- Benro offers a wide variety of options. Many people like their Induro line. Others enjoy their MeFoto line. If you have a DSLR look at their RoadTrip or GlobeTrotter tripods. Mirrorless cameras users, you might have more options because these cameras weigh much less than the DSLRs.
- LeoFoto is another brand worth considering.
TRAVEL TRIPOD TIPS - All brands offer travel tripods but avoid buying the shortest and most lightweight one just so you can pack it well.
- Look at the specs and get one that also works for your height and make sure the max load and the sturdiness work for your gear.
TRIPOD HEADS – The head gives you control of positioning the camera so give this careful consideration. Many professional tripods don’t come with a head giving you the flexibility to choose the right one for the type of photography you do and the weight of your gear. Just as with tripods, consider the materials and the weight as well as the max load it can hold.
Consider which of the 3 main types will suit you best;
• A three way head is ideal for Real Estate and Architecture. These allow you to move vertically, horizontally and on axis independently and with great precision. This is sometiems referred to as a pan tilt head.
 • A fluid head is great for shooting video as it moves very smoothly with no sudden stops or jerks.
• A ball head can be used for many types of photography. With just one knob to adjust the camera position, it’s quick and easy to line up the camera and shoot.
- There are other types of heads; geared, gimbal, panoramic, etc., but those are for more specific situations and might be discussed in a future article.
- Within the Manfrotto ball head line, the 494BH or 496BH are good choices assuming your camera and lenses are not too heavy. The X-Pro Ball Heads will hold more weight.
 - A little pricier, Acratech and Really Right Stuff are two other brands that offer quality heads and are definitely worth a look.
- Most of the MeFoto tripods come with a tripod head
- When you buy the head, most come with a quick release plate (the part that attaches to the bottom of your camera and locks on to the head).
- Consider getting an L bracket (for your specific camera). These give you ease of use for flipping from a horizontal shot to a vertical one.
MISCELLANEOUS TIPS
 - If your lens offers Vibration Reduction or Image Stabilization, turn it off when on a tripod. A floating element in the lens (which corrects for movement when handholding) may cause blurry photos if used on a tripod.
- Always use a cable release, a remote trigger or even the camera’s self-timer when using a tripod as just pressing the shutter release button can cause the camera to move or the tripod to vibrate.
SHOPPING FOR A TRIPOD – Once you have a few options in mind, it’s time to visit your local camera store.
- As instructors, we often see people at our classes struggle and fight with their tripod. It’s sad to see their frustration and it’s no wonder they don’t want to use it.
- Do yourself a favor and go to a camera store where you can see a variety to choose from and can actually handle them to get a feel for them before you purchase.
(Find a store near you, see our RESOURCES tab: Photography Stores and services)
 Using a tripod opens a whole new world of shooting possibilities and is one of the most useful accessories to add to your gear… choosing the right one is important and a good one will last you years if not a lifetime.
PRODUCT RESOURCES
www.manfrotto.us/photo-tripods
www.manfrotto.us/photo-heads-classic
www.acratech.net
www.reallyrightstuff.com/
Leophoto.com
Benrousa.com/Mefoto-tripods
Benrousa.com/Tripods/Induro
WHAT SOME OF OUR CPC INSTRUCTORS USE
Aaron Clamage
Bogen 3051. A super sturdy (but older) model. It is big and heavy (the only downside). But, the really nice thing is that all the legs are quick release. There are latches at the collar that fit your hands perfectly and in seconds you can raise or lower it without bending down and loosening or tightening any latches/knobs. It has a built-in level which is also nice. Its max height is 63 inches, which is not as high as some other tripods, but that’s trade off I’m willing to make. It’s plenty of height for photographing people. I use a “Really Right Stuff” ball head with it, which is also great.
Aaron is a professional corporate portrait and event photographer.
Beth Haubach
I have the MEFoto C2350 Carbon Fiber tripod.
I LOVE it! It is lightweight at about 3.1 pounds, folds to 16” long, converts to a monopod, and if necessary (and yes, I have done this), you can mount the camera BELOW the tripod on the center post if you need to get really low to the ground! It has a nice ball head and quick release plate. Additionally, when folded and stored in its case it is easily packed into your carry-on luggage (I’ve taken it to England twice). Lastly, I found the price pretty reasonable for a carbon fiber tripod that works great and fits the bill without breaking the bank. Unfortunately, the model I own is no longer available (as best I can tell) because it’s been updated to the ME Foto Globetrotter C2350Q2 which comes in several cool colors, other than black.
Beth enjoys many types of photography, nature, cityscapes, flower, macro, vintage and more.
Corey Hilz
Tripod legs: Gitzo GT2542T
Tripod head: Really Right Stuff BH-40 I like this setup because it’s lightweight, durable, and folds down compactly which is great for travel.
Corey enjoys nature, landscape and macro photography.
Judy Graham
As a landscape photographer, a tripod is an essential piece of gear. I have owned my share of tripods, but it wasn't until December 2023 when I finally found just the right one. They have either been too big, too tall, too heavy, too difficult or quirky to operate, or all the above. I made earlier purchases based on recommendations.
This time I went to an actual camera store (District Camera) with my ball head. Like Goldie Locks I tried on several. It was the very last one the store had in stock for me to try when I found my perfect tripod! It's a Benro BICLT204 carbon fiber tripod. (This has been replaced by the replaced it. Mach3 9X CF Series 3 Tripod, 3 Section, Twist Lock)
Why is it perfect, it's very quick and easy to operate in different positions, it's the perfect size for me at 63.5 inches (I'm 5'5"), it's sturdy, but not overly heavy at 4.08 lbs, and when folded it easily fits in my suitcase. And it can handle my abuse. It's done very well so far! I highly recommend this tripod to someone of my size. At $385 it's not too pricey.
Kim Kelly
I use a Leofoto LS-325C (carbon fiber) tripod with an LH-40 Ball Head and uses the Arca Swiss type plate for connecting the camera to the tripod. This tripod does not have a center column, though one can be added. I find it very useful with flower and nature photography because you can get extremely low to the ground. A tripod with a center column will only allow you to go down so far. In addition, this tripod has screw tight legs as opposed to clamps. This is my 4th tripod and I really like it.
Kim enjoys many types of photography; seascapes, landscapes, nature, floral, and more.
Marie Joabar
I love my tripod and have had it for 16 or 17 years. It the Gitzo 2542 with a Really Right Stuff ball head, BH50.
It’s so lightweight, it's easy to use and it's super sturdy. When traveling internationally (without heavy lenses), I’ll use my MeFoto Globetrotter Pro Carbon Fiber Travel Tripod with the Really Right Stuff BH40 ball head.
Marie enjoys landscape, cityscape and night photography.
Michael Koren
For cellphone photography I always carry a Joby GorillaPod with clamp adapter. The flexible legs allow me to wrap the tripod around a fence or tree branch. The GorillaPod is also great for smaller micro 4/3 cameras.
Michael is a talented street photographer and also enjoys iPhone photography.
Rick Frankle
I have a Benro MeFOTO RoadTrip Pro Carbon Fiber Series 1 Travel Tripod. I chose it because it provided stability at a really light weight, only 3 pounds which is great for travel.
Rick enjoys travel photography.
Tammy Loverdos
My tripod is the Benro Mammoth TMTH43C Carbon Fiber Tripod.
I like the height it can reach, the sturdy center column for easy height adjustments and the strength of its legs. Bolts are easy to tighten, legs are quick to adjust. I use a square, geared head for architecture.
Tammy is a professional Real Estate photographer.

Tips for Stunning Flower and Garden Images
May 16, 2024 by Marie Joabar
It’s flower and garden season and we’ll find an abundance of colorful flowers and lovely gardens just waiting to be photographed. This is a great way to slow your pace and get totally absorbed capturing quiet garden scenes or delicate flower details.
Whether you're a seasoned photographer or a beginner, these tips will help you take your flower and garden shots to the next level.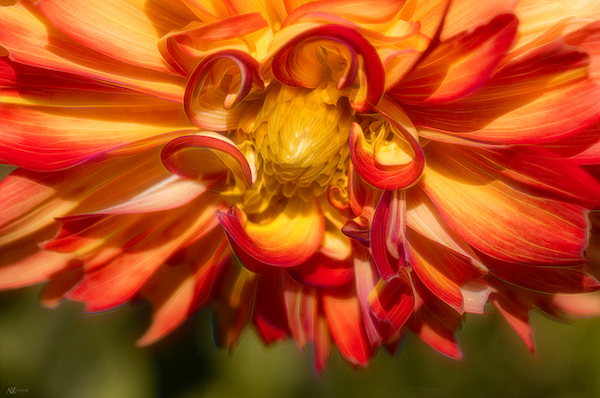
LIGHTING is important in any photography but especially in flower photography.
- Direct sun is usually undesirable as it creates harsh contrast, overexposed bright areas and dark shadows. A cloudy day is ideal because the light is evenly diffused.
- If you have no choice but to shoot in sunny conditions, consider using a diffuser. Made of milky white translucent fabric, it acts as a cloud, softly spreading out the light.
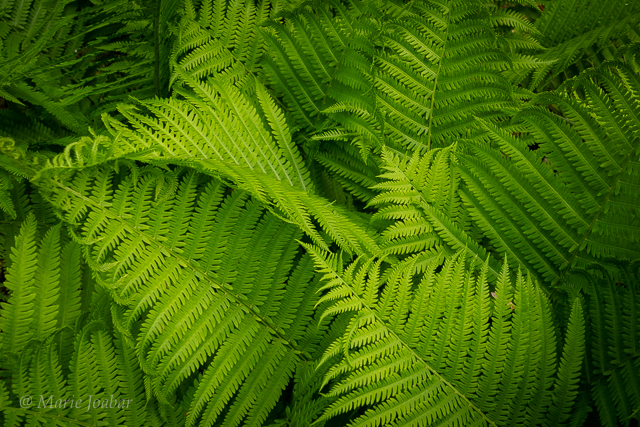 - On the other hand, flowers in a shady spot may benefit from a little light bounced in with a reflector. These can be purchased from a camera store but can also be as simple as tinfoil over cardboard or in a pinch, a white piece of paper tilted toward the flower reflecting light onto it.
TIME OF DAY is important and mornings are usually best.
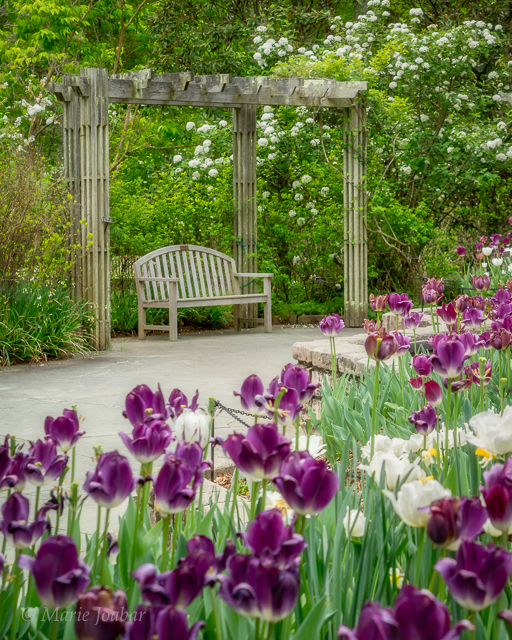 - In the early morning the flowers are fresher, we often find dew on the petals, and as a bonus, most bugs are either too cold or have a bit of dew on them so they can't fly away.
- The Mid-day light is often too harsh, creating strong shadows and blown highlights.
FRAMING your flower or garden scenes can make your images more unique.
- Shoot straight down from above.
- Get low to the groud and shoot across.
- Use flowers to frame a pretty scrtreet scene on your travels.
- Fill the entire frame with a grouping of flowers.
COLOR There are no limits to what you can do with color in flower photography.
- Mix bold complimentary colors or compose with a single color.
- Consider black and white.
- Experiment with different white balance settings to tweak the colors if desired.
- Experiment, try new things, and use your own creative vision to compose with color.
BACKGROUNDS can make or break a great flower/garden photo.
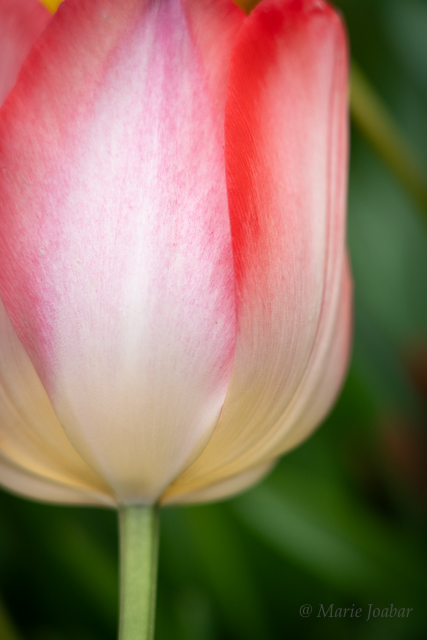 - Too much detail behind your flower can be distracting. To avoid this, use a wide aperture such as f2.8, f4, f5.6 and either get close or zoom in tight for a blurred out, dreamy background.
- A wide aperture also allows more light, which can help with faster shutter speeds to freeze any motion from winds.
- With garden scenes, you may want more depth of field (sharpness throughout the scene) so try using f8, f11 or f16.
- The closer you are to the first subject and the greater the distance behind it, the more you’ll need to close the aperture to render it all sharp. Try f11 or 16 instead of f8.
- Composing a garden shot can make a lovely photo but don't forget to also move in and get close.
CLOSE UP flower photography allows you to see and capture all the tiny details.
- To truly capture a flower's intricacies, macro gear is essential. A macro lens allows for tack-sharp focus on the smallest details.
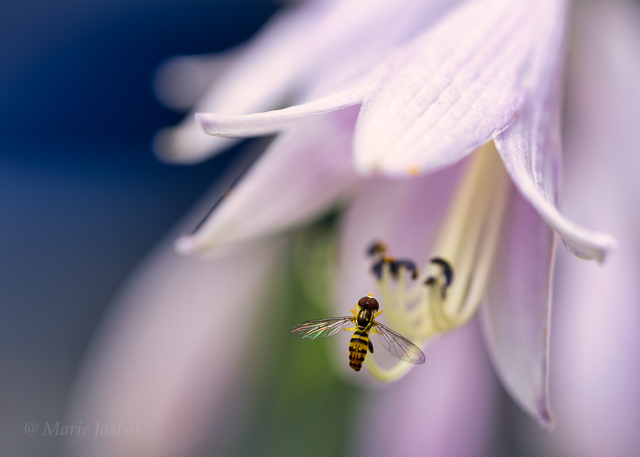 - The focal lengths of macro lenses vary, usually between 50mm to 200mm. The difference represents how physically close you can be from your subject and still maintain a 1:1 reproduction ratio. The larger the mm number, the further away you can be. If you're photographing flowers, 60mm, 90mm or 105mm may work fine, but if you need more distance, say for butterflies that will fly away if you get too close, a 180mm or 200mm macro lens would be better.
- Another options for shooting close-ups is using extension tubes or close-up filters. These also allow you to focus closer.
- With any type of macro shooting, using a tripod can help to capture a sharp, in-focus subject.
- For more information on Macro photography check out our Blog article, Move In Close With Macro Photography.
Have intention and consider what type of images you want to create, then get out in a garden and work on capturing them.
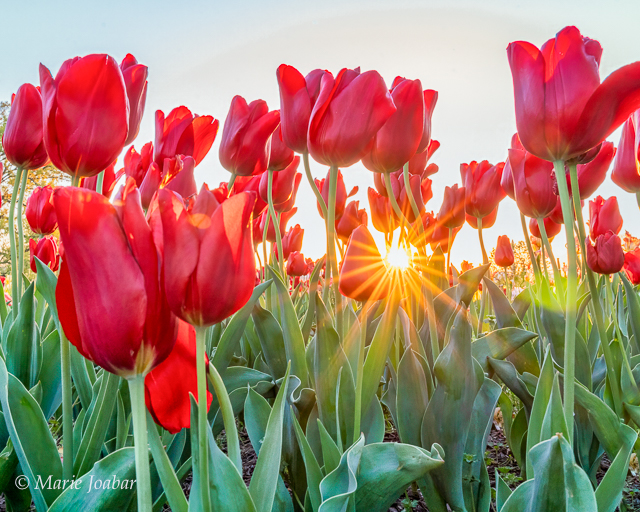 With the right lighting, timing, and camera settings, you'll be able to produce breathtaking flower and garden portraits that highlight nature's incredible beauty and craftsmanship.
The season is underway so get outside and get shooting - the blooms won't last forever!
Orange dalia photo by Beth Haubach.
Creative Abstract Photography
April 25, 2024 by Beth Haubach
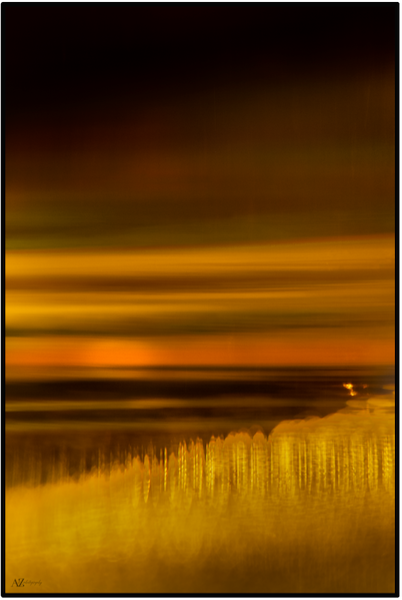 Abstract art, including abstract photography, has always flummoxed me! While I can appreciate the beautiful artwork or images I’m viewing, I confess that I don’t necessarily “understand” them.
However, I do enjoy making them and truly, it’s the creative process of capturing an abstract image and then finding ways to creatively edit it that challenges me to get outside of my comfort zone as a photographer.
As possibly the most “artistic form of expression,” abstract photography can transport viewers to places in their minds far from the ordinary day-to-day life.
I recently came across a description that I find most accurately defines it: “Abstract images are conceived or imagined outside of ‘reality’. They can encompass a huge variety of subject matter, take us out of our comfort zone, make us question what we see, or invite us to enter another realm.” **
Abstract photography crosses all genres regardless of your favorite subject matter or style. Learning how to apply the techniques for abstract images can benefit any photographer allowing them to move beyond the conventional image to one that springs from the imagination and expresses a truly unique vision and a one-of-a-kind photo.
Challenge Yourself
- Take an everyday object, photograph it in a new way and create an image that showcases it beautifully. This is a great way to jump-start your creativity and you don’t even need to leave your house.
- Hone your eye to find ordinary objects to transpose to creative artwork. What matters most is your desire to create and capture your photographic vision.
- You can use any lens in your bag. You can use your tripod or hand hold your camera.
- Photograph a subject from different perspectives. This can be accomplished by focusing on a tiny portion of a subject; shooting low, “worm’s eye view”, shooting from above “bird’s eye view”, using an extremely wide-angle lens to exaggerate the sense of perspective or using a telephoto lens to get in tight.
I enjoy the challenges of both the technical and creative aspects in forcing me to think outside the box, to troubleshoot the photographic process and shift gears on the fly as new ideas present themselves. Each time I take abstract photos I learn something new either about the camera, the limitations of a lens, that a different white balance resulted in a better image, and on and on.
I’ve also discovered something new about myself through my work capturing abstracts; I’ve found that I've become more determined to figure out a tricky “thing” on my camera or a set-up that has been baffling me. And I’ve learned how to look at the scene before me with “fresh” eyes, and how to be less of a control freak and let my imagination run the show!
The Rules of Composition
These are as important, if not more so, when creating abstract images and you’ll find creating abstracts is a great way to improve your compositional skills. 
- Balance and proportion are important because abstract images often contain minimal subject matter.
- Consider the order, placement and balance between shapes, patterns, textures, and lines within an abstract image, as these factors affect the visual weight of a photo.
- Be aware of color – some colors are more weighted than others. This can work in your favor by drawing the eye where you want or can work against you by drawing the eye where you don’t. Use color to emphasize various elements of your image.
- Whether abstract images are graphic and boldly colored or more subdued, they can be powerful! They can trigger an emotional response and stimulate the imagination.
- Even if the subject matter is unrecognizable, the photographer’s goal is for the viewer to appreciate the shapes, forms, and colors in the image; thus, creating a sense of wonder for the viewer.
Experiment With Photo Techniques
- Creatively use depth of field to guide the viewer’s eye to a specific point within the image.
- Use shutter speeds to add creative effects to your abstract images. Slow shutter speeds lend themselves especially well to this type of photography.
- Lighting is a major element in any type of photography and when creating abstract images, side-lighting, backlighting, silhouettes, and shadows add to the mystery and intrigue.
- While a lot of creativity may be expressed in post-processing, don’t limit your creativity to editing and software. Although programs like Photoshop, Topaz and others are wonderful for this, first learn about your camera and spend time with it.
My Favorite Abstract Techniques
- Capturing the play of light passing through, or the reflections created by, water in colored glass or colored water in clear glass containers.
- I particularly enjoy mixing oil and water and photographing it above a colorful background. I can be lost for hours capturing the other-worldly images this setup generates.
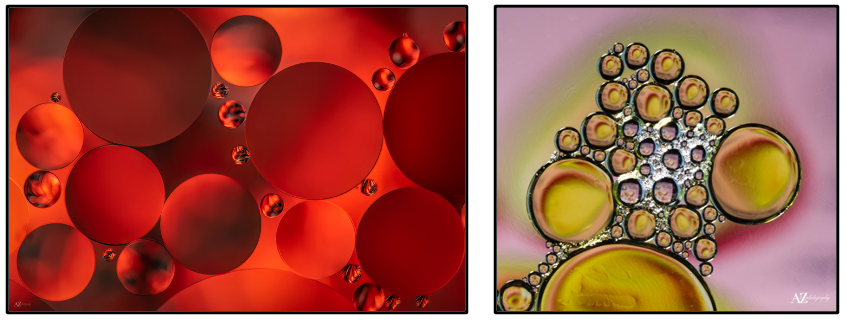
- After the fun of taking oil and water photos, the same setup is perfect to roll into capturing refractions. This technique is a bit challenging, but once mastered this a great way to produce unique, fun images.
- Using water drop photography to capture refractions is one of my favorite ways to make creative abstract images. I was determined to figure out this technique and it was not as straightforward as I had thought but once I did – WOW!
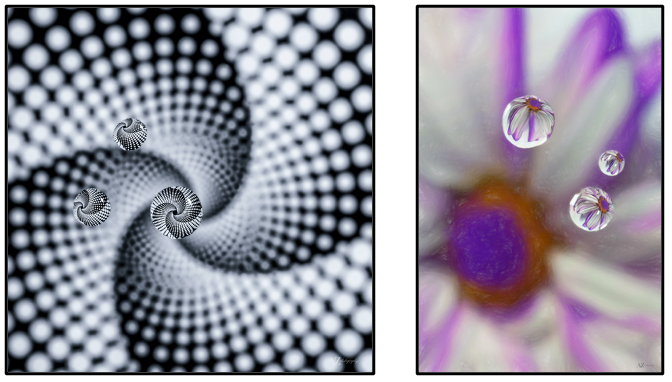
- Reflections are another way to make easy, creative abstracts. Reflective surfaces such as glass, mirrors, metal, and water are everywhere – you just need to keep your eyes peeled to see the potential that is all around you.
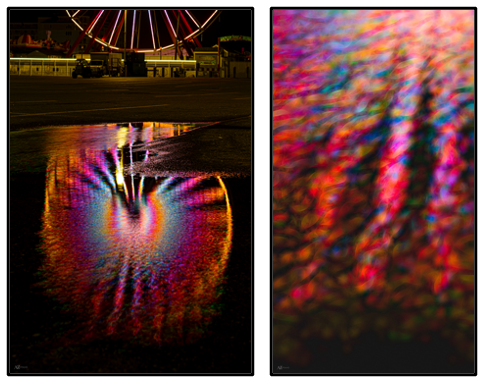
Lastly, abstract photography is FUN! So many times when I set out to capture an abstract image, I never really know what the result will be. I have an idea and I certainly have a vision, but when imagination meets the reality of capturing the shot, I’m often surprised by the result, and that’s what's fun about it!
The bottom line is abstract photography gives you the freedom to grow and express your creativity without any preconceived expectations. You have an endless supply of subject matter as the everything around you can potentially be transformed into abstract art.
When you train yourself to see abstractions in your daily life, you’ll expand the way you see the world and have an additional means to express yourself through abstract photography!
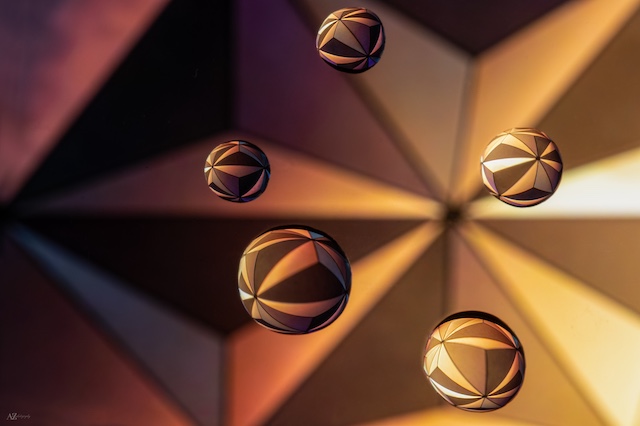
Join Beth for our new hands-on class on June 8, In the Abstract – Creating Abstract Images! Express your creativity through practice and play with various setups and techniques.
** Definition from: https://abstractedreality.com/definition-of-abstract-photography/
Tips for Solar Eclipse Photography
April 4, 2024 by Marie Joabar
 The excitement builds toward Monday afternoon as we anticipate the solar eclipse. While many people are traveling to what is called, “the path of totality,” many are staying in the DC area to enjoy it here.
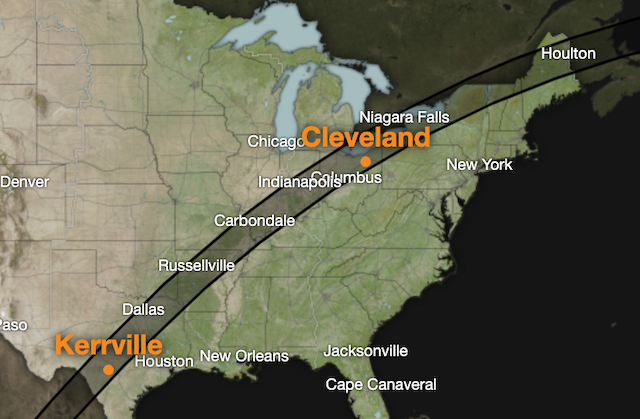 With a Total Solar Eclipse, the moon completely covers the sun for a few minutes. This can be seen if you are in the 115 mile wide “path of totality” and for the April eclipse, the closest areas are NW Pennsylvania or central Ohio (see map to the right). The trip is worth it as there won’t be another one in the US for another 20 years!
However, if you choose to stay in the DC area, it will be viewed outside the path of totality so it will appear only as partial solar eclipse. We will only see about 87% coverage but it can still be fun to photograph.
Timeline In DC: The eclipse will begin just after 2:00pm. The sun will be most covered by the moon at 3:20 and the eclipse will around 4:30.
Regardless of where you plan to be, here are some tips for photographing it and we can’t wait to seeing what everybody captures.
VIEW AND PHOTOGRAPH THE ECLIPSE SAFELY
-
Do NOT look at the sun without proper eye protection! Irreparable damage or even blindness may occur.
-
You MUST wear approved eclipse glasses. (CE and ISO certified) Even if the sun is partially eclipsed, you need protection.
-
The only time it’s safe to look without eye protection is the brief period during totality in a Total Solar Eclipse. In the DC area, we won't see ‘totality’ so we must wear eye protection at all times.
-
Do NOT point your camera or smartphone at the sun without a proper *SOLAR filter (see below). Use solar filters on your camera and your smartphone.
-
Do NOT use your camera's viewfinder, use the LCD screen instead.
SMARTPHONE TIPS
-
Turn your flash OFF. It won’t help your photos and it will detract from the experience of people around you.
-
Use a solar filter, or use a spare pair of the disposable eclipse glasses and hold them or tape them over your lens.
-
Resist pinch-zooming! It will result in grainy and low-quality images. If your phone is equipped with an actual telephoto lens (like the latest pro iPhones) use that or purchase an add-on lens.
-
Embrace the wide angle! Phone cameras offer great wide angle views. Take advantage of this and capture your environment and the people around you. Do some storytelling photos!
-
Learn how to focus your phone camera. Tapping on the screen focuses for a brief moment but to lock focus, do a long press and you can adjust from there.
-
Use Burst Mode on your phone to capture the eclipse as it happens very quickly!!
-
Use a tripod and a remote release for the sharpest photos. Any Bluetooth enabled remote trigger will work. If you have an Apple Watch, it can trigger your phone camera!
-
Shoot in Raw format. An iPhone 12 Pro and above with iOS 15 gives you the ability to shoot Raw. Androids, check if your phone cameras offer Raw. Turn on pro-raw in your Settings and tap the RAW button on your screen! (RAW files are large! Make sure your phone has enough storage space!).
-
Try taking some Video of the eclipse or the people shooting it.
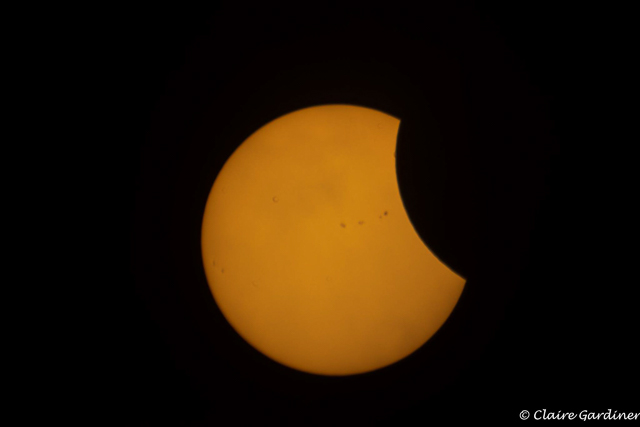
DSLR or MIRRORLESS CAMERA TIPS
-
You MUST have a *SOLAR filter (see below).
-
If you are going to be in an area that gives the Total Eclipse, during Totality you can remove your filter but you MUST put it back on immediately after totality.
-
In DC we will not have totality so we must use the filter (and our glasses) the entire time.
-
Try using a telephoto zoom lens 400-800mm for a tight shot of the sun and eclipse. A 200-300, 200-400mm will also work if it's all you have.
-
Carry a wider focal length lens, like 24-70mm, for your ‘scene’ and storytelling shots.
-
Use a sturdy tripod for tack sharp images. Turn image stabilization/vibration reduction OFF. If you choose to hand hold, you’ll need a high ISO to support a fast shutter speed.
-
If handholding, your shutter speed should be no less than the reciprocal of your lens for sharpest images. For example, if you are handholding a 400mm lens, your slowest shutter speed should be 1/400. Turn image stabilization/vibration reduction ON.
-
Shoot in Raw format for the largest files with the most data. You should be using Lightroom (or similar program) to process them. If you’re not using LR then shoot JPEGs.
-
Focus on the edge of sun (with your filter on). After you have focused, it might be helpful to then turn off Auto Focus.
-
For the tighter shots of the eclipse use spot metering and meter off the sun. You must have your Solar filter on for this. Don’t try to meter or focus off the sun without your filter.
-
Take several test images to fine tune your exposure. Don’t over expose your images. As the moon covers the sun, you’ll need to increase your exposure (add some light).
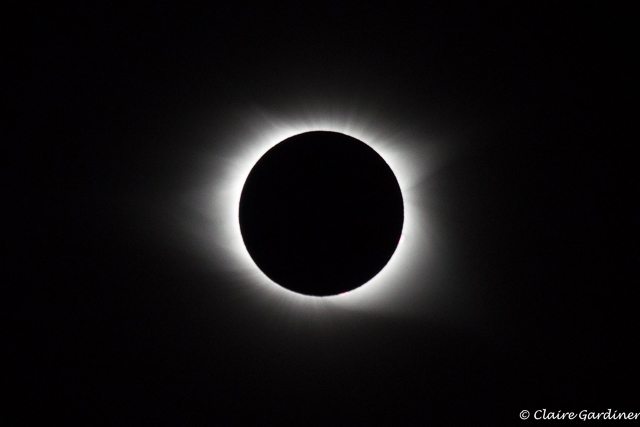
Exposure Settings – Test your settings and adjust accordingly.
Everyone’s camera, lens, filter set-up will vary so these are just a suggestion of where to start.
In Manual Mode on a tripod;
ISO 200-400
Use your sharpest aperture on your lens (typically f8) you could try f5.6 as well.
Shutter of about 1/100-1/400
In Aperture Mode on a tripod
ISO 200-400
Use your sharpest aperture on your lens (typically f8) you could try f5.6 as well.
Check your shutter speed and adjust the ISO until you get it in the range of about 1/100-1/400.
Check your exposure, you may need compensation to adjust the final “brightness” of your shot.
-
In either mode, you may want to bracket your exposures, you could try a 7 or 9 stop bracket. (See blog article about Bracketing)
-
Make sure to practice before the eclipse. Get familiar with the settings and how to change them quickly. Totality lasts only a few minutes! Practice and be ready.

-
The MONEY Shots – These can only be captured just before and just after totality, during a total eclipse, not during a partial eclipse (which is what we will have in DC).
- Bailey’s Beads: The sun’s light shines through the Craters on the moon’s surface and you’ll see little spots of sunlight around the moon,
- Diamond Ring: Just before totality, there will be a complete ring around one side, with one bright spot on the other side and it looks like a diamond ring.
EXPERIENCE THE SPECTACLE
 While Totality is the big event, don’t forget to capture some of the scenes around you including the people!
Also, capture the light and shadows from the eclipse. Look for shadows on the ground created by tree branches/leaves. Look for little ‘mini eclipse’ light patterns on the walkways.
Lastly, don’t forget to step away from your camera and look up at the sun during totality! Seeing the fully eclipsed sun is an AMAZING sight! States Claire, “I can honestly say, viewing the 2017 SOLAR eclipse was the single most impactful experience of my life. I got emotional telling people about it…it was just so surreal! I’m praying for clear skies for us all on Monday afternoon.”
** SOLAR Filters: They block nearly all sunlight so you can safely observe solar phenomena such as sunspots, solar eclipses, and planetary transits. They are made from specialized materials that effectively block harmful ultraviolet (UV) and infrared (IR) radiation while allowing a tiny amount (0.00001%) of visible light to pass through.
- Try to find a SOLAR filter, ND100000. At the very least a SOLAR filter with at least 16 stops or more.
- Solar filters are not the same as Neutral Density filters as NDs don’t block enough light for solar viewing.
Future Total Eclipses:
August 12 2026: Greenland, Iceland, Spain
August 2, 2027: North Africa and the Middle East
July 22, 2028: Australia and New Zealand
All Eclipse Photos: © Claire Gardiner
Special thanks to Claire for all her tips and wisdom about shooting eclipses!
See CPC Founder Marie Joabar and Instructor Claire Gardener as they were interviewed about the Eclipse live on Fox News 4/3/24. (Wait for the ads to pass.)
WE'LL BE DOING AN INFORMAL CPC MEETUP ON THE NATIONAL MALL TO HANG OUT AND PHOTOGRAPH THE ECLIPSE ON MONDAY AT 12:30-4:30PM. Hope you'll join us!
- Meet at this GPS, the base of the Washington Monument (the side closest to 15th street and slightly toward Constitution Ave.) https://maps.app.goo.gl/RuUEehWnbVEhbocp8?g_st=ic
- It might be helpful to read this article and any other tips you find about shooting the eclipse before you head out.
- The Smithsonian stop will be the closest Metro stop serving Blue, Orange and Silver. It will be about a 10 min walk to where we will set up. I’ll try to get there around 12:30 to save a spot. Please consider getting there around that time too.
- Pack snacks and water and pray the restrooms are open or there are port-pots nearby.
- This is an informal meeteup it is not a class. Although we are happy to give tips and such, we will be shooting too.
Safeguarding Your Photos With A Backup Plan
March 6, 2024 by Marie Joabar
We've all heard it before - "it's not IF your hard drives will fail but WHEN." Yet, even in 2024, many people are still caught off guard when their precious photo collections are lost due to a failed drive or other disaster. The reality is that data loss can strike anyone at any time, robbing you of years of image files and irreplaceable memories.
From device failures and malware attacks to natural disasters and human error, losing our photo collection can happen in an instant without warning. Don't wait until it's too late, put a backup plan in place now to safeguard your files.
COMMON DATA LOSS SCENARIOS
• Device Failure: Hard drives (internal and external) and even solid-state drives (SSDs) can and do fail, potentially wiping out your entire photo collection.
• Malware and Cyber Attacks: Viruses, ransomware, and other malicious software can corrupt or encrypt your data, holding it hostage or destroying it completely.
• Natural Disasters: Fires, floods, and other calamities can devastate your physical storage devices, making off-site backups essential.
• Theft: Losing a device to theft can mean losing all your data unless you have secure backups in place.
• Human Error: Accidental deletions, formatting, or file corruption can happen to anyone, no matter how careful we are.
BUILDING A BULLETPROOF BACKUP PLAN
 • Get Organized: A well-structured photo library makes backups easier and more reliable. Create a dedicated folder for all of your images.
• Follow the 3-2-1 Backup Rule: Keep at least three copies of your data, on two different storage media, with one copy off-site for ultimate protection. A secure off-site backup location could be a cloud storage service, on a device stored at your work office, a friend's house or a bank safe deposit box.
• Estimate Your Storage Needs: Determine the current size of your photo collection and plan for future growth. As a rule of thumb, each backup device should have twice the capacity of your current archive.
• Automate with Backup Software: Solutions like EaseUS Todo Backup (Windows) and Carbon Copy Cloner (Mac) can simplify and automate backup tasks, ensuring your data is always up-to-date. Trying to back up your files manually is bound to fall short in protecting ALL of your fileES.
• For computer hard drives backups: Look at Apple’s Time Machine and Microsoft’s Backup and Restore as great solutions for all the data on your computer's drive. These run in the background automatically so you never have to remember to run them. Use a dedicated disk as the backup location.
• More robust cloud-based backup services: Companies like CrashPlan, BackBlaze, or Carbonite offer paid plans to backup (the files you specify) to their servers automatically.
• Schedule Regular Backups: Set your backup software to run automatically based on how frequently you add new photos or make changes.
• Test Your Backups: Regularly verify that your backups are intact and restorable to catch any issues before it's too late.
BACKUP STORAGE OPTIONS
 • External Hard Drives: Still a reliable and cost-effective choice, with capacities up to 18TB from brands like Western Digital, Seagate, LaCie and G-Drive.
• Solid-State Drives (SSDs): Faster and more durable than traditional external hard drives, but still more expensive per gigabyte.
• Network-Attached Storage (NAS): Devices like Synology's DiskStation series provide centralized backups accessible from anywhere.
• RAID Arrays: Redundant drive setups offer enhanced data protection but at a higher cost.
CLOUD BACKUP SOLUTIONS
• Built-In Options: Services like iCloud Photos, Google Photos, and Microsoft OneDrive offer automatic photo backups from your devices.
• Dedicated Backup Services: Providers like Backblaze, Carbonite, and IDrive specialize in secure, off-site backups for all your data.
Lately, I’m hearing from a lot of people how they’ve lost their entire body of photos or a significant part of their collection. It can be heartbreaking to lose all your work; not only the photos but all of the work you did with them. If you don’t already have a solid backup plan in place, we hope you can get started now.
Our 10 Favorite Places to Photograph in DC in the Winter
February 15, 2024 by Marie Joabar
Winter is still a great time to get out and photograph, we just have to give more thought about where to go.
Below you’ll find Marie Joabar’s and Geoff Livingston’s favorite places to shoot in DC in the winter. Add a few of your own ideas to the mix and there’ll be no excuse for not getting out there with your camera.
 If shooting outdoors we’ll just need to train our eye to find beauty in sparse scenes. In wide landscapes, look for shapes, patterns and structure. Getting closer, we can find tighter intimate shots too. If indoors is more your style, we’ve got some great spots for that too.
Marie’s Faves
1. The National Arboretum
In the winter, sunrise is so late you can catch it coming thru the columns when the park is open. In Feb, capture the amazing golden light just after sunrise and before sunset.
2. Our Local Ice Skating Rinks
Use a slow shutter to purposely blur your skaters but get some stop action shots too. These also offer great opportunities for candid shot of people watching the skaters. Check out the rink in the center of the National Gallery of Art Sculpture Garden and the Georgetown rink at Washington Harbor.
3. Constitution Gardens
For wildlife lovers, in January and February the pond offers the opportunity to photograph ducks and various other waterfowl. Also a good spot to find some pretty winter landscape scenes.
4. Great Falls on Maryland Side
Both sides are great to shoot in the winter but I like the Maryland side as it offers the Old Tavern, the towpath and C & O Canal as well. Find beautiful views of the Potomac from the overlooks and some smaller falls on the way to and from the overlooks. You might also find some intimate scenes along the canal and if you lwalk along the towpath.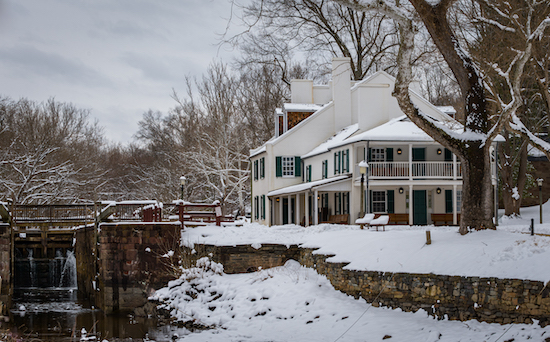
5. Washington National Cathedral
In winter find the low angle sunlight coming thru the stained-glass windows and dancing along the floor. It looks like a kaleidoscope! Head to the upper level and find really fun light and shadows as well as repeating arches and columns.
Geoff's Faves
6. Union Station
The iconic pillars and arches outside can make stunning black and white shots. The main hall with people rushing by. Look up and find statues framed in alcoves. On the inner section of the station, creatively frame the staircases, bridges and ceiling. 
7. National Building Museum
So much great light in this building. Architecturally it’s fun to pick apart, find amazing arches and repeating pillars throughout, as well as fun angles, lines and patterns. Don’t miss the iconic shot of the main hall taken from the second level. 
8. National Gallery of Art East Bldg
Creatively capture the light tunnel by artist Leo Villareal on the lower level, the iconic criss cross staircase, the ceiling and wall art throughout the museum, and don't miss the diamon spiral staicase tucked in a corner. 
9. The Philips Collection
Have fun shooting the beautiful spiral staircase, the traditional wooden stairwell, and of course all the beautiful hallways and art make for great framing for street photographers. With the framed art work, try to isolate pieces of it instead of the whole painting.
10. Alexandria Waterfront
Sunrise and sunset along the river with the Wilson Bridge make stunning compositions. Wander the harbor area, the quaint shops and historic streets. From Jones Point Park at the base of the Wilson Bridge to the Wilkes street tunnel, there is no shortage of photo ops. (OK so it's slightly outside of DC but who’s checking)
Don’t let the cold keep you from your photography! Hoping you might enjoy some of our favorites or find some of your own.
Advancing Your Photography - A 2024 Vision
January 4, 2024 by Marie Joabar
Our photography practice is a continuing journey, building on what we know and adding new skills to our craft. What endeavors did you try out in 2023 that you decided just weren’t worth continuing with in 2024? Were there some that you decided to move up on the list?
Let go of habits that no longer motivate you or advance your skills. It might be hard to break from a comfortable routine but it can free you to explore new areas of photography.
Adopt practices that you’ve toyed around with, look to photographers in various genres that can inspire you to get out of your comfort zone.
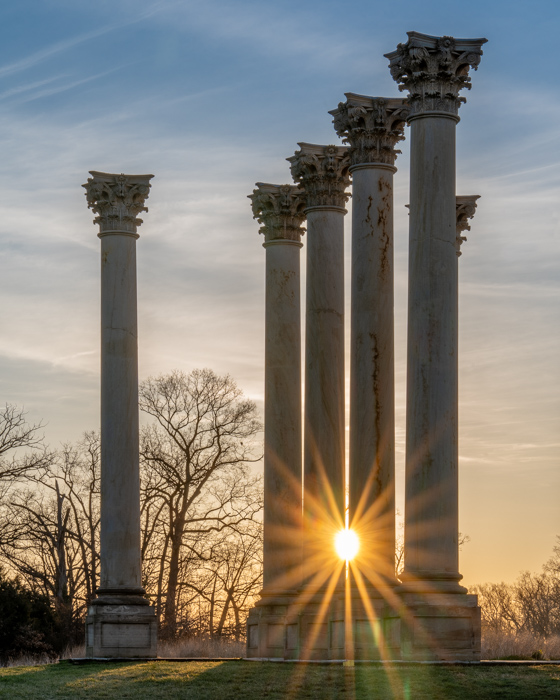 Reward yourself for the goals you’ve met and the milestones you’ve reached. Reflect on the work you put in to achieve those and chart a course to continue expanding in those areas or with the techniques you most enjoyed.
Don’t discount the mistakes or struggles, try to understand the reasons why they didn’t work well or were difficult to deal with. List the most useful set of lessons learned from the past year and move forward with wisdom for improvement.
Evaluate your technical and artistic development and define areas to continue expanding your skills.
Set new photography-related goals considering;
- Where do you want to improve?
- What projects can you list to inspire you in the year ahead?
- Do you need to expand your creative vision and ‘see’ stronger images?
- Do your software skills need improving to take your imagery to the next level?
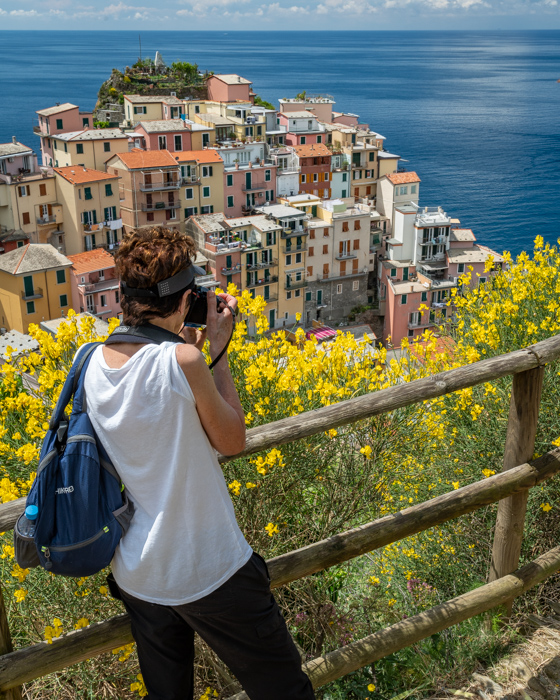 - Will new gear will solve a problem you’re currently faced with?
Be thankful for all who contributed to your own photography journey and pay it forward where you can. Consider the connections made and people impacted by your photography. Were you privileged to freeze powerful memories into photos for others? Celebrate that!
The new year represents a fresh start! At this time of renewal, release what no longer serves you and focus on setting exciting (but achievable) goals for the year ahead.
Where The Stores Are - Shopping Locally For Your Shutterbug
December 14, 2023 by Marie Joabar
It's prime holiday shopping season and whether you’re buying a gift for a loved one or for yourself, visiting your local camera store can be a huge help.
Get advice from those in the know and be assured they’ll support you long after the sale. They’ll even help the person you gifted when the holidays are over.
So if you’re thinking of getting your partner a new digital camera but not sure which to choose or you’re looking for a tripod for your son but are overwhelmed with the options or simply need a few stocking stuffers, let the folks at your local camera store help.
Already know what you want and don’t want to leave the house? No problem! Most of these stores offer online shopping and offer free shipping. So this Holiday Season, keep it local and support your nearby camera stores. Find one near you listed below.
District Camera
Full service camera stores family owned since 1978.
Website: https://www.districtcamera.com/
Phone: (703) 250-5555
Hours: Mon-Thurs 10am-7pm Fri/Sat 10am-6pm Open Sundays 12-4pm from Black Friday thru Christmas
Phone: (703) 250-5555 ext. 2
Hours: Mon-Fri 11am-7pm Saturday 10am-5pm Closed on Sunday
DC Location: 1225 I St NW, Washington, DC 20005
Phone: (202) 483-0090
Hours: Mon-Fri 9:30am-6pm Saturdays 10am-5pm Closed on Sunday
What They Offer
Both stores carry every major photographic line (Nikon, Canon, Sony, Fuji, Pentax and more). Their knowledgeable staff are very customer service oriented taking time and care to meet your needs in a friendly and professional environment.
- Take advantage of the many onsite services they offer. Visit them for repairs and rentals, as well as online digital printing, custom printing, canvas, and metal printing.
- Want to sell your old camera and lenses? They buy used equipment and offer a great selection to purchase.
- Their goal is to offer the best possible service with the best possible prices so shop local! Shop with confidence as they have a 100% price guarantee with most of the online shops.
Service Photo
Location: 3838 Falls Road, Baltimore, MD 21211
Phone: (410) 235-6200 (800) 344-3776 toll free orders
Hours: Mon-Fri 9am-5pm Sat 10am-3pm Sun Closed
Website: https://servicephoto.com/
What They Offer
Up in Baltimore, Service Photo offers new and used gear, Fuji, Nikon, & Canon and a little bit of Leica, and their inventory is HUGE with more in stock now than any time in their history! Their staff is very friendly and extremely knowledgeable.
They buy used gear and they pay top dollar for great stuff - especially when it is traded toward new gear. They offer high quality accessories, like Think Tank, Black Rapid and many others.
Service Photo is a destination and many photographers travel long distances to see them. Their goal is to make high quality items available to photographers everywhere. Although they have a large following, they enjoy meeting new customers, showing them who they are, what they do, and why they should consider Service Photo in the future.
Don't want to leave the house? Order online and enjoy free shipping on most camera and accessory orders.
A few more stores to shop local are listed below, all offer a wide selection of cameras, lenses and a full lineup of accessories not to mention services such as repair and image printing.
Ace Photo
In Ashburn. https://acephoto.net/
McClanahans
In Warrenton. https://mccamera.com/
ProPhoto
In DC on Pennsylvania Ave- seems to be mainly repairs. https://www.prophotodc.com/
RITZ CAMERA - UPDATE 2018 - This store has closed.
6917 Arlington Rd, Bethesda, MD 20814
Achieving Depth In Your Landscape Photos
October 4, 2023 by Marie Joabar
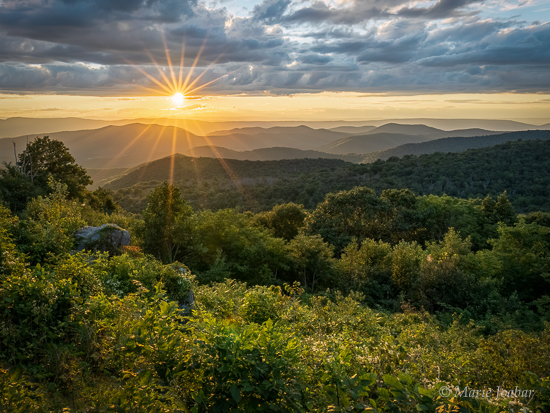 The key to an engaging landscape image is to convey a sense of depth. Having something interesting in the foreground grabs the viewer’s attention and draws them into the scene where they can explore the middle area and the background. When there is interest in all three areas, it’s important to render all of them sharp.
The key elements used to capture great depth and have everything sharp are;
- The Aperture
- The Focal Length of the Lens
- Your Distance to the subject as well as the distance between the foreground and the background.
- Where you Focus
The Aperture controls the depth of field; how much appears sharp in front of and behind the subject you’ve focused on.
Using smaller apertures such as f11, f16, or f22 are needed when you have a nearby foreground element and want that and all the background sharp. However, if there is no foreground subject or there is little depth in the scene, f8 or 11 should work fine. So it’s only when you have nearby subject that the smallest apertures are needed.
Most lenses are optimized at the middle apertures (f8 typically) so if you can capture the depth you need at f8 or f11, use those and avoid automatically setting your lens to its smallest aperture of f22.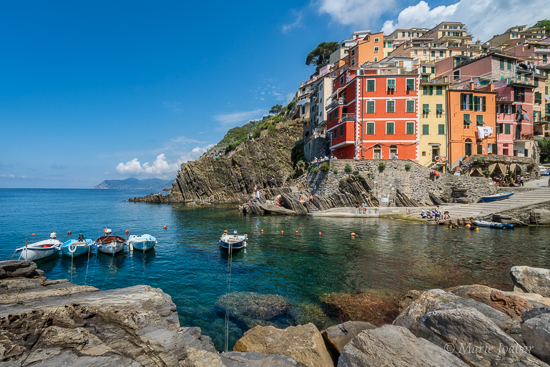
The Focal Length also plays an important role. To achieve maximum depth and have sharpness throughout, it’s best to use a wide angle lens such as 14mm, 18mm, 24mm, etc. These lenses are designed for landscapes so it’s easier to get great depth with them than the longer telephoto lenses such as 70mm, 135mm, 200mm, etc. Telephoto lenses compress space so depth is minimized.
Distance is another factor. The closer you are to the first subject in a scene, the smaller the aperture will need to be (f16 or 22). If there is nothing that close to you and everything is off in the distance, you can use a wider aperture, f8 or f11, and still get great depth of field.
Also, how far is your subject from its background? The further it is, the more depth there is in the scene and to make it all sharp, use f16 or 22. F4 or 5.6 will blur it. 
So a wide angle lens together with a small aperture and taking distance into consideration will give us sharpness throughout the scene. The question remains though, Where Should We Focus?
This is where using the “Hyperfocal Distance” technique comes into play. It may sound intimidating but it’s not, it simply means using the focusing distance that gives your photos the greatest depth of field.
There's and easy and more advanced way to determine this.
- EASY - Position your focus point on something a third of the way into the scene. This should give you one third in front of your focus point, and two thirds behind it sharp. Try it, it works pretty well most of the time as long as you are using a wide lens and small aperture.
- The more ADVANCED way is to find the hyperfocal distance for your lens, the focal length and aperture combination. Using a hyperfocal distance chart, you'll see how much will be sharp in front and behind your focus point.
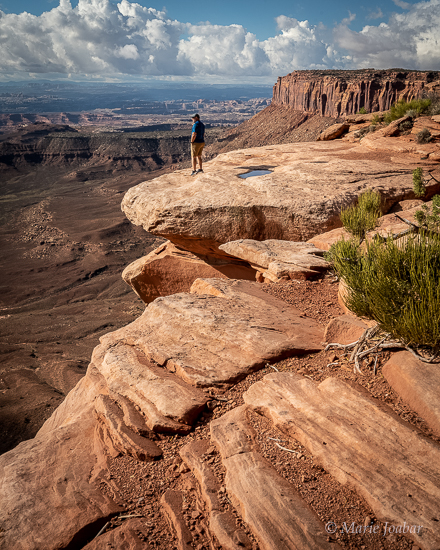
See if your lens came with a hyper focal distance chart, if not you can find many online, better yet is to use an app. I like Simple DOF by Montana Media but there are many to choose from.
If you’d rather use the easier way, try the one third technique and see if your camera has a depth of field preview button*. Press on the DOF Preview button and it will close the aperture to the one you have dialed in allowing you to see the sharpness (or lack of) in your scene. If all is not as sharp as you need it, try focusing on something a bit nearer or further and again check what’s sharp using the DOF preview button.
One of the most important things you can do before leaving a scene is to check that you have what you want. In the Playback mode, zoom way into the frame and scroll side to side and up and down checking for sharpness throughout.
So to sum it up, for maximum depth and sharpness in an image, use a wide angle lens, set a small aperture of f11, f16 (f22 if needed), carefully select what you focus on. Try it, experiment and see how effective this method can be. 
Aperture and focal length used in images (from top to bottom).
1. Sunset - f16 with 14mm lens
2. Italian coast town - f16 with 12mm lens
3. Smithsonian Castle - f20 with 15mm lens
4. Red rock overview - f 16 with 35mm lens
5. Maine pond - f11 with 28mm lens
* The “Depth of Field Preview” button is located on the front of most DSLR and mirrorless camera bodies although not all cameras offer them. Normally when we look through the viewfinder, the aperture is wide open letting in the most amount of light making it easy to see what we are shooting. Using the depth of field preview button shows you the scene with the lens closed down to the aperture you’re using. It will appear dark as the aperture is letting in less light but once your eye becomes accustomed to it, you will be able to see what is in focus and what is not. It might be helpful to slowly change the aperture a little at a time giving your eye the chance to adjust and see the changes.
The first time you try this it would be best to look at a brightly lit scene so you can more easily see thru the viewfinder. Focus on a subject then press on the depth of field preview button.
Tips For Better Portrait Photography
September 14, 2023 by Marie Joabar
 What makes a good portrait? To answer that it's helpful to think about what a portrait is.
When Aaron Clamage teaches our Getting Started in Portraiture class, he always asks the group their definition of a Portrait. He states that there’s no right or wrong answer but it’s interesting to hear what people’s idea of a portrait is.
Some think of it as a formally posed photo of a person, others think of it more as a studio headshot, and others think of it as a way to capture the person's essence or tell a story about them (whether it includes their environment or not).
These are all correct but I think we can agree that the most important part of a portrait is capturing the person’s essence or conveying their story. Everyone can take a photo of another person but to capture their essence takes skill.
Based on what I hear when I assist at our portrait classes, when people are just starting out the most difficult things for them are;
- Talking with their subject to evoke an honest emotion or elicit that beautiful smile
- Directing and posing the subjects
- Projecting self-confidence
Like anything else, the more you do it, the more skilled and confident you’ll become.
These tips might help you get the most from your efforts.
First, it is important to know what the portrait is going to be used for so you know the end goal. You’ll shoot a headshot completely different than a storytelling shot.
To Build Your Confidence
- Consider practice sessions with your family or friends.
- Practice talking with them as you photograph them.
- To bring out the smile, have a few jokes in your bag or ask them silly questions such as “who did you have a crush on in grade school?”
General Exposure Settings
- Typically, a portrait should focus on the subject and avoid any background clutter. This can be accomplished by using a wide aperture, like f4 -5.6 to achieve a shallow depth of field (blurred background).
- As always, it’s good practice to use as low an ISO as possible to get the best picture quality.
- If hand-holding, make sure the shutter speed is 1/60 or faster to capture sharp images.
Camera Settings
- Use Continuous shooting (burst mode) especially in groups or at events.
- Take control of your focus and you choose where to put your focus point. For single subjects this should be the nearest eye. If your camera has eye detect you can use it to achieve quicker focus.
- Zoom in to an image in playback to check focus.
Posing
- Position your subject at a slight angle.
- Tilt the head, even if it’s slight it can help a pose feel more dynamic.
- Don’t cut off body parts: fingers, elbows, hands, feet, top of head, etc. OK to cut at mid arm or mid leg but not at ankle or wrist.
- Watch for reflections of flash on windows or eye glasses, angling the glasses down helps prevent this.
Framing
- Avoid the bulls-eye and place your subject in upper or lower third or off to one side.
- Fill the frame with your subject and avoid too much empty space above the person’s head.
- Notice distracting backgrounds.
- Notice how subjects are lit - Can you reposition them or yourself for better lighting.
- People look better in shade or window light. Avoid direct sun if possible, especially mid-day when the light is the most harsh.
- When shooting with mixed light (deep shade with bright light) consider moving everyone into the same light. The camera will expose better this way. Otherwise, use the flash to even out the light.
Lighting
In portrait photography lighting can be done on a scale from very simple to very complex. For total control, professional photographers typically use strobe lights but that’s not to say you can’t get great portraits without them.
- Try starting out with natural light. If indoors, find a window that lets in a good amount of light. Placed your subject at the side of it and have them have them face you. Now, use something to reflect the light to the other side of them. A reflector would be the best option but you can achieve similar results with something as basic as white cardboard, poster board or even aluminum foil.

- Using off camera flash units can give you the right amount of light, where and when you need it.
- The use of light modifiers like umbrellas and reflectors can be an inexpensive way of controlling light to get more precise results. The better your tools, the less work you have to do.
Editing
There are many software programs to choose from but Lightroom and Photoshop are the most common and allow you to put the finishing touches on your photograph.
- Quickly fix things like red-eye, blemishes or crop out distracting elements.
- Adjusting color, contrast and vibrance levels for a polished look.
- Skin smoothing is needed in most portrait shots to some degree.
To Recap; Try to capture your subject’s essence or tell their story. Second, use proper camera settings. Third, take time to pose and look at your framing. Fourth, consider your options for lighting. And last, remember that image editing will give your photo a professional look.
If you want to improve your portrait photography or get started in that field, consider taking one of our portrait or lighting classes listed here.
February 25, 2024, Exploring Headshot Photography
March 3, 2024, Portrait Editing - Tools and Techniques We excited to offer this new class taught by Laura Hatcher!
February 3, 2024, Getting Started In Studio Lighting
January 27, 2024, Getting Started In Portraiture
The Many Benefits to Renting Photography Gear
August 24, 2023 by Marie Joabar

Have you ever wanted to play around with a camera to make sure it feels right and gives you the settings you need before you plunk down a few week’s wages to buy it?
Wouldn’t you love to have a longer telephoto lens for birding, wildlife or sports but spending $6000-$15000 is out of the question?
Have you thought of exploring Macro photography but don’t want to buy a lens before you know if you even like it?
Do you need a tripod but use one so seldom that you can’t justify the expense of a really good one?
How about flash or lighting? Wouldn’t it be great to try out a system out before you invest.
A great alternative to buying photography gear is RENTING it and we’re happy to share some exciting news in that department, and a little incentive in the way of a discount… read on.
We have a great source for renting just about any type of gear we might want or need right here locally! Just a few blocks from the White House is an amazing rental company called Aperturent and we encourage you to check them out. See how vast their inventory is and plan some fun shooting by renting some of their gear!

Renting gives us the opportunity to:
- Have access to a wide variety of gear.
- Try out different equipment before making the decision to purchase.
- Use gear that we might not use often enough to warrant investing in.
- Use gear to experiment with a new skill or technique to make sure we enjoy that type of photography before buying.
- Avoid the expense of owning (and storing) lots of gear.
- Obtain special gear that’s only needed for a given shoot.
Aperturent’s pricing is competitive.
Their website is super easy to navigate.
You can rent for 3 days, a week, or even longer.
The gear can be shipped to you directly or you can save on shipping and pick up and drop off.
I have a pretty good system but when looking at what they carry, I got really excited. I want to try a few new lenses, play with a particular camera, and explore some new lighting options. I can hardly wait!
Watch for more news about our collaboration with photo walks, contests, and more later in the year.
Aperturent is located in the Blake Building at 1025 Connecticut Ave NW #609, Washington, DC 20036. They are easily accessible to two Metro stations and are open Mon-Fri from 9.30am - 5.30pm.
VISIT THEIR WEBSITE FOR MORE INFORMATION!
CAPITAL PHOTOGRAPHY CENTER STUDENTS GET 10% OFF THEIR RENTALS!
USE CODE CPC10
Filters for the Outdoor Photographer
August 2, 2023 by Marie Joabar
 Filters can enhance the look of our images and there are plenty to choose from. Whether you photograph flowers and gardens, beautiful landscapes or dynamic cityscapes, there are a few filters you to consider having in your camera bag.
Let’s take a closer look at these filters:
- The Circular Polarizer
- The ND - Neutral Density filter
- The Graduated or Split Neutral Density filter
- The UV - Ultra Violet or UV-Haze filter
 CIRCULAR POLARIZING FILTER
Think of the this filter as sunglasses for your lens, we’ll use this mainly on sunny days but also when we want to remove glare or reflections.
- When shooting outdoors, a polarizer will add depth and contrast to the sky, making the clouds pop out in more detail and it will add saturation in the reds, greens and blues. This is a great effect for any outdoor shooting!
- Another benefit is that it removes reflections from non-metallic surfaces such as glass, windows or water.
- It also removes glare from foliage increasing sharpness, better color and contrast.
Tips when using the Polarizer;
- Our sky is not evenly polarized, there is only a band of polarization crossing it. On a sunny day, to see the effect of the filter, point your camera at a 90-degree angle from the sun. In other words, put either shoulder to the sun and point your camera forward then spin the outer ring. You’ll see more defined clouds, richer saturation and pleasing contrast.
- To remove glare or reflection on water, glass, or foliage, simply turn the outer ring and you will see the filter reducing glare or reflection.
- To use this filter, put it on your lens and then spin the outer ring. When doing so, you’ll see the filter’s effect on polarization.
- CAUTION using a polarizer with wide angle lenses. Since these lenses cover such a large expanse of sky, the effect is not even. The image will show the sky with the darker band of polarization clearly visible. This is very, very difficult to edit. Consider NOT using a Polarizer when using a lens wider than 28mm.
Instead, in Lightroom Classic, go to the HSL panel, open the Luminance sliders and slowly take the blue slider toward the negative to add a nice and rich blue sky.
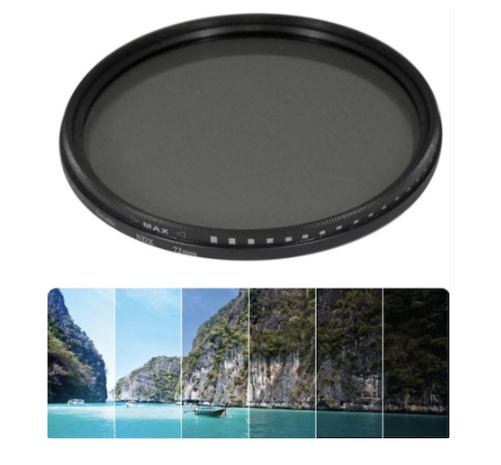 NEUTRAL DENSITY FILTER
This filter is a dark piece of glass and is used on bright days when we want to use a slow shutter speed, or a wide-open aperture for selective focus.
- When photographing cascades, waterfalls or fountains, the filter will allow you to use slow shutter speeds to blur the water rendering it as a silky flow. Without the filter, there would be too much light, hence overexposure.
Same if you want to use a wide aperture but don’t want to, or can’t speed up the shutter speed to balance the light. - ND filters come in different degrees of darkness (density) measured in stops, 1 stop, 2 stops, etc. and can even be stacked if you need to reduce the light further.
- These can be purchased as ND2(1 stop), ND4 (2 stops), ND8 (3 Stops) ND16 (4 stops), ND32 (5 stops), ND64 (6 stops). * For landscapes, a 6 stop filter is most typical.
- Variable ND filters are another option. By turning the outer ring of a Variable ND, you can adjust the amount of darkness, from 2 stops to 8 stops eliminating the need to carry separate filters of varying density.
*See article on Long Exposures for more info on ND filters and their use. Link at bottom of this article.
GRADUATED or SPLIT ND FILTER
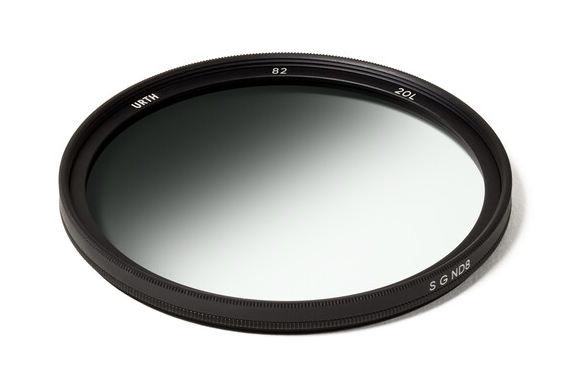 This is another version of the ND filter and is useful when there is a dramatic difference between the brightness in the sky and the darker shadow area of the landscape below.
As the name indicates, the filter is divided in two, one half graduating from light to dark grey, and the other half clear. The division is either hard edged or soft edge.
- A “hard” edge filter changes abruptly, good when the difference in light and dark in a scene is clearly defined such as a horizon.
- A “soft” edge is feathered, best for when the change between light and dark in a scene is gradual and
 less defined.
 - Cokin makes a great system for graduated ND filters. It uses a filter holder that attaches to your lens, you simply slide the filter into the holder and look through your viewfinder lining up the division in the filter with the division of light and dark in the scene. For more information on this type of holder and the filters, visit their website Cokin Filters.
A UV (ultra violet) or a UV–HAZE FILTER
 This filter serves a dual purpose. When shooting outdoors with this, the UV light is filtered out. This is great for landscape photography as distance usually causes a haze effect from UV light.
- Additionally, it protects the lens by preventing dirt, dust, and scratches from reaching the front of the lens. Most lenses have special coatings and the best way to preserve lens quality is to keep the front element untouched.
- Protect each of your lenses with a UV filter and leave it on regardless of whether you are shooting indoors or out. The only time you should take it off is when you are using a different filter as it’s best not to stack your filters.
MISC FILTER INFO
- The quality of the glass and the coatings are important and will make a difference. Single or multi-layer coatings improve contrast and help transmit light to the sensor in a straighter path preventing flare and other lens aberrations.
- As with all the filters, the better the quality, the better the image. If you have a $1000 lens and you put a $19 filter on it, you have substantially reduced the quality of that lens. Get what you can afford but if possible, don’t skimp on the glass - there is a reason one filter costs $179 and another runs $29.
- As with any product, some brands are better than others. German based Schneider Optics makes B+W filters which offer the highest quality filters on the market.
- Some camera manufacturers make their own filters and the quality is very good, Canon and Nikon in particular. Singh Ray, Hoya, Tiffen and Urth are just some of the many other brands available. There are even magnetic filters systems, one the well rated brands is Kase, the Wolverine IV system.
- If you have lenses with different filter sizes you can avoid having to purchase a separate filter for each lens by purchasing the filter to fit on your largest lens then using step up rings for the rest. For example, if the filter size of one lens is 72mm and the other lens is a 62, buy the filter to fit the 72mm lens, then buy a 62 to 72 step-up ring so you can use the same filter on the smaller lens. (The exception is UV filters as you should have one for each lens for protection.)
- To determine your lens’ filter size, look on the inside of the lens cap, it should be listed there.
Despite the technology in today’s cameras, they cannot always reproduce the full range in tone and varying amounts of light. That’s where filters come in, adjusting for our camera’s short fall and allowing us to capture what our eyes can see but our cameras are incapable of.
We just added a new class to our line-up which will deal a lot with various filters; Long Exposure Photography on 9/23/23
You might be interested in our Tips for Photographing Waterfalls blog post and our Waterfalls class with Corey Hilz on 8/6
*See the Article on Long Exposures for more info on ND filters and their use.
Revisiting Our Goals
July 6, 2023 by Marie Joabar
 We've officially hit the halfway mark of the year and it's time to take a moment to reflect on those fantastic New Year's resolutions and goals you set back in January. Remember the excitement and determination that fueled you when you made those commitments? Well, now's the perfect time to check in and assess your progress.
Don't worry if you're not exactly where you want to be just yet. Think of this halfway point as an opportunity to hit the reset button, to revitalize your motivation and get back on track! So, grab a pen and paper, or open up your favorite goal-tracking app, and come up with a game plan.
Here are a few tips for renewed commitment:
 Revisit your original goals and reward yourself for those that you accomplished.
- With the rest, break them down into smaller, actionable tasks and create a roadmap to get you where you want to be at the end the year.
- Plan tasks either weekly or monthly, or perhaps seasonal like summer, fall, winter.
- Consider an accountability friend, someone that knows your goals and that you will be accountable to.
- As you turn the page on the calendar each month, grab your list and see how you’re doing.
- Create a reward each time you accomplish one of your goals. It could be a purchase of something special for yourself, or as simple as an ice cream treat.
Goals to help you take your photography to the next level.
 Commit to getting out and photographing X number of times a week or month.
- Practice a new technique
- Organize your images and cull the ones that need deleting
- Check or create an image backup plan
- Make a complete list of your gear, as long as you’re going thru it, you could reorganize and clean it too.
- Find ways to share your images, either thru social sites, a website or photo sharing sites.
- Get some of your images printed and framed.
- Visit photo shows, art galleries or online photo sites for inspiration and to develop your eye.
- Help another photographer learn if you can.
Remember, it's never too late to restart, you can make it happen! Surround yourself with positivity and support and make the next six months count! You've got this!
Exploring Cinque Terre, Italy
June 15, 2023 by Marie Joabar
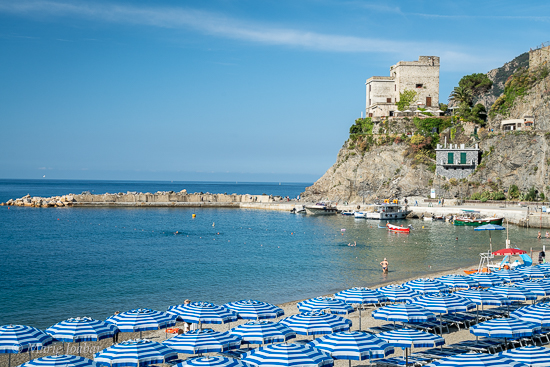 We’ve just concluded our CINQUE TERRE, ITALY PHOTO WORKSHOP and it is truly a spectacular area that we will definitely be going to again.
Cinque Terre is a coastal region north of Pisa and south of Genoa. The name translates to Five Lands and stands for the 5 villages. All feature colorful buildings built on the mountainside, terraced vineyards, olive trees sprinkled about, busy harbors, and the locals are friendly and welcoming. From the restaurants, to the cafes, markets, shops and the beaches, we had fun exploring each of these towns.
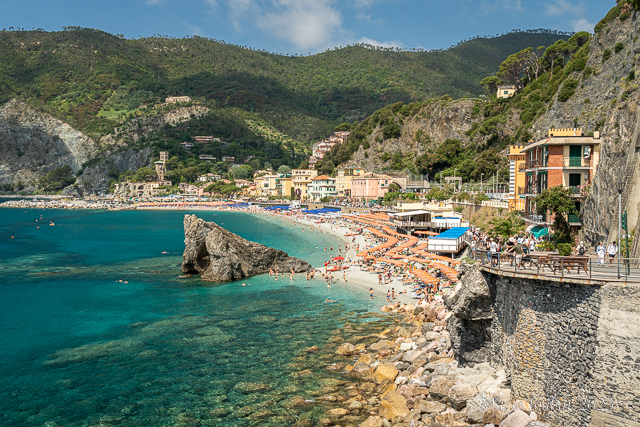 From a photography point of view, we found stunning vistas, beautiful turquoise water, sunbathers and swimmers, quaint storefronts, historic churches, cemeteries, statues, and the list goes on.
Catching a sunrise or sunset wasn’t an option due to the mountains blocking it at this time of year but there were plenty of other incredible photo ops to enjoy. The 6 hour time difference would have made sunrise shooting difficult so it was a blessing in disguise that it wasn't an option.
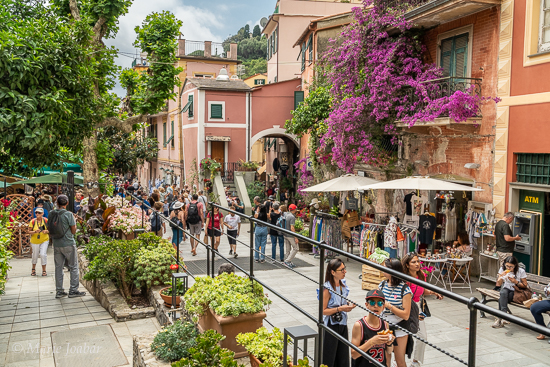 Traveling between each town is done on the regional train, very similar to the DC area Metro system. It’s super easy to use and we were surprised to find they even had restrooms on the trains! A passenger ferry also connects the towns and is a must see. Viewing the villages from the water offered a unique perspective.
For the hiking enthusiast, there are many trails in the area and these also connect the towns. Just note that many are strenuous as you are going up, up, up, and then down as you cross the mountains in between.
Taking the paths in each town up to higher vantage points was well worth the spectacular views and a great alternative to the longer strenuous trails.
MONTEROSSO was our home base and it was super easy to get the lay of the land and explore all it had to offer. Great little food markets, many gift shops, amazing restaurants, endless beaches and so much more, this town really had it all.
The Buranco Winery in Monterosso not only offers incredible wine and delicious food, the setting is gorgeous and offers so much to photograph, we enjoyed a great lunch there on our last day.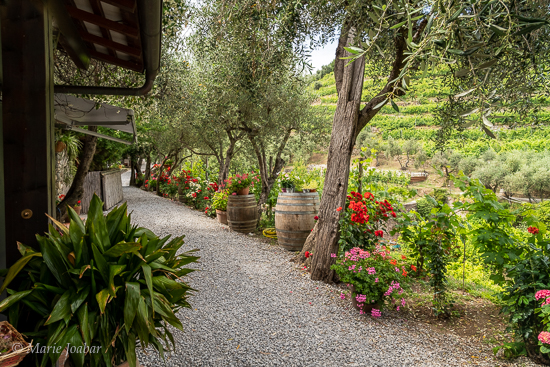
In VERNAZZA, we climbed up to capture the view of the front of the village as well as the path up the back side for a totally different perspective. In fact, we had a lovely dinner at a restaurant on a cliff overlooking the village and harbor. How special is that?!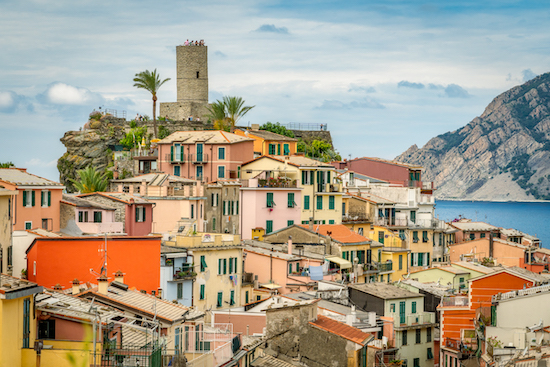
We took a leisurely stroll from the train station up to the town photographing tiny details, beautiful flowers, and a few cats along the way, before reaching the town proper.
The Wine Trail in MANAROLA offered gorgeous views over the town and sea and we spent a beautiful morning capturing it.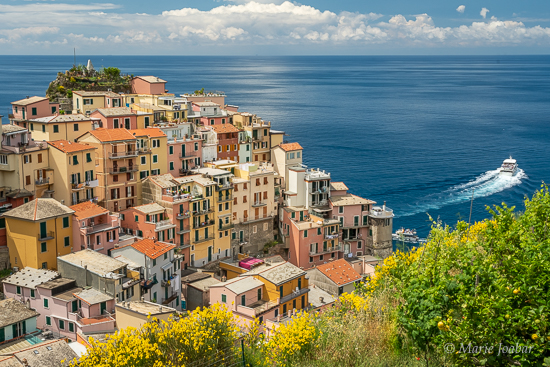
The harbor area in RIOMAGGORIE is hopping but further into the charming town area are lovey shops and restaurants and life moves at a slower pace. 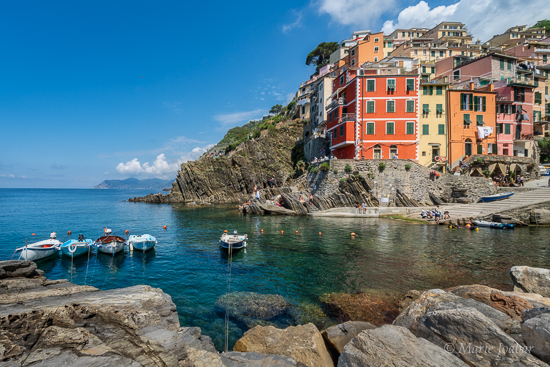
The weather was perfect (in the 70s each day). A few sprinkles 1 day but they quicky passed out to sea.
We practiced bracketing, so we could capture the details in both the shadows and the highlights, had fun with some slow shutters and camera movement, played with black and white for some scenes, and had a few opportunities for night photography as well.
Getting stronger with their cameras, exposure settings, and developing a stronger eye for composition were a few things that everyone commented was beneficial to them.
The workshop was in partnership with Il Chiostro, which offers workshops in cooking, painting, writing and some in photography. We had a wonderful guide, Enrico, helping us over the hurdles of reservations, transportation and other logistics as well as sharing his knowledge of the Italian customs and culture with us. He quickly became a friend to us all and truly enriched our experience.
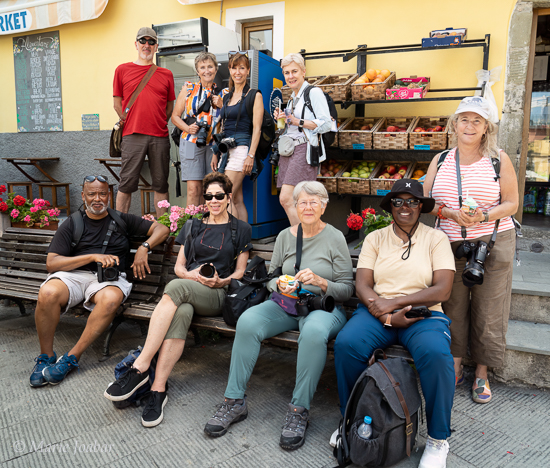 We'll definitely be doing this magical trip again in the future.
See our photos on our Cinque Terre Student Showcase https://capitalphotographycenter.com/showcase/cinque-terre-showcase
Long Exposure Photography
May 18, 2023 by Marie Joabar
Long Exposure Photography is all about using a slow shutter speed. Since the shutter speed controls motion, we can slow it or “drag” it to blur anything that’s moving while keeping stationary subjects sharp. We can also use it for playful, creative and dramatic imagery.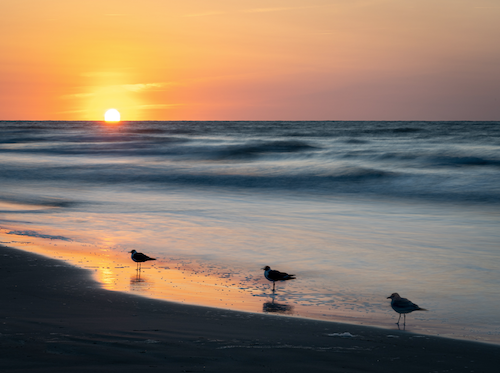
Opportunities for Long Exposures
- To blur moving subjects; people walking/running, car taillights, waterfalls & fountains.
- To smooth water & clouds
- For Panning
- Camera movement for a creative look
This type of photography usually works better in the Manual Mode as everything needs to support the slow shutter speed.
The length of time (shutter speed) is usually 1/10 second or slower. Set this to give you the amount of time or the amount of blurring that you want. The ISO and the aperture support that speed and to help control light.
- Aperture - In low light try f11, 16 or 22. In bright light try f22 or smaller if your lens offers it.
- ISO - Typically 100 is good but you may need 200 or 400 with shorter speeds such as 1/10 to 3 seconds.
Before you start photographing your subject, first, consider what you want the moving subject to look like. Also, how fast is the movement and how blurred do you want it?
Some examples or movement and a starting point for your shutter speed.
People walking: 1/10 - 1/20 depending on how fast/slow they’re walking.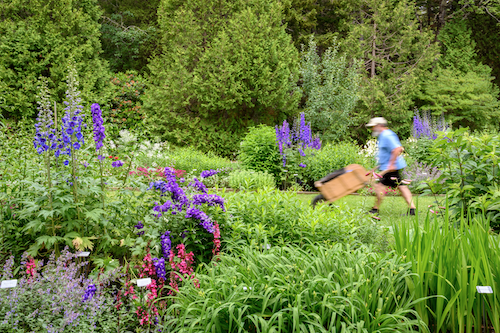
People running: 1/30-1/60 depending on how fast and how close you are.
Waterfalls and Flowing Water. Slow the shutter enough to smooth the water but still see flow lines. If shooting a large volume and/or it’s fast flowing a shorter shutter speed works well. As a starting point, with a fast-flowing stream, 1/4 shutter speed might work well. With a slow flowing one, 1 to 2 seconds may be needed. Experiment and choose the look you want. Most waterfalls and cascades are easier to expose for in the early morning or on cloudy days.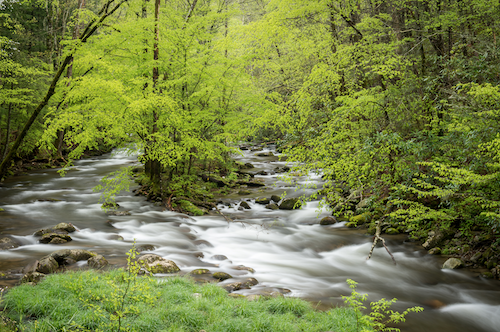
Fountains: 1/10 and slower, depending on volume and speed of water.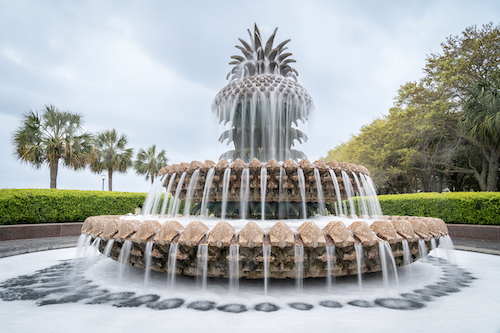
Moving water and clouds: Make choppy water smooth and give clouds an artistic look. 1 to 30 seconds and longer depending on speed of the cloud movement and the choppiness of the water.
Car taillights: 8 -15 seconds or longer. The longer the shutter speed, the longer the streak of light. Anticipate the flow of traffic and wait until it’s moving fast before shooting. Buses give tall streaks.
Panning: Move your camera to follow the subject. It results in a nicely blurred background and a somewhat sharp subject but one thing in the frame should be relatively sharp. The typical shutter speed is 1/30 and you can adjust from there. Hand-holding is easier but you can use a tripod. Find a clean background.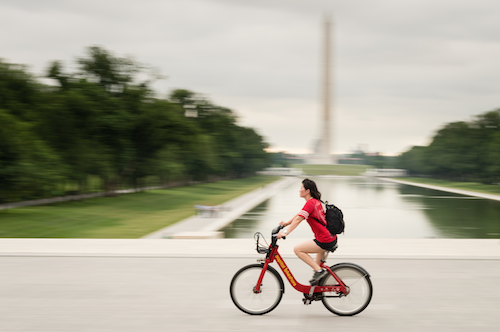
Carnival rides: Ferris wheels, kiddie rides, etc. 1-3 seconds or longer depending on speed of ride.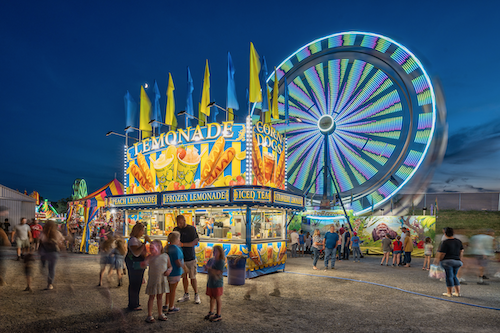
Camera Movement: This is a super creative way to capture photos and is sometimes referred to as Intentional Camera Movement. Basically, you’ll move the camera while exposing. Try it with 1/10 second or longer and try any of the movements listed. A tripod is not required but you’ll cleaner blurring if using one.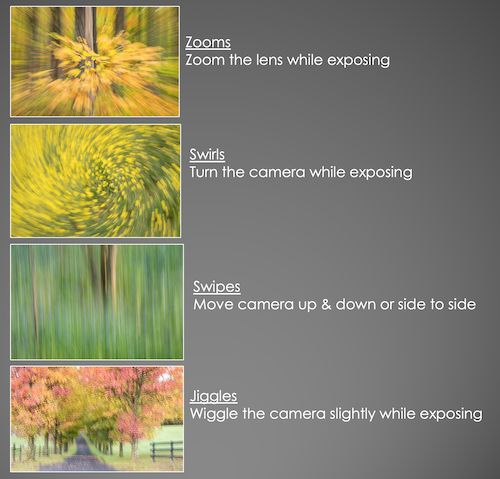
Zooms - Zoom the lens while exposing
Swirls - Hold the lenses Zoom ring and turn the camera while exposing
Swipes - Move camera up & down or side to side
Jiggles - Wiggle the camera slightly while exposing
With practice you’ll get to know which shutter speeds work best for the look you like. After time, you just remember the starting shutter speed and then adjust from there.
Filters To Help Avoid Overexposure
Using slow shutter speeds in daylight can cause overexposure but Circular Polarizers and Neutral Density filters help prevent that. Use these with waterfalls, cascades and fountains for the silky looking water. Also use them to blur moving clouds.
- Circular Polarizers - Take away 2 stops of light and sometimes that’s enough. If not enough, use darker ND filters. These can be stacked for additional light reduction. A very sturdy and ridged tripod is a must.
- Neutral Density Filters - Use to prevent overexposure with longer shutter speeds. For the landscape photographer, a 6 stop ND filter is typical. This can be stacked with a 2 or 3 stop filter if more time is needed.
If the correct exposure without filter is 1/8 second...
ND2 (1 stop) - could take shutter from 1/8 to 1/4
ND4 (2 stops) - could take shutter from 1/8 to 1/2
ND8 (3 stops) - 1/8 to 1 second
ND16 (4 stops) - 1/8 to 2 seconds
ND32 (5 stops) - 1/8 to 4 seconds
ND64 (6 stops) - 1/8 to 8 seconds etc

The number on the ND filters can be confusing as different brands use different numbers. This chart will help with that.
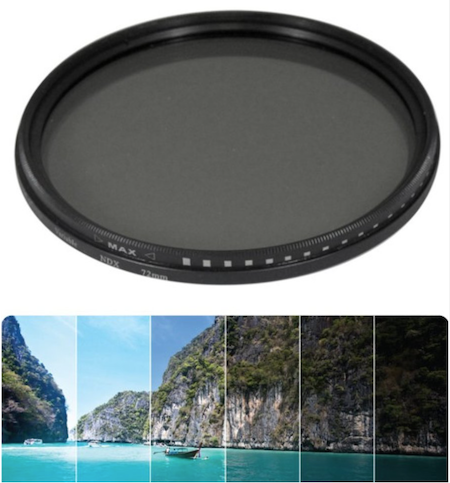 Consider a variable Neutral Density filter, it offers several stops and you turn the outer ring for the desired stop or darkness.
- A Graduated or Split Neutral Density Filter, can be used to darken a portion of the photo. For example, use to darken the brighter sky but not the normal or darker foreground.
Hope you have fun exploring this technique as another tool in your photography tool box!
Why Black and White?
April 19, 2023 by Admin
Black and white photography is experiencing a resurgence in popularity both in the digital world and the analog (film) world. What is it that’s responsible for this increased interest? Photography started as a purely black and white process and perhaps people want to explore the origin of the medium, as the saying goes, “what’s old is new again.”
Regardless of the reason, black and white photography provides today’s photographer with so many opportunities to create and express their artistic vision.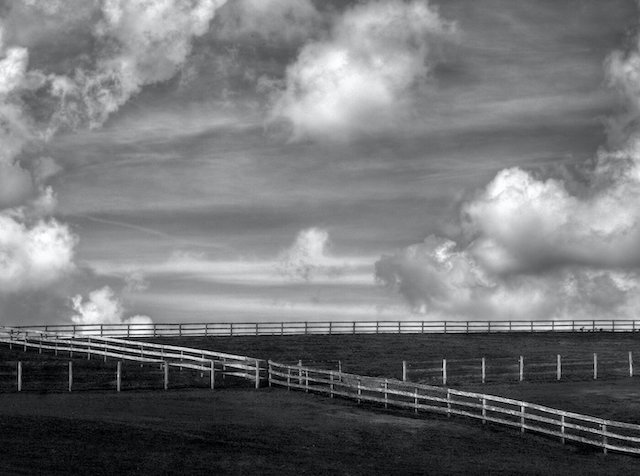
- One of the most obvious things we note about black and white photography is it’s opposite – color. Color can distract the viewer from the essential quality of the image, the composition, the emotion and the overall mood of the image.
Beyond being a distraction, we associate emotions with certain colors – yellow represents joy, green represents growth, blue for calmness, etc. There are times where your color images may be representing a feeling that you did not want the viewer to feel. In these cases, black and white may be far more effective.
- Another great reason to shoot black and white is when the colors in the scene before you are drab. A cloudy day with washed out neutral colors can be made stronger by removing all color.
- Additionally, when the light is harsh and the scene shows bright highlights and strong shadows, this is a great opportunity to show shapes and patterns by using black and white.
Black and white reveals the “bones” of the image and therefore your overall composition must be clearly understood by the viewer. The basic elements of black and white photography are:
- Contrast represented by light and shadows
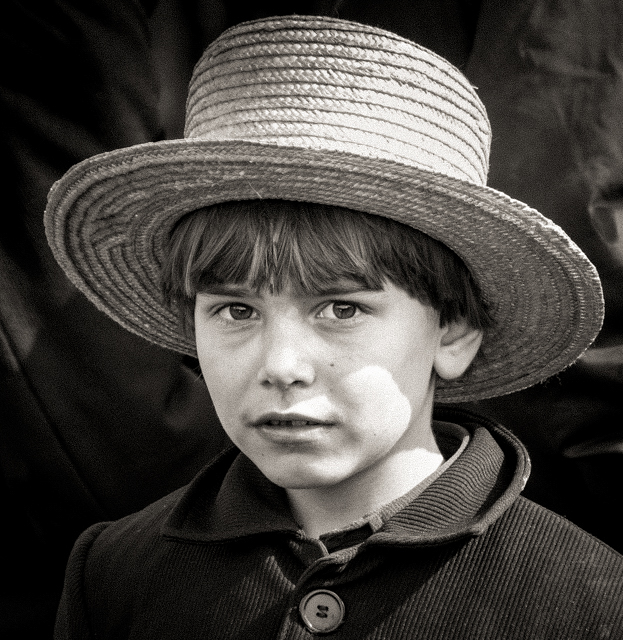
- Mood and atmosphere
- Lines and therefore patterns
- Forms, shapes and textures
- Overall composition
Black and white more easily represents the emotive quality of the image that you are creating due to this ability to emphasize certain compositional elements.
Black and white photography also conveys a feeling of timelessness. Look at the image of the Amish boy. Are you able to tell when this image was created? Whenever you want to give an image a timeless feel, black and white will help convey that.
The image of the calla lily is pure shape and form with contrast of light and dark to help the viewer immediately see the impact of the subject. 
On the other hand, the image of the begonia has little contrast and is more of a study of its lines and patterns and its ethereal feeling.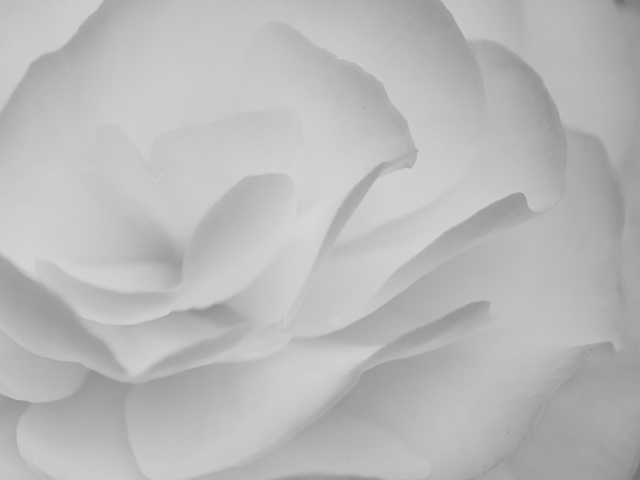
The image of the fence line shows nice contrast and strong compositional elements.
T he broken window demonstrates the intricate details of the lines and patterns that are far more emphasized in a black and white image. Notice the repetitive pattern of squares represented by the overall shape of the window and its panes.
In closing, the more you experiment converting your images to black and white the more you will begin to see the advantages and the opportunities to express your art.
Note - You should always shoot in color and later convert to black and white in a software program such as Lightroom or Silver Efex Pro. The algorithms in your software programs are far more powerful than the ones in your camera.
If you are shooting in Raw, it’s fine to capture in black and white using your cameras, “Picture Style” “Color Controls” or whatever it’s called in your brand of camera (look for the Monochrome setting). This can help you “see” in BW as you capture and may help you develop your eye for good subjects. When you see the file in your software program, it will display in color and then you can convert it to BW.
However, if you are shooting JPEGs, then definitely capture in color and process in black and white, you cannot turn a BW JPEG into a color file.
Composition and Visual Storytelling
March 30, 2023 by Marie Joabar
 Composition can be challenging for many. For others, it comes naturally and “seeing” strong compositions comes easy. Some call that having a 'good eye'.
If you fall in the first category and don’t think you have a good eye, don’t be discouraged, composition can be learned. By studying the subject, spending time looking at other's images and practice, you can and will improve.
One statement I try to keep in mind when I’m photographing is from one of our instructors, Michael Koren. “The composition of a photograph is the single most important element a photographer uses to convey an artistic statement. What’s included, excluded and the arrangement of elements within the frame is all part of composition.”
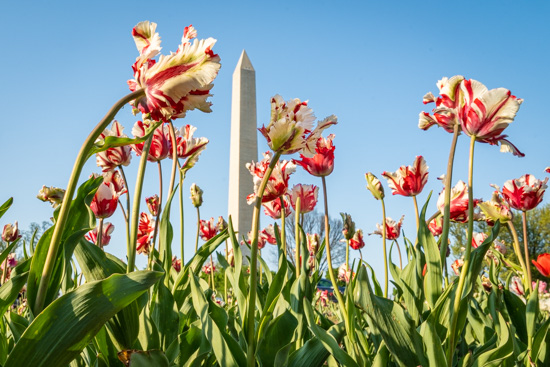 We as the photographer are responsible for everything in our frame.
When I see an interesting subject, instead of just picking up my camera to photograph it I try to identify what excited me about it in the first place. What made me stop to look at it? Was it the color, the light, the shadow, the texture, the uniqueness, etc. That becomes my story and gives me the reason to capture it. I then consider how to arrange the elements or “compose” it in an interesting way.
I think about what I want to convey and then how. For this to work, I have to slow my mind down and have more patience. I'll look at the subject, the light, the background, I'll move around to find the best angle, I'll look for anything that might get in the way or be distracting. Then I can finally see my shot and that’s when I pick up my camera and try to capture it.
Don’t Look For An Image, Look For A Story To Make Into An Image.
Take your time, look around and ‘see’ before you shoot. Find the gem among the clutter.
Try it yourself, each time you pick up your camera to photograph, try asking yourself, “What made me stop, what excited me about this subject, why am I photographing it and what story am I telling?” Then build your composition around that story.
 Telling Stories -The WHY
Story ideas;
- How light is the hitting subject
- Repeating patterns
- Mix of opposites; light and dark, smooth and sharp, straight and round, etc.
- Mystery thru light and shadows
- The beautiful venue or the environs
- People enjoying the environs
Once You Know WHY You Are Photographing Something;
- What is the primary subject in your photo?
- Walk around and find the best angle for the shot.
- Can it be captured at a diagonal? Diagonals show more movement and might be more compelling than straight on.
- Look at the background and place yourself (or camera) accordingly.
- Can you isolate your subject? Do you need or want to isolate it?
- Do you have enough depth of field for your story?
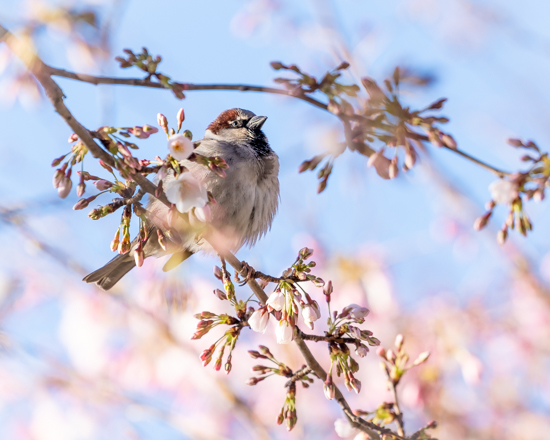 General Tips;
- Uneven numbers work well, frame 3 or 5 subjects instead of 2 or 4.
- Be aware of the Rule of Thirds to help avoid the bullseye shots.
- Repeating patterns are fun to capture as are converging patterns.
- Look for light and shadows for shape and form.
- Look for textures, usually more visible with the help of shadows.
- Look for lines to lead your viewer to the subject; pathways, fence lines, natural landscape elements, etc.
- Capture both horizontals and verticals.
- For an interesting perspective, consider getting low to the ground to frame your subject.
Watch For Distractions
- Bright highlights in the corners
- A pop of color that competes with your main subject
- Crooked lines, buildings, or horizons
- Check all 4 corners of your frame
If you're struggling with your compositions or just want to get stronger with them, check out these classes to help.
- Join Instructor Michael Koren at our 4/1 class COMPOSITION FIELD SHOOT AT BALTIMORE HARBOR AREA
- Join us at any of our In-The-Field-Shooting classes and we'll be offering composition tips as we photograph.
Local Photo Contest Winners
March 9, 2023 by Marie Joabar
It's always a thrill when you win a contest, any kind of contest! It's gratifying to be chosen, to be considered worthy enough for the prize.
With that, we want to congratulate ALL the winners of these contests. Bravo!!!
In the ExposedDC 17TH ANNUAL PHOTO CONTEST, a special shout out to some of our past students and one of our instructors for being included among the winners. We're sharing a few of their photos here and we think you'll agree, they're definitely worthy of the prize.
Suzy MacIntire, Karen Davis, Criag Nedrow, Thomas Cluderay, and Instructor Joshua Steele.


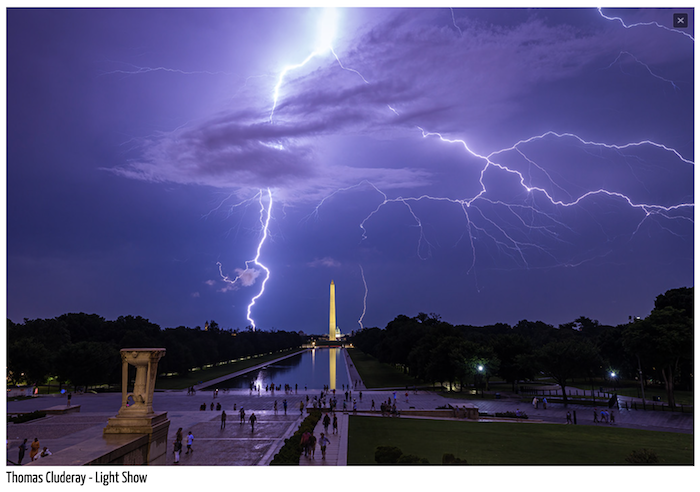
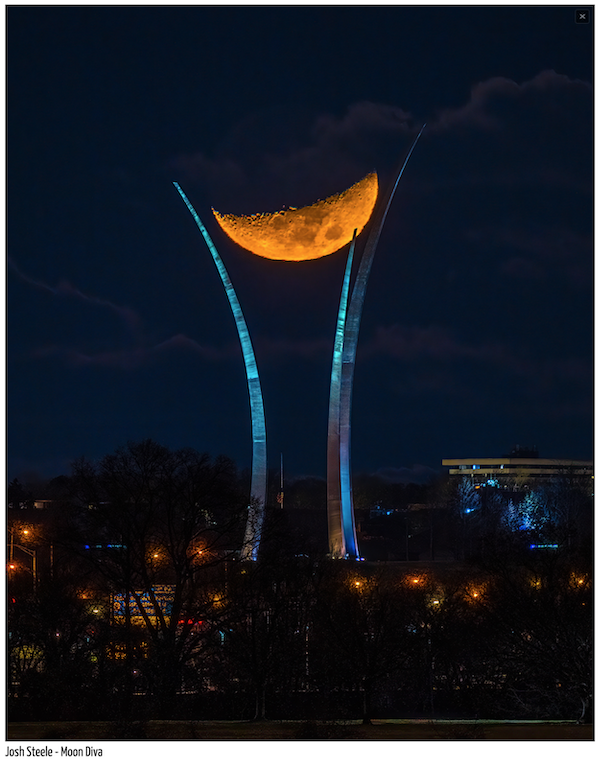
There are many other incredible winning images so be sure to give them a look. See all the winners of the ExposedDC contest here.
In the WASHINGTON GARDENER MAGAZINE 17TH ANNUAL PHOTO CONTEST, we congratulate the grand prize winner, Jeanne Markowski (image below) but also to the first-place category winners (listed below) and also to the second and third place winners and honorable mentions!

Category Winners in the Washington Gardens Magazine Photo Contest; Bob Galvin - Garden Creatures, Stephanie Boss - Garden Vignettes, Karin Melinda Reber - Small Wonders, Phyllis Kimmel - Garden Views. See all the Washington Gardener Magazine winners here.
You'll definitely enjoy viewing the MID-TLANTIC PHOTO VISIONS CONTEST winning images. There are some truly remarkable photos here in a wide variety of categories from People's Choice, Best in Show, Close-Up, Landscape, Floral, Water, Nature, Birds, Sports, People, Studio, Architecture and more. Find a comfortable chair and view them all!
Congratulations to the winners of this contest!

See the WINNING MAPV images here
See the JURIED MAPV images here
Stay tuned for next year's contest, we're looking forward to seeing the winning images then!
7 Photo Books to Celebrate Black History Month
February 16, 2023 by Marie Joabar
In celebration of Black History month, we would like share this collection of photography books. Each beautifully showcases some aspect of black history in America; black culture, black community and everyday life, black photographers, portraits of Harlem’s artistic community, civil rights issues, and more.
“A picture is worth a thousand words” and anyone who enjoys photography will find examples of how to tell a captivating story thru the lens. And everyone, even non-photographers, will find powerful stories expressed through the amazing images in these books.
We hope you’ll explore the selection!
Black: A Celebration of a Culture
 By Deborah Willis - Black, A Celebration of a Culture, presents the vibrant panorama of 20th-century black culture in America and around the world. The photos tell one story that resonates throughout the world. Broken up into segments that examine in detail such subjects as children, work, art, beauty, Saturday night and Sunday morning, the photos detail the history and the evolution of a culture. Each photograph, hand-picked by Deborah Willis, America's leading historian of African-American photography, celebrates the world of music, art, fashion, sports, family, worship or play. With over 500 photographs from every time period from the birth of photography to the birth of hip hop, this book is a truly joyous exhibition of black culture. From Jessie Owens to Barry Bonds, Ella Fitzgerald to Halle Berry, Black: A Celebration of a Culture is joyous and inspiring.
Reflections in Black: A History of Black Photographers 1840 to the Present
 By Deborah Willis - Reflections in Black, the first comprehensive history of black photographers, is a groundbreaking pictorial collection of African American life. Featuring the work of undisputed masters such as James VanDerZee, Gordon Parks, and Carrie Mae Weems among dozens of others, this book is a refutation of the gross caricature of black life that many mainstream photographers have manifested by continually emphasizing poverty over family, despair over hope. Nearly 600 images offer rich, moving glimpses of everyday black life, from slavery to the Great Migration to contemporary suburban life, including rare antebellum daguerreotypes, photojournalism of the civil rights era, and multimedia portraits of middle-class families. A work so significant that it has the power to reconfigure our conception of American history itself, Reflections in Black demands to be included in every American family's library as an essential part of our heritage. 600 duotone photographs, 32 pages of color.
Black Archives: A Photographic Celebration of Black Life
 By Renata Cherlise - A photographic celebration and exploration of Black identity and experience through the twentieth century from the founder and curator of the hit multimedia platform Black Archives.
Renata Cherlise’s family loved capturing their lives in photographs and home movies, sparking her love of archival photography. Following in her family’s footsteps, Cherlise established Black Archives, which presents a nuanced representation of Black people across time living vibrant, ordinary lives. Through the platform, many have discovered and shared images of themselves and their loved ones experiencing daily life, forming multidimensional portraits of people, places, and the Black community. These photographs not only tell captivating stories, they hold space for collective memory and kinship.
Featuring more than three hundred images that spotlight the iconic and the candid, Black Archives offers a nuanced compendium of Black memory and imagination.
African American Women (Double Exposure)
 By Natasha Trethewey - Volume 3 of Double Exposure highlights NMAAHC's rich collection of photographs of African American women, some of whom are cultural icons. This volume demonstrates the dignity, joy, heartbreak, commitment, and sacrifice of women of all ages and backgrounds, with photographs by Henri Cartier-Bresson, Beverly Conley, Robert Galbraith, Ernest C. Withers, Wayne F. Miller, P.H. Polk, Joe Schwartz, and Milton Williams.
Everyday Beauty (Double Exposure, 6)
By Robin Givhan -  Everyday Beauty features fifty-five images that pay visual tribute to the extraordinary style and aesthetic of African American figures, famous and anonymous, by highlighting themes of self-representation, resilience, and civic engagement. The photographs depict people across generations showing how staged and candid moments can be both beautiful and precious. African Americans have long recognized the power of images and used them to document moments―from the monumental to everyday.
This volume in the critically acclaimed Double Exposure series presents a range of photographic styles by celebrated photographers as well as snapshots by unknown amateurs. Explore all of the books in the Double Exposure series from the National Museum of African American History and Culture.
Freedom & Justice: Four Decades of the Civil Rights Struggle As Seen by a Black Photographer of the Deep South
 By Cecil J. Williams - This is a photographic journey back into the legally segregated world in which I grew up. A world entirely shaped by race and color. This book is an eyewitness account of many sociological events having a direct impact on my life. These events also affected the lives of millions of blacks and whites, especially those who lived in the Deep South. My pictures most often salute the unknown people who put their lives on the line to confront and change a system of segregation and racism. At a time when our nation still struggles with the issue of race, hopefully this book will promote racial harmony and the need for acceptance shared by all people, despite their racial, ethnic, and religious heritage.
Kwame Brathwaite: Black Is Beautiful
 By Kwame Brathwaite - In the late 1950s and throughout the 1960s, Kwame Brathwaite used his photography to popularize the political slogan “Black Is Beautiful.” This monograph—the first ever dedicated to Brathwaite’s remarkable career—tells the story of a key, but under-recognized, figure of the second Harlem Renaissance.
Inspired by the writings of activist and black nationalist Marcus Garvey, Brathwaite, along with his older brother, Elombe Brath, founded the African Jazz Arts Society and Studios (AJASS) and the Grandassa Models (1962). AJASS was a collective of artists, playwrights, designers, and dancers; Grandassa Models was a modeling troupe for black women, founded to challenge white beauty standards. From stunning studio portraits of the Grandassa Models to behind-the-scenes images of Harlem’s artistic community, including Max Roach, Abbey Lincoln, and Miles Davis, this book offers a long-overdue exploration of Brathwaite’s life and work.
In Memory of Roy Sewall
January 26, 2023 by Marie Joabar
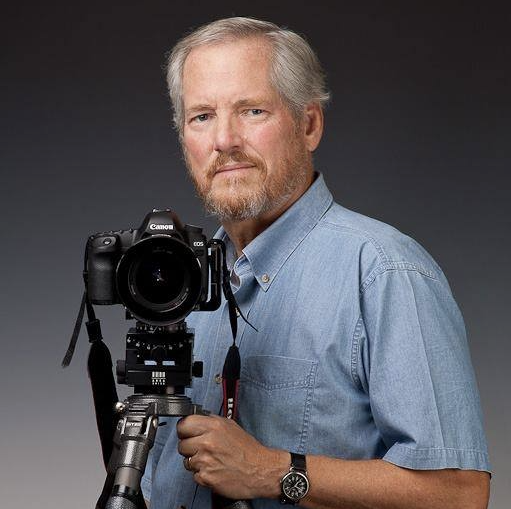 Many of you may have already heard the news of Roy Sewall passing away. Roy recently struggled with health issues and sadly they got the best of him.
Although we are incredibly saddened we are so very fortunate to have known him! We have many fond memories of the years that Roy taught with us and I wanted to share a few stories here.
Many years ago Roy sent me an email about becoming an instructor. It was something like, “how does one become instructor at CPC?” We decided to meet and discuss it and I’ll never forget that day. He was so easy to talk to and his interest in helping others with their photography skills was obvious. We met at a small coffee shop in Vienna, VA, which he chose because after our meeting he was going across the street to a diner for his weekly meeting with friends over lunch. I could see he really enjoyed staying connected with this group and the camaraderie it offered. I learned over the years that was typical Roy, enjoying connections and friendships.
So we planned a few classes. One was a lecture/presentation called Take Your Photography To The Next Level. I sat in on it and realized how committed he was to sharing his knowledge and helping others improve. I also remember how much I learned from him in that one class! We offered that class for many years and I know that everyone who took it benefited from the insight that Roy imparted.
We also planned another really cool class. Roy was active with the C&O Canal and had been inside many of the lockhouses along the canal. He thought it would be pretty cool to get special access to take a group of students to photograph them. Back in 2014, we started offering classes at Pennyfield and Edward’s Ferry Lockhouses and it was always a treat working with him on these. He would take a group upstairs and I would work with a group downstairs and then we will flip-flop. Roy enjoyed helping people share the history of Canal life through their photography. See the photo below which one of the students took, I treasure it for the memory. Roy was in his element.
He also taught our Small Studio class to teach students how to set up a small studio in their own homes for portraiture. In fact, Roy took my headshot at his studio after one of those classes and did an amazing job.
 Roy also taught the Waterfalls classes at Great Falls. In fact, he had written 2 books on the Falls and was happy to help students capture amazing images of it. I would occasionally assist with these and afterwards, Roy would often invite folks to join him at a nearby coffee shop, he just really enjoyed being with like-minded people, conversing and getting to know them.
Roy would call me from time to time and say, “Marie, it’s time for our Coffee meeting.” We would try to use these to plan classes but most times we got off topic and would just enjoy a fun conversation. Roy was like that.
Roy was special! Not only was he a great instructor, he was kind, caring, generous, down to earth, smart, full of life, and a great friend to many. Anybody who ever knew Roy has to agree they’re better off for knowing him.
As the saying goes, count your blessings, and as sad as we are, having known Roy we can count as a huge blessing!
Our hearts go out to his family that he was devoted to and we’re thankful he was together with them when he passed.
There may be a celebration of life later in the year. We’ll try to make people aware when we know more.
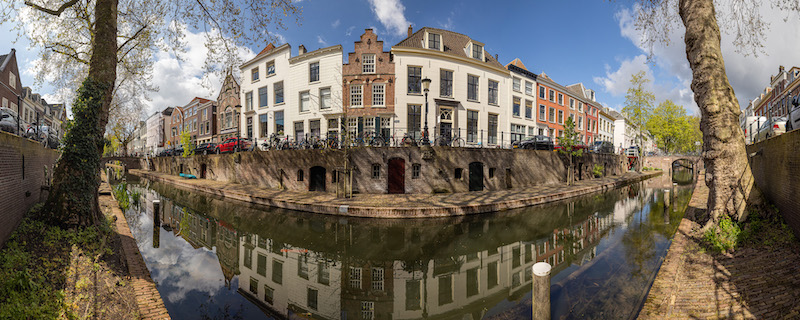
The last photo Roy shared with me. This is where his daughter lives in the Netherlands and Roy and his wife bought the apartment above so they could be close when they traveled to spend time with her and his grandson. He was so pleased with this shot and how he was able to curve the straight canal. As always, Roy was having fun with his photography.
Rest in peace dear Roy!
Shoot Less, Shoot More
January 5, 2023 by Marie Joabar
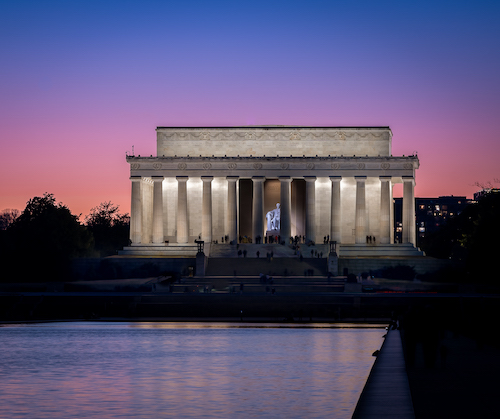 Once upon a time while at a Penn Camera group dinner, we were talking about photography and one of the Penn founders made a comment that has stuck with me to this day.
It was something along the lines of... When we photograph, we should take our time and frame what we really want to capture. We wouldn’t need to take so many extra photos if we took more time before we pressed the shutter button.
At the time, film and digital were both popular and his comment surprised me. In one way, he was a business owner so the more images a film shooter took, the more profitable it would be for the company. And with digital, it would be easy to take extra pictures and delete the ones we didn’t want later.
That was a good 15 years ago and the other day something reminded me of it. Looking at it today, it makes so much more sense than it did then. Along those lines, today I would say to people, shoot less and shoot more.
SHOOT LESS
SHOOT LESS refers to what the Penn Camera owner was saying, take your time, frame with intention and capture what’s in your mind’s eye. If you don’t have an idea of what you want to frame, take some test shots, review them, and then recompose and shoot with intention.
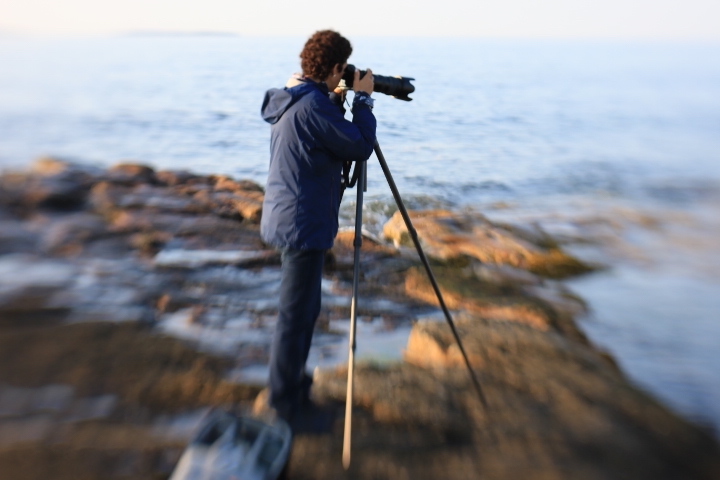 I think we’ll see an improvement in our photography if we take our time, think about what we are photographing, and how we want to convey what we see with our eyes into the image we capture with our camera. Additionally, it makes it so much easier on the backend when there aren’t so many images needing sorting, sifing and deleting.
The biggest benefit though is perfecting our craft. When looking at our images after the fact, we can see how we might have captured them better or we can affirm that we captured them the way we intended. Either way it can be a good learning experience.
SHOOT MORE
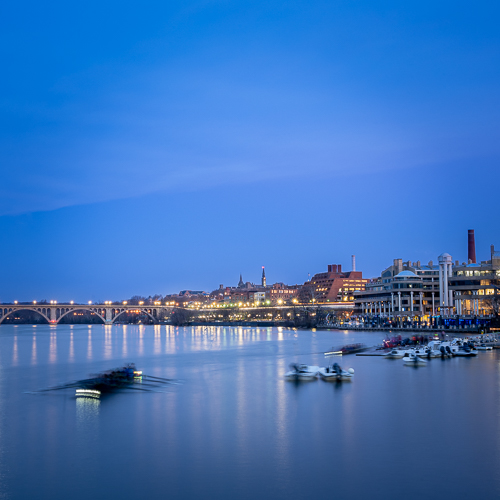 SHOOT MORE refers to getting out there more often and photographing. The more we photograph the better we become.
- We make more mistakes and those mistakes teach us valuable lessons.
- We learn what we like and what we don’t like.
- We improve our vision.
- We perfect our craft.
-We are more inspired and excited for what we can capture.
-And, we have more fun.
Hopefully we can get out a few times each month and enjoy photography. Clearly, it’s easier to do in the warmer weather but even in the cold winter, we should seek out opportunities to photograph. Indoors or out there is plenty to work with. The point is to shoot more often.
As we start the new year, we might be thinking about ways to improve our photography. For me, I’m going to try shooting less and shooting more.
Center photo by Paula Freer
8 Ideas To Capture Everyday Holiday Moments
December 15, 2022 by Marie Joabar
 There’s no doubt this is a busy time of year. Despite that, we should still carve out time for our photography, even if it is just around our home. Here are a few suggestions to make some meaningful holiday photos without a lot of stress, complication or making a big time commitment.
1. Consider 2 important tips;
- Try to always have your camera handy. Leave it out and accessible, someplace (safe) that you can simply grab it and shoot with it. Having it in a camera case in a closet will not give you the spontaneity that having it within reach through out the day will.
- The simple things are just as worthy and fun to capture as the more elaborate scenes or gatherings.
2. Celebrate even the everyday happenings.
In the kitchen, have fun photographing your baking, the countertop covered with ingredients as you prepare your holiday cookies, a steaming casserole, a hearty soup or a mug of hot cocoa.
 3. Around the house
Capture the tree trimmings before they’re put up on the tree, the wrapping paper, scissors and bows before the gifts are wrapped, stuffed shopping bags as you come in from your holiday shopping, lit candles on your dinner table, the poinsettia leaves up close, you get the idea.
4. Think outside the box and get creative in how you frame your shots.
Fill the frame, get close, shoot from many different angles, blur the background then blur the foreground. Try a few slow exposures of the holiday lights or a colorful decoration.
5. Snap candid photos of family members.
Sometime those can be more meaningful than the posed shot or posed group shots. Frame your child looking at the tree or goofing around with a friend or sibling, or a parent or relative quietly sitting reading.
6. Are there pets that can be framed with holiday décor in the background?
7. Look for colorful or festive decorations in your neighborhood.
Take a leisurely stroll with your camera to capture them. After a rain, look for the holiday scenes with reflections for double the color.
 8. The point is to celebrate both your photography and the holidays, look for ways to enjoy both!
We don’t necessarily need to go somewhere or make an elaborate setup to capture the season, seek out the many opportunities right in front of you in your home and your neighborhood.
Keep it simple, fun and stress free.
Wishing you and your families a beautiful holiday season filled with images to be treasured now and thru the years.
A Year of CPC Photography
November 20, 2022 by Marie Joabar
Join us for the YEAR! Stay immersed in photography throughout the year with monthly themed topics, 4 in-person meetups, and 12 exciting presentations by various CPC instructors!
We're so excited to offer this new program and it's such a great way to stay 'focused' on your photography and grow with each of the topic presentations we'll offer.
Each month we'll have a different instructor presenting on a new topic which will include an image rich presentation covering tips, techniques, ideas and inspiration for capturing the themed topic. Unlike past Year programs which were led by a single instructor, the 2023 Year program offers students the opportunity to learn from many different instructors.
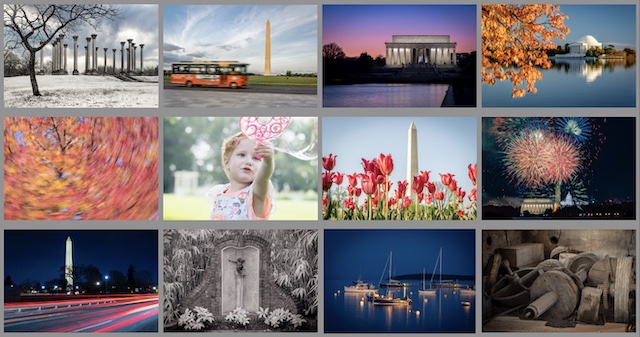
FOR MORE INFORMATION OR TO REGISTER
All skill levels are welcome from the novice to the advanced. It will be interesting to see how each student thinks about the topic and chooses to capture it. That's the beauty of the program, seeing each person's interpretations of the month's topic.
Throughout the month, students can upload their images to an image sharing site and at the end of each month, students will meet with that month's instructor via Zoom for an image review.
Topics can include:
- The 30 Day Challenge - Jumpstart your photography with 30 days worth of photo ideas
- Seeing Great Photos In The Urban World – Cityscapes, architecture, composition tips, and more
- Family And Portrait Tips – from the candid to the posed
- Capture And Edit In Black and White – Learn how to see in monochrome
- Macro Photography From Flowers to Miniatures – Seeing details and texture up-close
- Fun With Slow Shutter Speeds – Capture drama, excitement and creative fun with slow shutters speeds/long exposures and camera movement
- Landscape Compositions - Framing with leading lines, curves, negative space, using odds, rule of thirds, symmetry, low key/high key, and so much more.
- Shooting With “Abandon” – Finding beauty in old, neglected and decrepit subjects
- Capturing Exciting And Colorful Night Scenes – From the urban streets to creatively lighting subjects in the night
- Shooting Exciting Fireworks – Settings, techniques, location ideas, and editing tips
- And more!
In addition to the monthly presentations and image reviews, we will have 4 in-person meetups throughout the year so we can come together as a group and explore exciting areas and photographic techniques.
Zoom sessions will be held on the second Wednesday of each month from 7-8:30pm.
Enjoy the Year of CPC Photography with a variety of CPC instructors; Marie Joabar, Corey Hilz, Michael Koren, Judy Graham, Aaron Clamage, Laura Hatcher, Beth Haubach, Roy Sewall, Lewis Katz, and others.
FOR MORE INFORMATION OR TO REGISTER
Mid Atlantic Photo Visions 2022
October 27, 2022 by Marie Joabar
 Mid-Atlantic Photo Visions is excited to bring you another great event this year! They are virtual again this year and expect to be back with the full in-person event with the expo in 2023.
FIND ALL THE DETAILS ABOUT THIS EXCITING EVENT HERE!
Juried Images Posted
Images juried into Mid-Atlantic Photo Visions 2022 are now posted for both the Nature and Photo Art Categories. View 2022 Juried Photos
Event Speakers
All presentations will be recorded and available for ticket holders for 6 months after MAPV 2022. As a bonus MAPV 2022 is offering 5 free Fundamentals of Photography sessions leading up to our big event. One session per night beginning on Sunday, October 30, 2022 and ending on Thursday, November 3. All sessions are free but you must register for each of the Fundamentals sessions when you purchase tickets for MAPV 2022.
EVENT SCHEDULE
Pre-Event Educational Sessions
These sessions are free and registration is required.
Sunday, October 30, 2022, 7:00 – 8:00 p.m. (EDT)
Marie Joabar: “The 10 Best Features of Lightroom Classic”
 Monday, October 31, 2022, 8:00 – 9:00 p.m. (EDT)
Marie Joabar: “The Magic of Night Photography”
Tuesday, November 1, 2022, 7:00 – 8:00 p.m. (EDT)
Michael Koren: “Powerful Phone Photography Editing with Snapseed“
Wednesday, November 2, 2022, 7:00 – 8:00 p.m. (EDT)
Emily Carter Mitchell – “Introduction to Bird Photography“
Thursday, November 3, 2022, 7:00 – 8:00 p.m. (EDT)
Wayne Wolfersberger – “Great Photography In Our National Parks“
 Main Event Sessions
These sessions are discounted for club members and registration is required.
Friday, November 4
4:00 – 5:30 p.m. (EDT) – Marc Adamus: “Finding the Third Dimension“
6:00 – 7:30 p.m. (EDT) – Sharon Tenenbaum: “Architectural Photography as Fine Art”
8:00 – 9:30 p.m. (EDT) – Georgina Steytler: “The Art of Using Light Creatively in Bird Photography”
Saturday, November 5
1:00 – 2:30 p.m. (EDT) – Ian Plant: “Creating Compelling Visual Designs”
3:00 – 4:30 p.m. (EDT) – Huibo Hou: “Personal Expression in Black and White Photography”
5:00 – 6:30 p.m. (EDT) – Joshua Cripps: “Stop Being a 1-Dimensional Photographer!”
Sunday, November 6
1:00 – 2:30 p.m. (ET) – Richard Bernabe: “Wildlife Photography Tactics and Strategies from Around the World”

3:00 – 4:30 p.m. (ET) – Julieanne Kost: “How to Increase a Photograph’s Impact in Lightroom Classic”
5:00 – 6:00 p.m. (ET) – Awards Ceremony – This session is complimentary
We hope you can join in for this year's exciting event!
Fun Times at Our Arches and Canyonlands Photo Workshop
October 6, 2022 by Marie Joabar
Our September Arches and Canyonlands Photo Workshop was simply amazing. We had such a wonderful group of people and it was so much fun spending time with them exploring this unique area.
The weather was perfect, the light was beautiful, and gorgeous scenery was everywhere we looked.
Thanks to Emily Carter Mitchell for leading the workshop with me and all the work planning it! Emily’s knowledge of the area and our time scouting it a few days prior to the workshop made all the difference in knowing where to go, when the light would be great, and getting the students to the right place at the right time!
 The geology of this region is so unique. Taking millions of years to form, we saw layers upon layers of rock, stone and sand. Weather, erosion, and water have worked to carve out unique rock formations, deep ridged canyons, beautiful arches, towering buttes, and more. If you ever have the chance to visit this area, you won’t be disappointed.
In fact, I had never been here and have to confess it wasn’t my first choice for a workshop. I enjoy mountains, lakes and greenery so visiting a desert location of rocks and scrub bushes didn’t excite me much. However, once I was there I was overwhelmed by the beauty and uniqueness the area offered. I’m a total convert and can’t wait to going back again hopefully next year (stay tuned).
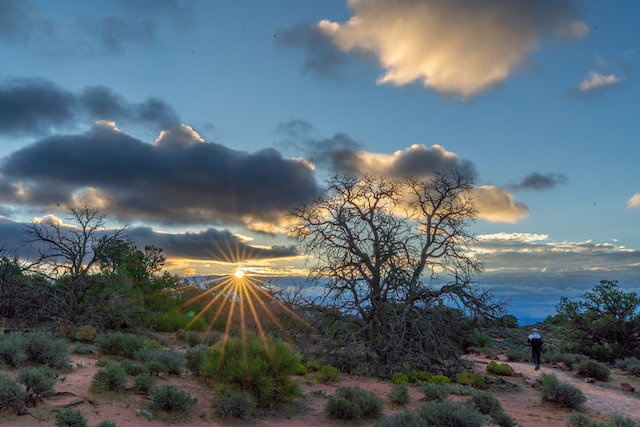 Each day we got out early to capture the soft morning light and then take a break mid-day. We’d be well rested for our afternoon/evening excursions and were able to get in a couple Milky Way shoots too.
Throughout the workshop it was wonderful to see the participants making connections and becoming friends and our group dinners together were always a fun affair!
Watch for our 2023 workshops to be listed later in the year. For now, enjoy seeing Arches and Canyonlands through our lenses. Check out the amazing student photos on our Showcase!
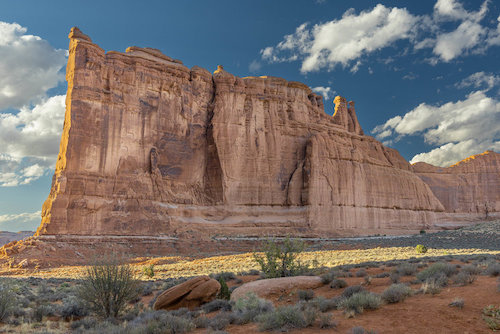

Photo credits in order listed.
Group Photo At Arches
Gladys Sewell, Green River Overlook
Suma Thonpadu, Sunrise
Mark McDonough, The Courtyard
Jan De Regt, Open Road
Susan Smigocki, Milky Way
Troy Meyer, Park Avenue
Cathy Underwood, Perspective
There are so many more and we just couldn't fit them all in.
See all the rest on the Arches/Canyonlands Student Showcase.
Secrets for Shooting Great Compositions
August 24, 2022 by Timothy Cooper
 Good composition is the ingredient that separates the snap shooter from the artist. It’s the difference between merely documenting a scene and providing your viewer with your personal interpretation of that scene. While learning the basics of leading lines and the rule of thirds is somewhat easy, creating meaningful images using these rules is a lifelong endeavor. Successful composition is always a delicate balance between perception, expression, and execution.
One of the biggest obstacles to overcome, is the blending of the aesthetic and the technical. While both are important, it’s the aesthetic that demands more of our attention. Too often we get caught up in worrying about the exposure, the depth of field or our shutter speed. These need to become second nature so you can focus your attention on the interpretation of the scene before you. Take the time to practice. Work with your gear until it becomes an extension of your hands. Removing the technical concerns allows your mind to focus on the scene before you and helps to crystallize your vision.
 PERCEPTION - Begin by closely examining your scene. What is your main subject? Try not to name a physical aspect such as a portrait, a mountain, or a monument, but rather why you want to photograph it. The main subject of the portrait might be the person’s expression, their clothing or maybe their attitude. Those are the real subjects, not the person themselves. Remember you are actually photographing an idea or a feeling, not the actual subject.
EXPRESSION - The next step is to deciding how your want your viewer to experience this subject. This is your expression. Do you want your composition to be bold? Make the main subject undeniable. Larger than life. Remove any subjects that do not directly support the concept. Does your idea demand subtlety, complexity? Work to include supporting material that does not overwhelm your subject but enhances it instead.
 EXECUTION - The nuts and bolts.
- Avoid trying to find the image first in your viewfinder. Set your camera aside and explore different vantage points and angles before determining the best camera position. Move your feet! Stand up. Crouch down.
- Place the subject within the frame using the rule of thirds or proper horizon lines.
- Determine which focal length will best capture the photo you envision.
- Consider whether you have too much or too little depth of field and make sure your most important subject is sharp.
- Consider the affects of shutter speed on motion in the scene.
- Determine if high contrast or distracting bright areas are competing with your main subject.
- Practice border patrol. Take the time to run a quick look around all edges of your frame before snapping the shutter. Often we are so engrossed in the subject matter that we forget to analyze the rest of our scene. Watch for lines going out the corners of the photo and small items located near the edges of the frame as distractions from the main subject.
- When photographing people, shoot a lot of frames. Communicate with your subject.
- When photographing scenes, shoot a lot of frames. Vary your distance to the subject and explore various vantage points.
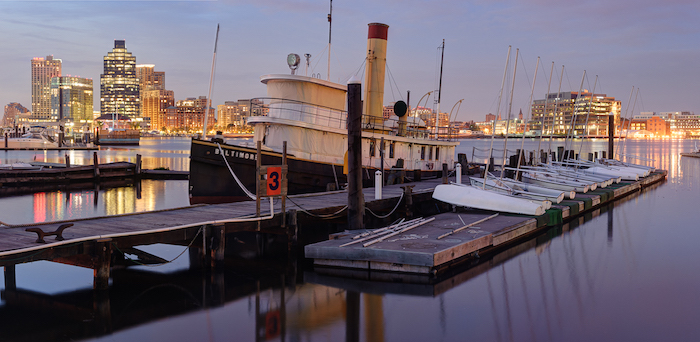
Enjoy your time in the field shooting! The more you practice and shoot, the stronger you'll get with your compositions.
Fun with Fair Photography
August 4, 2022 by Marie Joabar
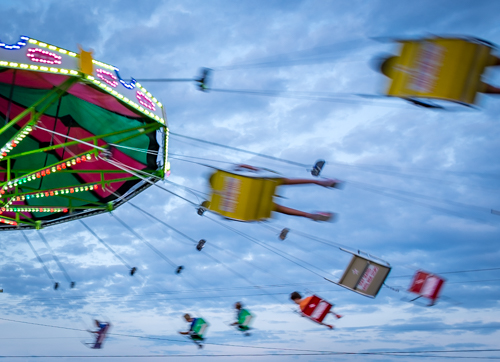 It's that time of year, Fair Season! From August thru September there's a fair to photograph every single weekend. The shutterbug will find endless opportunities during the day or night, indoors or out; from colorful arcades, neon-lit carnival rides, tractor pulls, farm animals, livestock auctions, harvest contests, Miss Fair pageants, kiddie contests, to plenty of street photography scenes.
14 local area fairs are listed at the bottom of this article so plan to enjoy one near you and have fun photographing it.
Daytime Fair Shooting Tips:
 Explore the fair during the day and capture folks enjoying themselves eating ice cream, watching the pig races, horse and pony shows, or antique car parade, or capture images of your own children on the kiddie rides or at the petting zoo.
- For your outdoor landscape shots, consider composing without the sky if it's super bright, or change your angle (if possible) to get the sun behind you.
- Speaking of bright sunny days, don’t forget the Circular Polarizing filter. These filters remove glare, make your reds, greens and blues more saturated, add contrast and overall just improve the look of your outdoor scenes on sunny days.
- If you struggle to see your LCD screen in the bright light, look for a Hoodman Loop. It’s my favorite accessory for image review on bright sunny days. https://shop.hoodmanusa.com/category-s/128.htm
- A zoom lens is going to be the most versatile and will give you plenty of options.
- A wider lens, anything from 35mm or wider, is good to capture an entire scene such as the view of the fair’s main drag or the wide range of the midway.
- The longer telephoto lenses allow you to zoom in tight on a specific subject and isolate it from the background. They’re ideal for candid of people. 105mm, 135mm or greater are helpful.
- A prime lens (any lens that doesn't zoom) will help you indoors in low light as they have such wide apertures to gather light.
- No need for the tripod during the day, it will only get in yours and other’s way and it’s bright enough to hand-hold your camera.
Indoors
- When the mid-day light is too harsh, head indoors to the Livestock barns. These offer so much to photograph from the young farm kids with their animals to the animals themselves.
- Don’t bother using the on-camera flash in the barns, most likely it will be too bright and spoil the “look” of the scene. Instead, set your ISO to 800, 1600 even 3200 depending on how dim it is.
Nighttime Fair Shooting Tips
- Shooting at night is a ton of fun. Plan to capture your favorite night scenes at twilight just after sunset when the sky is a beautiful blue and the artificial lights stand out like gems.
- Best results can be achieved with the manual exposure settings and slow shutter speeds are the most exciting! In Manual mode, set the ISO to 100, set the aperture to f22 and then just play with the shutter speed to give you the motion blur that you want.
- Try shooting the ferris wheel or midway rides for 1 second to several seconds and capture the motion of the lights. The photo with the Funnel Cakes sign was captured at ISO 50, aperture f22 and shutter speed of 5 seconds.
- Long exposures require a tripod together with a cable release or self-timer. (Monopods won’t work.)
- Find a location that offers you room to set up your tripod without blocking people’s way.
- Fill the frame with the color.

- Get shots of people enjoying the midway.
Many of the fairs hold a photography contest, check out their website to find out more about entering your best shots for the following year.
If you attend any of the fairs, we’d love to see what you capture, send us your faves or just tag us. We're on Facebook, and on instragram
List of 2022 Local Area Fairs by Date
- Aug 4-7 - Fairfax County 4-H Fair & Carnival Herndon https://www.fairfaxcounty.gov/parks/frying-pan-park/4-h-fair
- Aug 6-13 - Howard County Fair,West Friendship, MD https://howardcountyfairmd.com/
- Aug 12-20 - Montgomery County Agricultural Fair, Gaithersburg, MD https://mcagfair.com/
- Aug 12-20 - Prince William County Fair, Manassas, VA https://pwcfair.com/2022-fair/
- Aug 14-20 - Clarke County Fair, Berryville VA https://clarkecountyfair.org/clarke-county-fair/schedule-of-events/
- Aug 17-21 - Arlington County Fair, https://www.arlingtoncountyfair.us/
- Aug 25-Sept 11 - Maryland State Fair, Timonium, MD https://www.marylandstatefair.com/
- Sept 11 - DC State Fair, Washington, DC https://dcstatefair.org/
- Sept 14-18 - Anne Arundel County Fair, Annapolis, MD http://www.aacountyfair.org/
- Sept 15-18 - Charles County Fair, La Plata, MD https://www.charlescountyfair.com/
- Sept 16-24 - The Great Frederick Fair, Frederick, MD https://www.thegreatfrederickfair.com/fair/
- Sept 22-25 - St. Mary’s County Fair, Leonardtown, MD http://www.smcfair.somd.com/
- Sept 23 - Oct 2 - State Fair of Virginia, Doswell VA (North of Richmond) https://www.statefairva.org/
- Oct 7-9 - Waterford Fair, Waterford VA https://www.waterfordfoundation.org/event/78th-waterford-fair
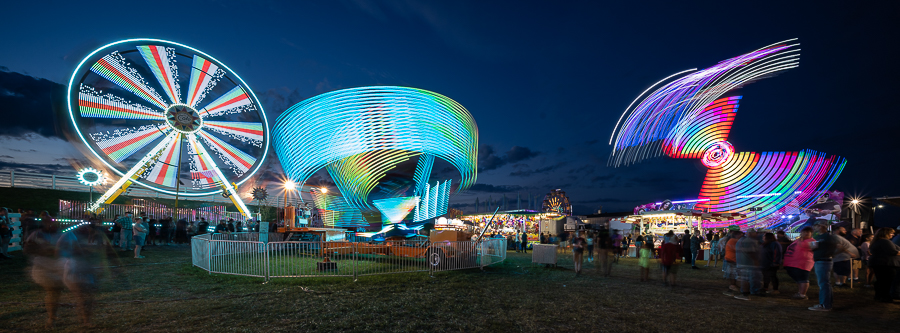
Taking Charge Of Your Focus Settings
July 7, 2022 by Marie Joabar
When we buy a new camera, the auto focus is typically set so the camera chooses what to focus on and also how to focus whether to focus at a single distance or to follow a moving subject.
At our classes and in our Private Sessions, we find many people struggle to achieve sharp focus. They’re frustrated when the focus system is not working the way they need it to so let’s take a look at the settings and learn why.
The two auto focus settings that are important to understand are focus area; what to focus on and focus mode; how to focus - single distance or continuous as the subject moves.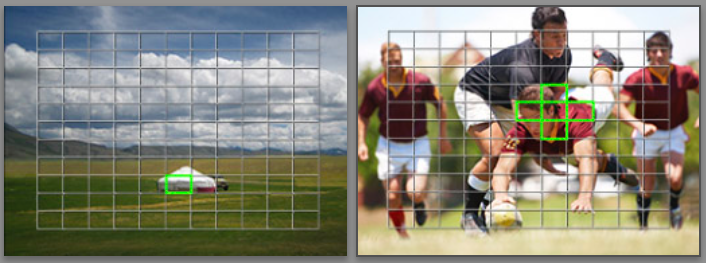
Of the two, the FOCUS AREA is the most important.
This is the setting where you choose what you want to focus on; the closest eye, the flower in the front of the garden, your child with the ball, etc. When the camera chooses, it may or may not be on the subject you wanted. Typically, it will choose the subject closest to the camera. (If while focusing, you see several boxes or dots light up, this indicates the camera is in control of focus and it is showing the areas it is focusing on.)
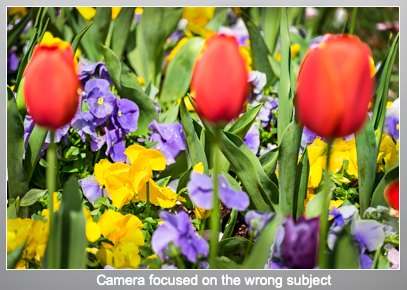
Look in your camera manual for FOCUS AREA and see how you can change it from the manufacture default setting to a single point that you can reposition. You could also try using a selectable zone that you can move around. This can work well for subjects moving thru the frame (with your Focus Mode set to Continuous).
The chart below describes the Focus AREA options found in most cameras. (Wide might be called Full and Flexible spot might be called Single Point.)
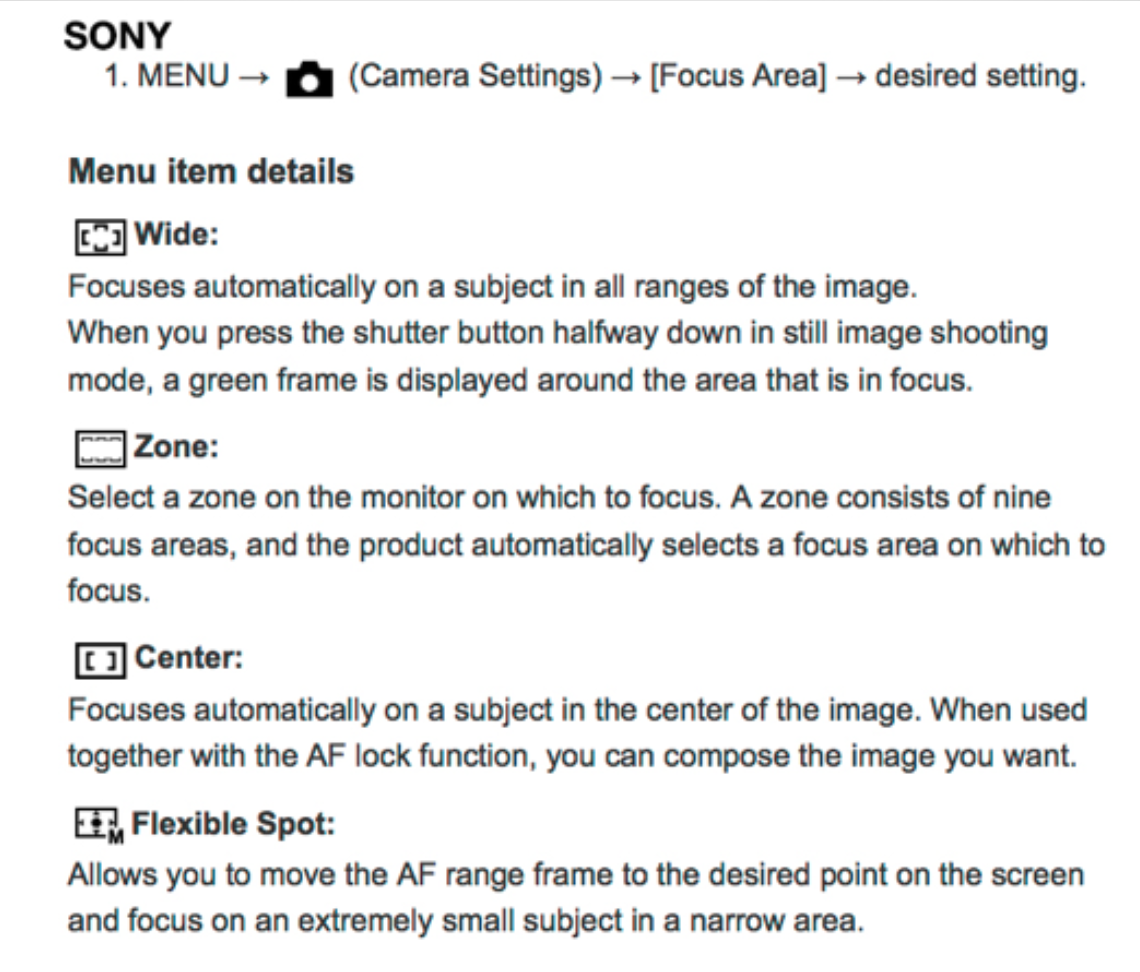
The other important focus setting is the FOCUS MODE.
- This can be set to focus at a single distance AF-S on most cameras, One Shot on Canons.
- It can also be set to continuously track your subject as it moves. AF-C on most cameras, AI Servo on Canons.
- It can also be set to Auto in which it will jump between single distance focus and continuous focus based on what it reads in the frame. AF-A or AF-F on most cameras, AI Focus on Canons.
Look in your camera manual for FOCUS MODE and see how you can change it from the manufacture default setting of Auto Focus-Auto to the setting that will work best for what you're photographing. You'll see there are many choices for the continuous focus setting and they're based on the movement of the subject. Any type of action shooter should definitely read up on this section and get familiar with thier options.
The chart below describes the Focus MODES found in most cameras (not Canons).
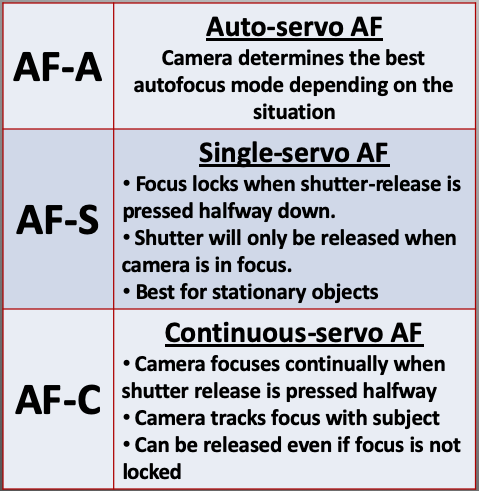
The chart below describes the Focus MODES found in Canon cameras.
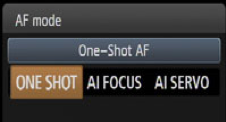
Putting it in Practice
- If you're shooting stationery subjects, a portrait, flowers, cityscapes, night scenes, architecture… anything that is not moving around, try using the selectable point as the focus area and single distance (AF-S) as the focus mode.
- If you are photographing subjects that are moving such as birds in flight, a soccer game, kids playing on a field, a dog catching frisbees, etc, chose the focus area as a single focus point or zone and place that on the moving subject, and set the focus mode to continuous so the camera will follow it.
Of course there are many other settings involved in the focusing systems in our cameras; face and eye detection, different settings to optimize tracking with the continuous focus mode, the list goes on but at the very least, control where and how your camera focuses as a starting point.
If there is one section of our camera manual that we should all read, it’s the Auto Focus section. Today’s cameras offer robust focusing systems and understanding the capabilities of your camera will help you get the best from it and the sharpest focus for what you’re shooting, you may be surprised at all of the focusing options you'll find. It used to be that cameras offered only Auto Focus or Manual Focus but those days are long gone and now we have super sophisticated focusing that we can take advantage of.
Note - Focus and exposure are independent from each other. You can use auto or manual focus regardless of whether you’re shooting in an auto exposure mode or a manual exposure mode.
Photo Books For Summer Reading
June 15, 2022 by Marie Joabar
Summer and vacation season are here so whether you're spending time poolside or traveling, throw a photography book in your bag to pick up a tip or two or just for a little inspiration.
Here are some of our favorites. Whether you’re an amateur or professional, photograph people or landscapes, we hope you find some of these books worth the read.
HOW TO Books
 THE SECRETS TO AMAZING PHOTO COMPOSITIONS: 83 COMPOSITION TOOL FROM THE MASTERS
By Mark Silber Published by Mango
No matter what kind of camera or smartphone you’re using, you can take your photography to the next level by learning composition tools and secrets known to the masters of the art. There’s a common misconception that composition is an ambiguous talent and only certain people have a natural gift for it, but the truth is that composition involves a set of skills that you can master.
What you'll learn from this book: - How to take better photographs today by learning the essential tools to composition - Quick and easy to follow “recipes” for composition at your fingertips - The secrets of composition from the masters of classical art and photography - Various tips and strategies for using photos to tell a visual story, and examples to making these tools your own.
THE VISUAL TOOLBOX - 60 Lessons for Stronger Photographs
 By David Duchemin Published by New Riders
This book is photographer David duChemin’s curriculum for learning not just how to use a camera–but how to make stronger photographs. He has developed 60 lessons, each one a stepping stone to becoming more proficient with the tools of this art, and the means to create deeper visual experiences with your images. David introduces you to the technical side of the craft but quickly moves on to composition, the creative process, and the principles that have always been responsible for making great photographs; he shows you these principles and invites you to play with them, turn them on their heads, and try a different approach to create beautiful, compelling images with your camera.
Features action-oriented micro-chapters designed to improve your photography immediately. - Includes explanations of 60 concepts with an assignment for nearly every chapter. - Covers such topics as balance, using negative space, exploring color contrast, waiting for the moment, learning to incorporate mood and motion, and much more.
 UNDERSTANDING EXPOSURE: How To Shoot Great Photographs With Any Camera (Fourth Edition)
By Bryan Peterson. Published by Amphoto Books
Understanding Exposure has taught generations of photographers how to shoot the images they want by demystifying the complex concepts of exposure in photography. In this newly updated edition, veteran photographer Bryan Peterson explains the fundamentals of light, aperture, and shutter speed and how they interact with and influence one another. With an emphasis on finding the right exposure even in tricky situations, Understanding Exposure shows you how to get (or lose) sharpness and contrast in images, freeze action, and take the best meter readings, while also exploring filters, flash, and light.
With all new images, as well as an expanded section on flash, tips for using colored gels, and advice on shooting star trails, this revised edition will clarify exposure for photographers of all levels.
LANDSCAPE PHOTOGRAPHY: FROM SNAPSHOTS TO GREAT SHOTS
By Rob Sheppard. Published by Peachpit Press
 For photographers interested in landscape photography, this guide will help you conquer the fundamentals and take amazing outdoor shots. Pro photographer Rob Sheppard starts with the basics–composition, light, and perspective–and describes how to connect with your scene. He covers all the key camera features that affect your image, including how changing focal lengths alters your perspective and the aperture’s direct correlation with depth of field. Once you’ve captured those shots, Rob takes you through simple post-processing steps in Lightroom, Photoshop, and Photoshop Elements.
This guide is for beginning-to-intermediate digital photographers to understand the basics and bring their own unique artistic expression to landscapes and outdoor shooting.
UNDERSTANDING PORTRAIT PHOTOGRAPHY - How To Shoot Great Pictures of People Anywhere
 By Bryan Peterson. Published by Watson-Guptill
Great portraits go beyond a mere record of a face. They reveal one of the millions of intimate human moments that make up a life. In Understanding Portrait Photography, renowned photographer Bryan Peterson shows how to spot those “aha!” moments and capture them forever. Rather than relying on pure luck and chance to catch those moments, Peterson’s approach explains what makes a photo memorable, how to spot the universal themes that everyone can identify with, and how to use lighting, setting, and exposure to reveal the wonder and joy of everyday moments.
This updated edition includes new sections on capturing the perfect selfie, how to photograph in foreign territory while being sensitive to cultures and customs, how to master portraiture on an iPhone, and the role of Photoshop in portraiture. Now with brand-new photography, Understanding Portrait Photography makes it easy to create indelible memories with light and shadow.
STREET PHOTOGRAPHY ASSIGNMENTS: 75 REASONS TO HIT THE STREETS AND LEARN
By Valerie Jardin. Published by Rocky Nook
 ...Street photography has experienced a remarkable resurgence in recent years. You can be roaming the streets of a classic urban environment (New York, Paris, Tokyo) or on a simple photo walk around a quiet neighborhood―it has never been more popular to pursue the art of capturing those candid, fleeting moments that happen throughout the day, of freezing a moment in time and transforming the ordinary into an extraordinary photograph.
But learning to see light and moment, to make quick decisions, and to nail a photographic composition are all crucial skills you must master in order to become a good street photographer. Photographer, instructor, and author Valerie Jardin has been teaching photographers how to take better photographs for years, and in Street Photography Assignments: 75 Reasons to Hit the Streets and Learn, she provides dozens of prompts for you to practice.
LIGHT ― SCIENCE & MAGIC: AN INTRODUCTION TO PHOTOGRAPHIC LIGHTING, 6th Edition
 By Fil Hunter, Steven Biver, Paul Fuqua, Robin Reid. Published by Routledge
Photographic lighting is a topic that will never go out of style, no matter how sophisticated cameras and other technology get. Even with the most high-tech gear, photographers still need to put a lot of thought and vision into lighting their photographs in order to get great results. Mastering this key skill has the power to dramatically and quickly improve your photographs as well as your efficiency.
This book provides you with a comprehensive theory of the nature and principles of light, with examples and instructions for practical application. Featuring photographs, diagrams, and step-by-step instructions, this book speaks to photographers of varying levels. It provides invaluable information on how to light the most difficult subjects, such as surfaces, metal, glass, liquids, extremes (black-on-black and white-on-white), and portraits.
DOCUMENTARY & INSPIRATION BOOKS
 UNSEEN - Unpublished Black History From the New York Times Photo Archives
By Dana Canedy, Darcy Eveleigh, Damien Cave and Rachel L. Swarns
Published by Black Dog & Leventhal
Hundreds of stunning images from black history have long been buried in The New York Times archives. None of them were published by The Times until recently. UNSEEN uncovers these never-before published photographs and tells the stories behind them.
NATIONAL GEOGRAPHIC THE PHOTO ARK: ONE MAN'S QUEST TO DOCUMENT THE WORLD'S ANIMALS
By Joel Sartore. Published by National Geographic.
This book has been around for a while but is listed on Amazon right now for just $19.
 The lush and unique photography in this book represents National Geographic's Photo Ark, a major initiative and lifelong project by photographer Joel Sartore to make portraits of the world's animals—especially those that are endangered. His powerful message, conveyed with humor, compassion, and art: to know these animals is to save them. This book showcases his animal portraits: from tiny to mammoth, from the Florida grasshopper sparrow to the greater one-horned rhinoceros. Paired with the eloquent prose of veteran wildlife writer Douglas Chadwick, and an inspiring foreword from Harrison Ford, this book presents a thought-provoking argument for saving all the species of our planet
THE NEW ART OF PHOTOGRAPHING NATURE: AN UPDATED GUIDE TO COMPOSING STUNNING IMAGES OF ANIMALS, NATURE, AND LANDSCAPES
By Art Wolf and Martha Hill
In this fully revised edition, master photographer Art Wolfe and former Audubon photo editor Martha Hill team up to explain the art of composing images of enduring beauty. Against a backdrop of more than 250 photographs of nature, wildlife, and landscapes, they share insights and advice about what works and what doesn’t, and how small changes can take an image from ordinary to extraordinary. Throughout, all-new tips from digital imaging expert Tim Grey show readers how to make the most of digital technology, whether by choosing the right color space, understanding sensor size, or removing distracting elements in post-processing. The result is an invaluable collection of expert advice updated for the modern age.
LOCAL
 GREAT FALLS AND MATHER GORGE
By CPC instructor, Roy Sewall
"Great Falls and Mather Gorge" is the definitive, in-depth look at the spectacular Great Falls area on the Potomac River, including the two adjacent National Parks: Chesapeake and Ohio Canal National Historical Park in Maryland and Great Falls Park in Virginia. What makes the book unique is that it concentrates on just one square mile - a half-mile wide swath along two miles of the river. This wilderness area is a diverse wonderland of river scenery, complete with rare plant life, wildlife, historic structures, world-class whitewater paddling, rock-climbing, and other recreational activities. All of this is easily accessible to people in the Washington, D.C. metropolitan area. Also see Roy's first book, OUR POTOMAC. Whether you are a long-time visitor to Great Falls or a newcomer, the photographs, map, text, and captions in both these books will educate, surprise, and inspire you.
Enjoy Your Summer and Happy Reading!
Note: The descriptions listed with the books are provided by the publisher.
Creative Captures with Camera Movement - Swipes, Swirls, Zooms and More
May 19, 2022 by Marie Joabar
Photographing with intentional camera movement has become so popular and at our classes we’re often asked how to do it. It’s a ton of fun so if you haven’t already tried it, I encourage you to give it a shot!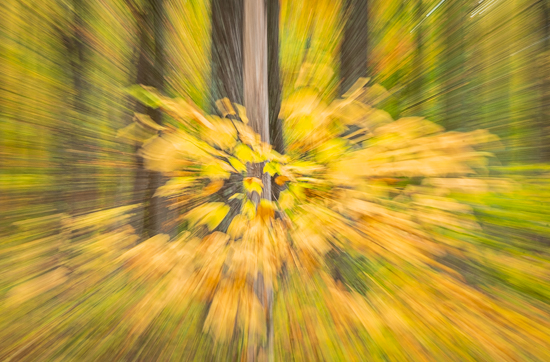
In a nutshell, we’re using a long exposure and moving the camera while shooting. This gives you a very creative and abstract looking image.
Many years ago my good friend and one of our instructors, Karen Messick, showed me how to do this. We were in a beautiful forest in West Virginia and after a few vertical swipes framing the tall trees, I was hooked. Years later, I took a workshop with Bryan F. Peterson and I learned how to shoot swirls (which is now my favorite) and also learned blending Multiple Exposure of the same scene. To this day I still think of Karen and Bryan whenever I am shooting with these techniques. 
These techniques help me to mix things up and exercise the creative side of my brain. And I love sharing it at my classes. Students love it and are always so excited to see how creative they can make their photos look.
- A Swipe is the practice of moving your camera up or down or sideways while exposing. This gives you a linear look.
- With Zooms, you hold your camera still but turn the zoom ring on your lens while exposing. This gives you a circular look.
- A Swirl is when you rotate your whole camera, giving you a spinning look.
- A Jiggle is just that, jiggle the camera while exposing for an impressionistic painterly look.
- Using Multiple Exposures is another technique that can be used to convey movement - take multiple exposures of the same scene, with each frame slightly shifted from the previous one as show in the image above.
Let’s look at it in more detail.
Exposure Settings
 Long shutter speeds are key as you need enough time to be able to move the camera. Anywhere from 1 second to 4 seconds works well. Depth of field is not important because most of the scene will be blurred anyway so just use the aperture to control the light. During daylight we may need to use f22 to control it. Additionally, with a long shutter speed, you may need to use the lowest ISO setting depending on the brightness of your scene.
For Multi-Exposures, you expose as you would normally, you don't need a long exposure time for these. Expose as if you were taking a normal hand-held shot.
Filters Can Help
Long exposures in daylight can be challenging because we risk overexposure. Using a circular polarizing filter will help to take away some light (about 2 stops) and that may just be enough but if not, then a neutral density filter (ND) will definitely do the trick. ND filters are available in various degrees of density from 1 stop to 10 stops and it's always good to have a couple of them in your bag.
Techniques
ZOOMS – Press the shutter button while turning the zoom ring on your lens. You may or may not want to zoom the full range of your lens as you might include more in the frame than you want. Conversely, you may not capture enough of the scene and may need to zoom wider. Take a few test shots and decide if you should zoom less or more. It’s helpful to start turning lens before you actually fire the shutter. This will help you to move more fluidly and avoid jerking the camera.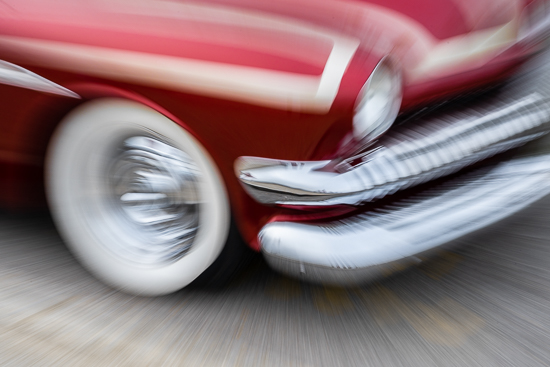
SWIPES – Expose while moving your camera up, down or sideways. How far up or down you move your camera depends on what you want in the frame. If you have a bright or dark area that would be distracting, stop the swipe before you get to that part. Start moving the camera before you actually fire the shutter for a more fluid motion. Continue moving after the shutter fires too for this same reason.
For SWIRLS, it’s good to fill the frame with what you want in the shot and then swirl the camera around staying on the subject. Again, begin moving the camera a little before you actually fire the shutter for more fluid movement.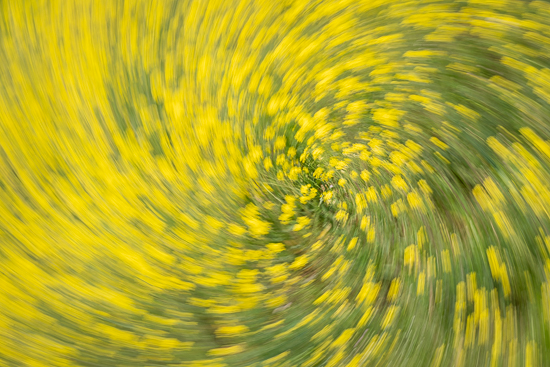 With JIGGLES, frame the scene you want and then slightly jiggle the camera as you expose. This can be done with 1/15, 1/8, 1/4 or 1/2 a second. Longer exposures might make your photo too blurry so these briefer speeds usually work better.
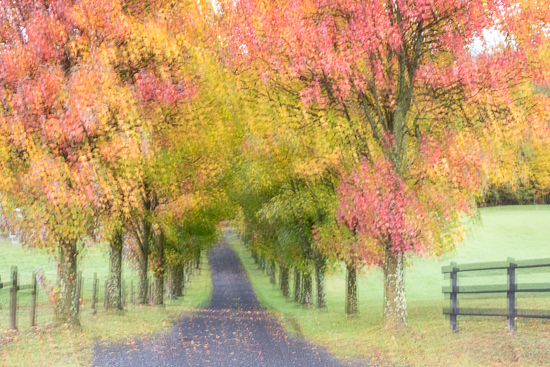
For MULTIPLE EXPOSURES, see if your camera has this setting and if so, dial in how many exposure you want. Try starting with 4 or 5. The camera will blend them together and you'll have a super fun image. If your camera doesn't offer this, capture 4 or 5 frames using the burst mode and then you'll blend those together using Photoshop. 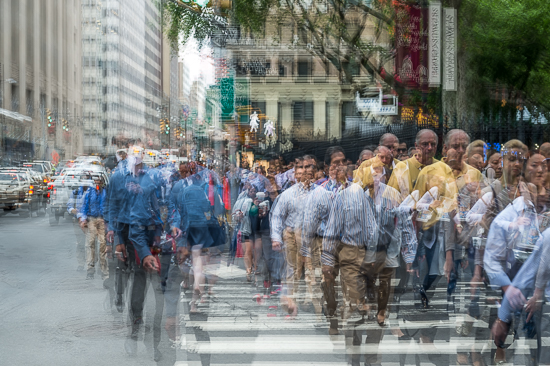
Tripods or Hand Holding
Hand holding is fine for this technique and often times easier but you’ll see that when you’re zooming (as opposed to swiping or swirling) you’ll have a cleaner look with a tripod because only the lens will be moving, not the camera. Try this with and without a tripod and decide if using it gives you better results.
Subjects That Work Best
You can use these techniques with just about any subject: brightly lit night scenes, a city street scene, anything with a repeating pattern, very colorful subjects or scenes for kaleidoscope looking images, trees in a forest, a colorful sky at sunrise or sunset, waves at the beach and the list goes on and on.
So there you have it, a new tool for your photo tool bag. Give these a try and you’ll be capturing photos in a whole new and very creative way!
Image Exposure Settings
1. Yellow Fall Tree - ISO 800 f20 0.5 sec on tripod
2. Bluebells in field - ISO 320 f8 1/10 sec
3. Playground slide - ISO 250 f8 1/8 sec
4. Red car - ISO 200 f22 0.4 sec
5. PInk Crepe Myrtle tree - ISO 50 f22 1.3 sec
6. Mustard flowers - ISO 400 f22 1/20 sec
7. Fall trees on path - ISO 80 f20 2 sec
8. City street people - ISO 200 f5 1/60 sec
9. Trees - ISO 250 f22 1.3 sec on tripod
10. Night fair - ISO 100 f8 2.5 sec on tripod
11. Tulips - ISO 80 f22 0.5 sec
10 Tips for Sunrise and Sunset Shots
April 27, 2022 by Marie Joabar
The weather's getting warmer and it's much easier to be out photographing in the early morning and late evening. If you enjoy sunrise or sunset shots, here are some tips that can help.
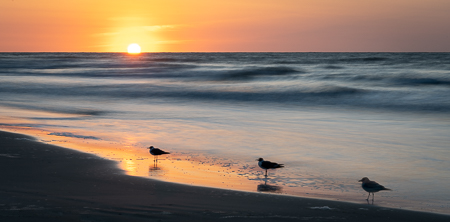 1. PLAN - Scout the location in daylight so you get the lay of the land and know where to set up for sunrise.
2. BEFORE, DURING, AFTER - Plan to be in place about an hour before sunrise so you can capture the beautiful pre-dawn color. Watch as the black sky fades to a deep blue and shortly after, to a pinkish purple, then to a brilliant orange and yellow just minutes before the sun rises. Just after sunrise, turn around and capture the scene in front of you bathed in the warm sunlight.
At sunset, enjoy the warm glow for about an hour prior to sunset and then make sure to stay in place for about 45-60 minutes following sunset to capture the dramatic post-sunset color.
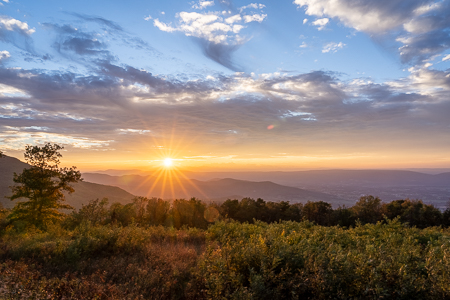 3. COLOR SETTINGS - The White Balance setting in your camera can help accentuate the early morning or evening hues. During pre-sunrise, try Incandescent or Tungsten to blue up the sky. As the sky gets lighter, try Florescent to add a rosy hue. Once the sunrises, try the Daylight setting for natural color. Otherwise, use the Auto White Balance setting.
4. EXPOSURE - Capturing a sunrise and sunset works better in manual exposure mode instead of aperture or shutter modes. In those modes, the camera meter tries to render everything as neutral and as a result, your images may be too dark or too light.
If using an auto mode, see if the camera offers a Sunrise or Sunset setting. This should give you beautifully saturated color in the sky and might help prevent overexposure.
Exposure Settings for Sunrise in Manual Mode (using a tripod):
- Set the ISO to 400 to start and as the sky gets brighter, adjust it to 200 or 100. Reverse the order for sunset.
- Set the aperture to f16 or 22 to capture the sun’s rays like a starburst. If photographing before sunrise or after sunset, adjust the aperture for the depth in your scene. F8 is usually a good starting point.
- Leave the ISO and aperture set, then as the sky brightens, adjust the shutter speed until you have the desired brightness in your image. (Making it faster will make the image darker, slowing it down will make it brighter.)
5. FILTERS - Consider using a split or graduated neutral density filter just before and after the sun rises over the horizon to prevent overexposure in sky. This filter has a dark area on the top half to control the light in the sky and prevent overexposure.
6. DYNAMIC RANGE - Another option is to bracket the exposures to capture all the tones from bright to dark. Take a series of either 3 to 5 photos each 1 stop apart depending on the dynamic range before you (the range from bright to dark). These can later be merged together with editing software such as Lightroom or Photoshop.
7. CLOUDS - Slightly cloudy conditions are ideal and will make your images more colorful. A clear sky is not as colorful or dramatic.
 8. FOREGROUND INTEREST - Having a foreground subject can add interest for the viewer and can help make a stronger composition. A farmhouse, church steeple, an interesting patch of trees, or a city skyline, etc, can be used to strengthen your composition. There are many spots in the area to shoot from, just try to avoid a large tree line, or skyscrapers that might obscure the sun as it rises/sets as you’ll lose the golden rays while waiting.
9. SILHOUETTES - This is a great time to capture striking silhouettes! With the subject backlit, expose for the bright sky and your subject will be underexposed. Subjects that work well for this can be anything with a definable shape, people, buildings, a city skyline, etc.
10. CAMERA MOVEMENT - Get creative, before the sun rises or sets, use camera movement for some fun frames. You’ll need a slow shutter speed so that you have time to move the camera while exposing. Depending on how bright it is, a neutral density or polairing filter may be necessary to prevent overexposure. 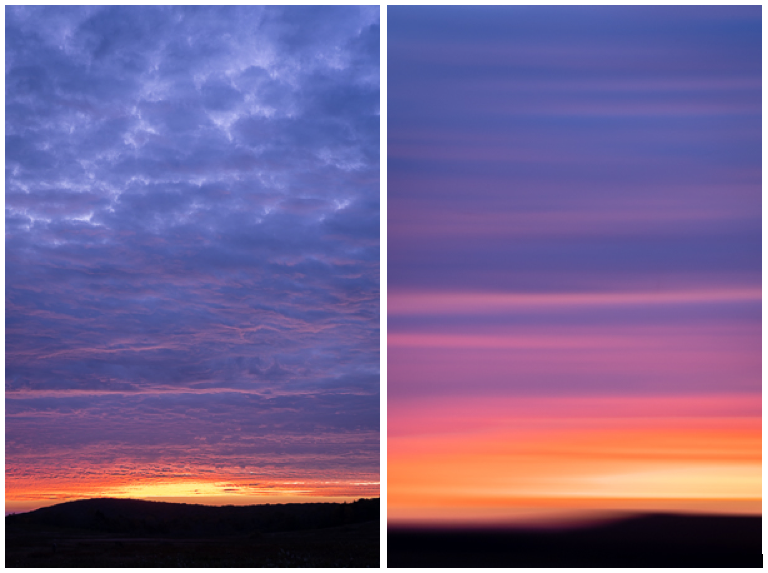 The image on the right (above) was shot during a 1 second exposure while moving the camera sideways.
11. APPS - Use an app such as The Photographers Ephemeris (TPE) or Sun Seeker. TPE shows the direction of the sun rise/set based on your chosen location so it helps you plan the best spot to shoot from. It also tells you the twilight, sunrise and sunset times.
As with any type of photography, the more you practice the stronger you'll get. Plus, there's nothing like learning from your own personal experiences so whether your photos are good or just okay, are winners or mistakes, keep at it and continue learning and perfecting!
Our Favorite Outdoor Spots To Photograph In The Metro DC Area
April 7, 2022 by Marie Joabar
It’s so exciting to see the area come to life with all the spring color. This is the perfect time to plan some beautiful family, engagement, or portrait shots, wide landscape shots or just spend your time getting lost in flower and garden photography.
Here are some of our favorite outdoor spots for photography in the Washington, DC area.
District of Columbia
The Smithsonian Gardens along the Mall in the heart of the city offers unique gardens (Enid Haupt Gardens, Ripley Gardens).
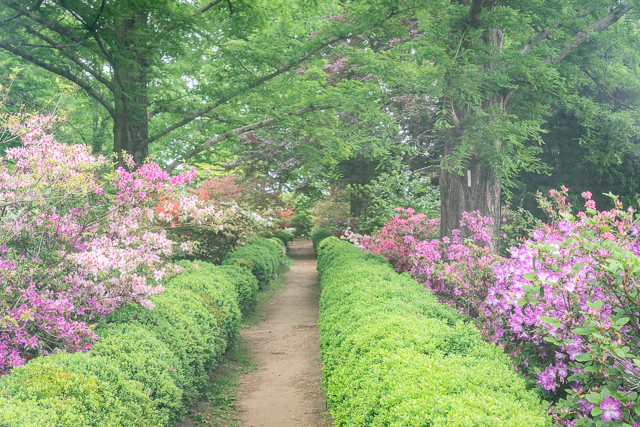 The National Arboretum in DC. The Arboretum is so large you'll want to visit it more than once. The Azalea garden in springtime is just stunning, but you'll want to visit throughout the year, each season offers something to experience. By the way, for any of you gardeners out there, their annual plant sale is on 4/30/22.
The area around the Capitol building and the outdoor gardens at the U.S. Botanical Gardens offer beautiful plantings and landscaping.
The Bishop’s Garden (managed by All Hallows Guild) at the National Cathedral is lovely and offers a peaceful escape as you explore it. Don't miss the trail through Olmsted Woods while you're there.
Dumbarton Oaks Gardens in Georgetown is a special place. It has several gardens settings and each is different from the others. Open only in the afternoons, plan to visit more than once and throughout the year as there is always something special blooming. You'll find plenty of nooks and crannies to sit and reflect among the gardens.
Hillwood Estate & Gardens was the home of Marjorie Merriweather Post and sits on 25 acres overlooking Rock Creek Park. A must see for any garden lover.
The Franciscan Monastery has incredible tulip beds and a lovely garden area to stroll through as well.
Maryland
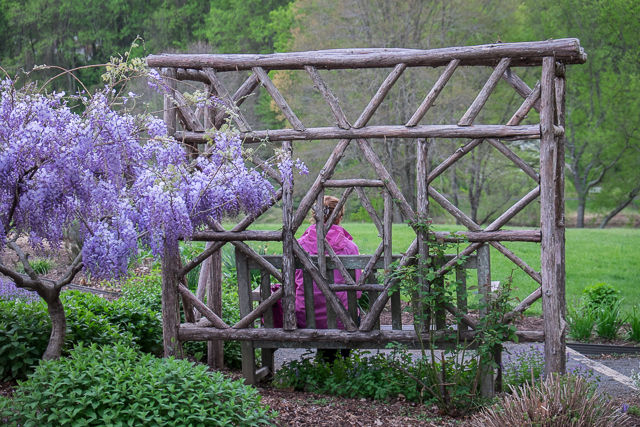 Brookside Gardens in Wheaton, MD is one of our favorites. With 50 acres to explore, 2 conservatories and a gift shop, you'll have visit more than once to see it all. Throughout the year Brookside will never disappoint!
Brighton Dam Azalea Garden in MD is a must see during Azaleas season in April. It's worth the drive to visit and photograph.
Virginia
Greenspring Gardens in Alexandria VA is easy to explore. One side offers a pond with a trail beside it and the other offers several gardens. In the summer time, the area around the Gazebo is planted with flowers that attract hummingbirds.
The Netherland Carillion at Arlington Cemetery is filled with tulips in the springtime and provides a fantastic view of the DC skyline.
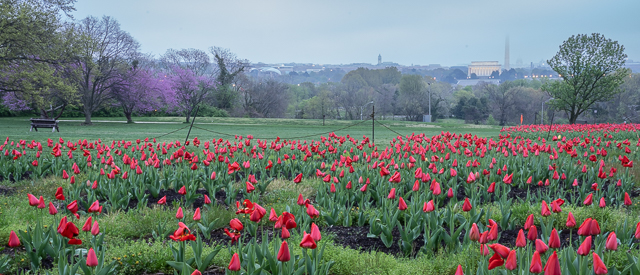 Meadowlark Gardens in Vienna, VA offers 95 acres to explore throughout the year. You'll find ponds, gazebos, a Korean Bell collection, and of course the beautifully landscaped gardens.
Manassas Battlefield Bluebells, VA. Lots of civil war history here as well as fields of bluebell blooming right now.
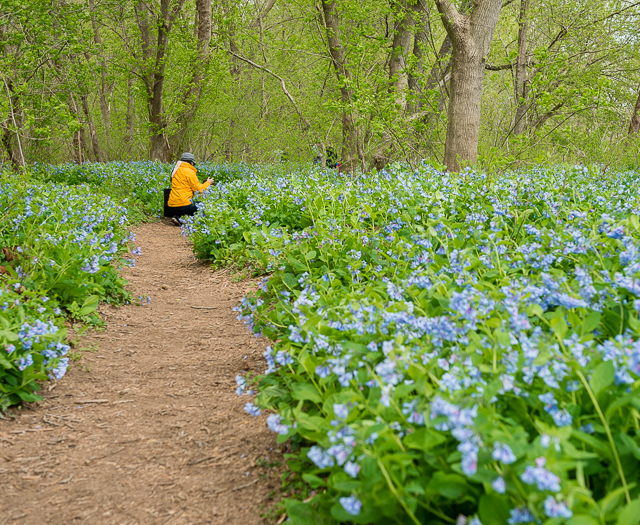 River Bend Park (bluebell path) This park is just past the Great Falls Park in VA and offers trails through the woods along the Potomac River. Filled with wildflowers and bluebells, spring is a perfect time to visit.
Burnside Farm in Nokesville VA offers planted fields of tulips. Watch for their Sunflowers in July.
Stroll thru Old Town Alexandria and find quaint homes decked out with spring decor and colorful planters framing.
A bit further out, you'll find in plenty of spring wildflowers on any of the trails in Shenandoah National Park.
Wherever your adventure takes you this spring, amazing photos await, explore and enjoy!
If we left any great spots off the list, please send us an email and we'll include it here. (info@capitalphotographycenter.com)
Note: some parks may require a permit to photograph portraits so it's a good idea to check the websites first.
10 Tips For Capturing Spring Flowers
March 9, 2022 by Marie Joabar
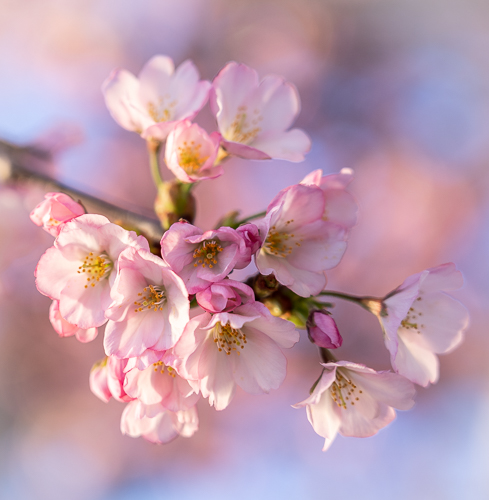 Winter is behind us and we can hardly wait for the spring blooms. The Saucer Magnolias and Cherry Blossoms are getting ready to pop and close on their heels are the redbuds, dogwoods and the colorful tulips.
Even if flower photography is not your passion, it’s hard to pass by these spring beauties without framing a few in your viewfinder.
10 Helpful Tips
1. Get a combination of vantage points, get the wide shot as well as the tight shot, get one from above as well as one from below.
2. If you can get very low to the ground, the height of the flowers can block out distracting cars, fences and other unwanted elements. Getting low and shooting up also gives a fresh and fun perspective.
3. Frame a landmark with your flowers to tell the story of location. Framing friends and family among the flowers is a special story too.
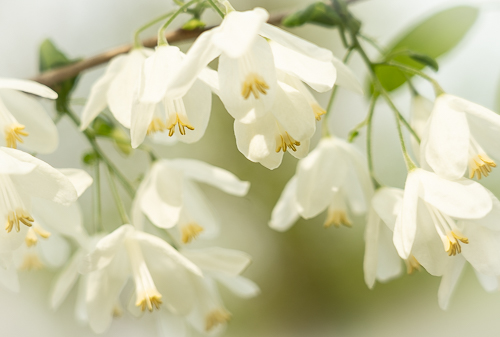
4. The soft, warm-toned side lighting found in early morning and late afternoon provides the best light to work with. Cloudy days give you soft, even light without harsh shadows or contrast.
5. Play with camera movement; swirls, swipes and zooms can be a lot of fun, especially with a colorful pallet of flowers.
6. Dust off your macro lenses, close up filters or extension tubes and move in tight for a bug’s eye view.
7. Consider a reflector to add a touch of light where the flowers might be shaded. It will also help bounce light into the center of the flower. Depending on the light in your scene, a flash (with the power dialed low) might help add light where needed.
8. Look at other’s photos of flowers or gardens for ideas or inspiration.
9. Visit your favorite gardens at peak times. Most of their websites will list what is blooming and when so you can plan your visits accordingly.
10. Make a plan. Set some dates to get out there with your camera and capture the spectacle of a garden full of spring blooms! The springtime show is about to begin!
Hope you're able to get outside and enjoy doing some Springtime Flower and Garden photography!
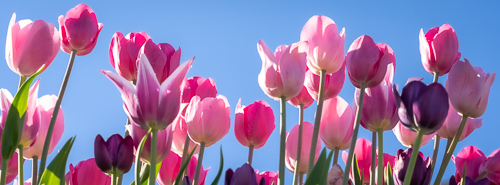
Celebrating Black Photographers and Their Vision
February 16, 2022 by Marie Joabar
In recognition of Black History Month we want to "expose" these black photographers to you and celebrate their vision. Enjoy these online articles featuring both legendary and contemporary black photographers.
 14 Black Photographers You Need to Follow Right Now
From NationsLab - "... a list of 14 black photographers worth following on Instagram. From documenting haute couture to everyday street photography, these photographers will improve the quality of your Instagram feed."
We have to add these very talented and LOCAL photographers on the list to follow;
Laura Hatcher @spikeNavy (Incredible photographer and one of our amazing instructors!)
Cherisa May @cherissmay
Kirth Bobb @kirthbobb
Robert Miller @rmillerphotoeditor
Black Voices: 100+ Black Photographers You Should be Following on Social Media
From PhotoShelter - It’s 2022 – you simply can’t say that it’s hard to find Black photographers to hire or feature. Not only is it inappropriate, it’s just not true.
10 Black Female Photographers to Watch in 2021
From PH Museum - The founder of Black Women Photographers, Polly Irungu, introduces us to the work of artists from their platform you should discover and support.
Black Fashion Photographers Throughout History - A Look Behind the Lens
From CRFashionBook
7 Legendary Black Photographers We Want to Show Love For
From the PhotoBlogger - "...Of course, legendary black photographers will inspire today’s crop of black photographers. But their work should also inspire anyone that cares about the craft. Rather than showing the odd photo of the below selection, we’ve turned to YouTube. This way, we can show you in-depth content, allowing you to appreciate the effort put in by those that paved the way for today’s generation."
 10 Black Photographers Who Shaped American History
From Focus Camera - "... a list of 10 black photographers who shaped (and continue to shape) American History."
The Black Photographers Who Paved The Way For The World We Live In Now
From BuzzFeed - "... Their photographs show a world we’ve left behind, and highlight the importance of legacy and holding on to your history.
14 Tips For Architectural Photography
January 27, 2022 by Marie Joabar
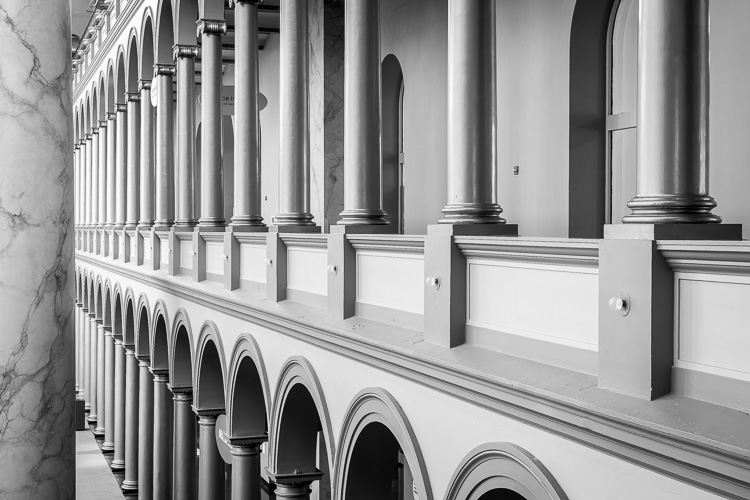 Recently I was photographing at the National Building Museum as I was scouting for my class and I was really excited about the images I came away with. I remember how years ago I had no idea how to photograph buildings and architecture but now it’s second nature and I take my skills for granted. That’s not to say I’m a pro by any means but with a few key tips, it’s easy for anyone to capture strong architectural photographs.
1. Building exteriors usually look better from an angle showing 2 sides. This adds dimension instead of a straight-on shot of the façade. However, depending on the size, shape and the grounds around the building, a straight on symmetrical image might work well too.
2. Photograph early morning and/or late in the afternoon for softer light.
- You’ll want the sun behind you (when you’re looking at the building) for well exposed exterior images with good color and pleasing contrast.
- For east-facing buildings, morning is the best time to shoot.
- For west-facing properties, afternoon is great.
- If the building faces north, any time between 10:00 and 2:00 is ideal.
- If it faces south, take the photos first thing in the morning or late in the day.
3. Polarizing filters can help remove window glare and add nice saturation and contrast.
4. Consider black and white for architecture. Often the absence of color removes distraction and allows the viewer to see the building elements better.
5. Don’t be afraid to show people in the frame, they can show scale.
 6. Keep the camera level to the ground and avoid tilting it. Tilting causes distortion and the lines of the building to converge.
- Tilting the camera up or down affects the verticals.
- Tilting the camera right or left affects the horizontals.
- Some cameras feature a level that displays during capture to help you know when you’re straight and level. If your camera doesn’t have a built-in level, they can be purchased as a camera accessory and fitted to your hot shoe.
7. A tripod can also help make sure you’re not tilted and some offer a level on the base plate. Plus, they also allow you to take sharp, crisp photos with low ISO’s hence less graininess.
8. Use a wide angle lens to capture the full building without any tilting.
- Sometimes, the only way to capture the whole building is to step back- way back, even across the street depending on the height of the building.
- Take for example the Washington National Cathedral, to capture the entire church front you have to cross Wisconsin Ave and shoot from the other side of the street. Turning the camera vertically will give you the whole church but also the street. No problem though, simply crop out the street and you have a lovely photo.
- Using a wide angle lens with interiors allows you to frame floor-to-ceiling and wall-to-wall without tilting. The smaller the room, the wider you’ll want the lens to be.
9. Notice everything that’s in the frame and try to avoid distracting elements. Otherwise, crop or clone them out in post processing.
10. You can remove parked cars or other street elements by getting down low and blocking them out with shrubs or flowers.
11. If you need to remove traffic or moving cars, use a long shutter speed such as 2 to 6 seconds and they’ll move thru the frame without being recorded. Dark filters like a neutral densitys or a polarizers can help prevent overexposure when you need a long shutter speed in daylight.
 12. If you want the indoors as well as the view out the window, you’ll most likely have to use a flash unit. If the space is small, a flash should work well. In larger spaces, you may need studio lighting.
- External Flash Units - For smaller spaces try exposing for the bright area out of window then turn on flash to light the interior.
- Try using TTL (auto flash mode for external flash units) and then adjust the brightness of the flash with Flash Compensation (a setting on the camera or flash). Note you’ll have to work within your camera’s sync speed, the fastest shutter speed that can be used while using flash, this is usually 1/200th second.
- A soft box or light sphere can help spread out and soften the light.
- If using flash in the manual flash mode, consider using 1/8th or 1/16th power. Play with the zoom settings on the flash to affect the spread of the flash.
- Try swiveling the flash and bouncing it off the ceiling or a side wall for softer light. (Only use on white or neutral color walls or ceilings.)
 13. Another option to capture the indoors and the view out a bright window is to bracket your exposures for HDR (High Dynamic Range). Same for outdoor scenes with bright highlights and dark shadows.
- No camera can capture the dark shadows and the bright highlights (the dynamic range of tones) in the same frame.
- If you have a dark interior room with windows showing the bright outside, you’ll take 3 photos at different exposures (exposure bracketing); capture one shot exposing for the outside brightness, one shot for the mid-tones, and another shot exposing for the dark interior. These can be later be blended together in Lightroom using Photo à Merge to HDR.
14. Practice Makes Perfect. The DC area has plenty of beautiful buildings to practice with both indoors and out. Here are some great ones to start with.
Nat Building Museum, Library of Congress, American Museum of Art, National Gallery of Art, the U.S. Capitol... the list is endless. Let's not overlook what is right in front of us with the historic buildings or beautiful homes in our neighborhoods.
8 Bad Photography Habits and Tips To Correct Them
January 6, 2022 by Marie Joabar
As the year begins, let’s make sure we’re starting off on the right foot with good photography practices. Now is a great time to identify your bad habits and going forward, make a commitment and a strategy to correct them.
Case in point, as I was searching for a photo the other day I was scolding myself for not keywording my images well enough which prevented me from finding the ones I needed. And to make matters worse, I had to sift thru thousands of photos that should have been deleted long ago.
Check out the list below of some common bad habits… are any of them on your list? I’ll admit I’m guilty of a few myself but I’ve set some firm goals for correcting them this year.
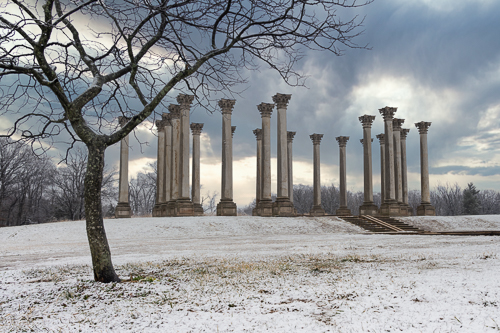 1. Not getting out enough to photograph
- Keep yourself immersed in photography and set your goals for shooting; 2ce a week, every 2 weeks, 1ce a month. Whatever time frame works for your schedule, set it and follow it as best you can.
- Taking classes, joining community groups or meetups can provide a good solution to get you out there regularly and keep you involved in your photography.
- Consider the CPC Photo Community or the Year of Creative Photography course as a way to keep you shooting and motivated.
2. Not taking the steps to learn and practice a new technique
- Define what you want to learn or improve on and decide how you can accomplish it.
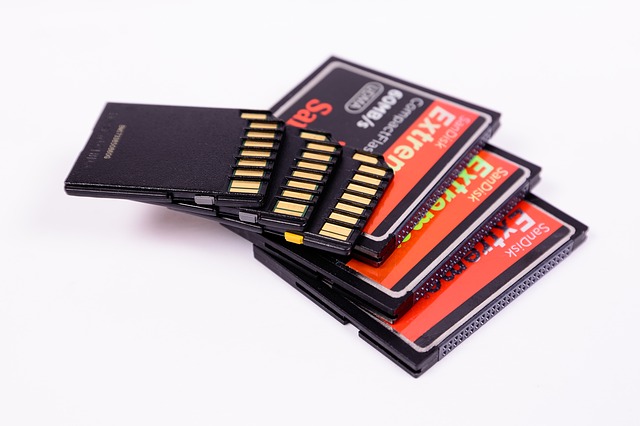 3. Sloppy card management
- Waiting days to download after shooting
- Not taking the time to keyword images – think long term and trust me, you’ll be glad you took the time to do this upon import.
- Not culling images and deleting - same as above, don’t wait, there’s nothing worse than going through old images that are bad. One day when you have all the time in the world, you can go back thru your archive to add keywords and/or delete old pics but for now, commit to be diligent about this going forward.
- Not formatting your memory cards to have them good and clean and ready for new shooting sessions.
4. Not backing up the images to a different device or to the cloud.
- If you lose them you can only say, should have, would have, could have.

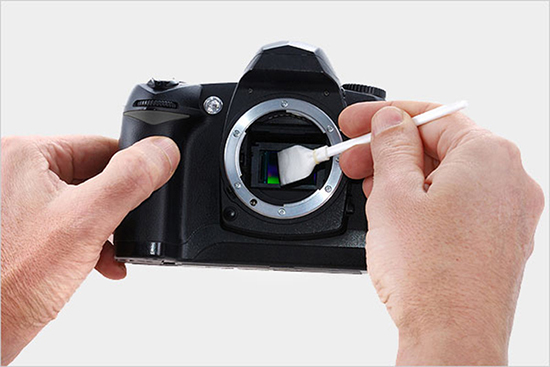 5. Not cleaning your gear.
- Wiping down your camera and lens when done and keep that dust from working its way into your camera and onto your sensor. With a lint free cloth, wipe down your camera body and lens. With a lens cloth, wipe down the front element of the lenses and filters.
- Use a hand blower to remove dust from your camera sensor and front and rear lens elements. See this article for more tips on cleaning sensors.
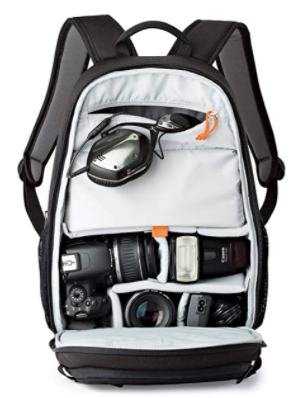 6. Not keeping your gear organized.
- After cleaning your gear from a shoot, reorganize and store it so it’s ready for the next shoot. Make everything handy so you can easily grab what you need.
- Have batteries charged, a clean and formatted card in the camera, and your camera bag ready to go.
7. Not removing disposable batteries from devices.
- Store you battery with but not in your flash unit or other device. Avoid finding them corroded and stuck in the battery compartment months later.
 8. Not sharing your images.
- Why keep them a secret? Look for photo sharing sites or post on social media.
- If you don’t have a photography website, make this the year you create one and if you do have one, upload new images to it regularly.
With a blank slate before us, this the best time to start. Let’s make 2022 the year that we practice good photography habits!
Capturing Holiday Magic at Home
December 20, 2021 by Marie Joabar
 If travel is not in your plans over the holidays here are a few photo ideas you can capture in your own home.
You’ll need your camera, a zoom lens in the range of 24-70mm and a tripod so you can shoot with lower ISOs.
Holiday Presents
Create your own mini studio photographing gift wrapped presents. Use the tree as a colorful background or try using mini white lights for some holiday magic.
Tips:
- Find an arrangement of small boxes that you can wrap and use for your ‘presents.’
- This can easily be done during daylight hours, just make sure not to include any windows in the frame.
- Get close to the presents (either with your feet or with your zoom lens) and pull the presents away from the background so it will be nicely blurred.
- Use a wide enough aperture to give you blurring but consider the depth in the arrangement of the presents. If you’re close enough, you’ll naturally have good blurring so you may not need to open the aperture all the way.
- Use a low ISO and get the light you need from the shutter speed.
- Consider a reflector to add a little light to the front of the packages if they’re backlit.
- Try placing mini lights behind or woven between the packages for some extra magic.
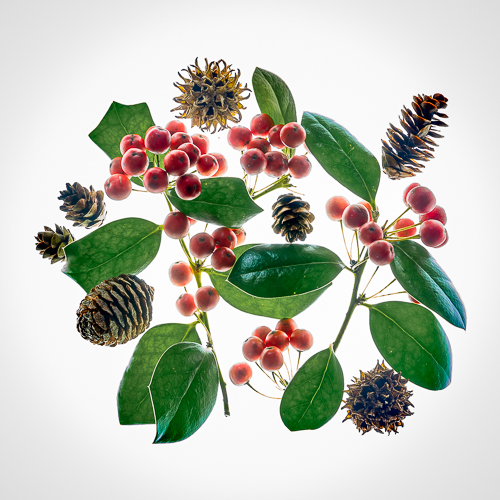 Flat Lays
Find some evergreen branches, pine cones, holly berries, or similar, and make a beautiful flat arrangement of them.
Tips:
- Place your subject on a light tray and if you don’t have one, try a white cloth.
- Shoot straight down on the subject making sure the camera is not tilted.
- Depending on how high your subject is, dial in the aperture to capture the depth of field that you want.
Holiday Ornaments
With the tree lights on, capture your favorite ornament(s).
Tips:
- The ambiance will be more colorful in the evening than in daylight.
- The white balance may need to be adjusted depending on the lights you’re using. Try incandescent or others that give you the best look.
- Watch that the placement of the lights don’t distract from the main subject.
- Try a single ornament as well as a nice grouping of several.
 Holiday Lights
Have fun photographing the holiday lights using the zooms and swipes techniques. Also play with capturing bokeh.
Tips:
- Camera Movement – The key with the following techniques is having a long enough shutter speed to move the camera while you are exposing. Typically we use a very low ISO, a small aperture like f16 or 22, and this allows us to have a 2 or 3 second exposure.
- Zooms – Using a zoom lens, try twisting the zoom ring while exposing.
- Swipes – instead of zooming, swipe the camera up or down, or side to side, and the lights will show as lines.
- Squiggles – hand hold the camera and jiggle it for a fun image. See photo.
-Try these on the tripod for a cleaner look. Hand holding can work but the images will not be as sharp or clean due to the longer the exposure time.
- Bokeh (pronounced boka) is out of focus light. Capture subjects in front of the lights. To blur them, get close to your subject, have some distance between your subject and the background, and use a wide aperture in the range of f2.8-f4.5.
 Other Exciting Possibilities to Photograph;
- A decorative plate of holiday cookies.
- Holiday stockings together with a crackling fire in fireplace.
- Your child standing in front of the lit tree will show as a silhouette.
- Yours (or your neighbor’s) front door wreath.
- The list goes on…
Whatever you choose to photograph we hope you enjoy framing some holiday magic.
We’d love to see your favorites, tag us on Facebook or on Instagram and share with us!
10 Tips for Colorful Fall Photos
October 21, 2021 by Marie Joabar
Autumn provides shutterbugs of all levels the chance to photograph any and everything with a colorful fall back drop. Although it’s a bit slow this year, soon we’ll be at peak so get your cameras ready for some beautiful fall landscapes and seasonal portraits of family and friends.
Consider these 10 tips for exciting fall photos.
 1. When shooting portraits (formal or informal) frame your subject against a background that expresses the mood you want to convey; bright and cheery, dark and moody, or fun and whimsical. Use a large aperture such as f2.8 - f4 for a shallow depth of field to help blur the background. For group shots, use a midrange aperture (f8) so that everyone’s face is sharp. (Portrait photo by Cat Simmons).
3. Shoot from different angles for a unique shot. Get low to the ground and frame a pathway of leaves leading up to the trees in the distance. Look up and frame yellow or orange leaves against a bright blue sky.
4. Fall is a great time to use a macro lens for extreme close ups showing the tiny details on leaves, fall flowers, seed pods, etc. If you don’t have a dedicated macro lens, try close up filters. Although not as sharp as a macro lens, they offer an affordable way to get super close to your subject.
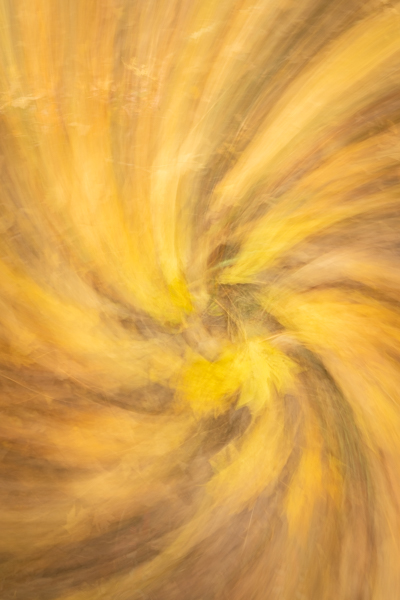 5. Get Creative!
 - Try camera movement for some abstract colorful shots filled with reds, yellows and oranges and you’ll have a lot fun doing it.
- While shooting zoom the lens (zooms), turn the camera (swirls) or move it up or down (swipes). Set a small aperture (f16 or 22) and a low ISO so you can use a slow enough shutter speed for the intended movement. You may need a polarizer to help prevent overexposure.
- Take photos that are intentionally soft focus. Give a dreamy effect to a winding forest path with soft focus. A soft filter, a piece of lace covering the lens or even a little breath on the lens can produce this effect. The selective soft focus from a special effect lens like the Lensbaby lets you control sharpness very precisely and the effects can be stunning. Multiple exposure is another option to help with soft focus, just move the camera ever so slightly between shots.
6. Early morning and late afternoon offer the best and most colorful light to work with. The sun is lower in the sky and its light is golden adding a beautiful richness to an already warm scene. There is also less contrast at these times. Also, plan your destinations by the time of day. For example, plan to shoot a west facing scene in the morning for a scene bathed with warmth. Shoot an east facing scene in the afternoon when it is lit from the west.
 7. Fall provides some of the best opportunities to find fog around rivers, ponds and streams as the cool morning air moves over the water. It also occurs in areas without water because the longer nights cool the air and increase humidity. Take advantage of this and get out early to capture it.
8. Celebrate cloudy days for the soft light they offer. The larger the light source, the softer the light so think of a cloudy sky as a giant softbox diffusing the light, eliminating dark shadows and the jarring contrast of a sunny day. This light works beautifully for posing couples and family. If you have no choice to shoot in the harsh midday sun, consider carrying a large diffuser and also an off-camera flash to ‘fill in’ the shadows.
 9. A circular polarizing filter will help to remove glare on the leaves, even on a cloudy day. They’ll also add increased saturation and contrast. If shooting near water, it can allow you to see through the water by removing the glare and reflection. Don’t leave home without it.
10. Try setting your cameras White Balance to Cloudy to warm up the color of the leaves. The WB setting of Shade will warm it up even further and exaggerate the reds, yellows and oranges.
You don’t have to venture far for exciting fall shots, look no further than your downtown area or your neighborhood streets to capture fall decorated shops, porches or city scenes.
No matter where you are, work an entire scene and capture all that it offers; from the wide shot capturing an expanse of vibrant colors, to a lone showy tree, to the intricate detail of a single leaf.
Photographing Abandoned Places and Urban Decay
September 29, 2021 by Beth Haubach
 I’ve always liked "old stuff:” old, oxidized tools; old dusty books; old vehicles being reclaimed by rot and rust; old deteriorating buildings…you get the point. My imagination is set on fire when I look at abandoned buildings or vehicles. I have to wonder, “What happened here? Why were these buildings or cars and trucks simply left to decay?" Most of the buildings I’ve been in look as if the employees simply walked out one day and vanished. Many of the buildings I’ve ventured into served a singular purpose and often contain some interesting and unusual machinery. As I stand looking at vehicles in a field or at ancient machinery in a factory, I can only imagine the lives of the people who worked in these spaces or drove these vehicles.
I’m also drawn to the beautiful designs and effects that appear as nature takes over causing paint to peel, metal to rust, and wood to decay. The opportunity to capture what may be the last breath of a disintegrating vehicle or crumbling building is something I jump at! Whether capturing an entire subject or an abstract portion of it, the creative and photographic possibilities seem endless.
Deciding how to photograph in these different spaces is dependent on the light and any rules imposed by the venue (i.e., some places do not allow tripods, etc). Obviously, outdoor shooting provides more light to work with than indoors but still, a bright sunny day brings challenges that can be difficult to work around. Often in abandoned buildings the only light is natural light, which results in bright highlights (think windows) and deep, dark shadows. This becomes a perfect opportunity to do HDR photography. As such, I will bracket my shots and then process them using HDR editing software.
 Before even taking my camera out of the bag, I will walk around and through the area I’m planning to shoot to get a “lay of the land” and closely study the space. Once the camera goes to my eye, what I “see” can be limited. I start “wide,” using a Sigma 10mm-20mm wide-angle lens, and capture the entire scene from various angles. Then, I either change lenses to a Sigma ART 18mm-35mm f/1.8 or to my Nikon 24mm-120mm f/4. Although the 18-35mm isn’t as wide than the 10mm-20mm, it performs phenomenally well in low light and is a super fast and sharp lens. Additionally, the wide aperture of the Sigma ART lens provides great depth of field and a lot of creative options. If I can’t get close to my subject, I might use a 70mm-300mm zoom; although the lack of light, even when using a tripod, can be problematic with this lens. These old spaces provide great opportunities to practice macro photography, so I’ll usually finish using a Nikon Micro-NIKKOR 85mm f/3.5 lens in order to get in tight.
I would not recommend venturing alone into abandoned spaces or fields for a host of reasons. Ideally, you want someone to know exactly where you are and be able to help immediately if you run into trouble, be it an angry landowner, injury, snakes, or other animals. To date, I’ve always been with at least one other person, and more often, part of a group.
One of my first true forays into abandoned building photography was in the Spring of 2017. I was invited to join a group of photographers at an old seed washing factory (yep, that’s actually a thing!) in rural Virginia. The building was owned by one of the photographer’s friends, who gave us the run of the place. Admittedly, it was a little dangerous in that the building was pretty decrepit, so being with a group of people was somewhat comforting. I was in the company of several photographers who were much more experienced than I was at the time, providing many invaluable learning experiences for me.
 To find other photographers with similar interests, Meetup events can be a good resource. As a result of one of these events, a good photographer friend and I discovered, and subsequently visited, a truck “graveyard” near Richmond, Virginia. Another event landed us at Waterside Woolen Mill located close to Breezewood, PA. Both of these locations were wonderful opportunities to practice proper exposure, bracketing, composition, HDR photography, and even a little light painting.
Eastern State Penitentiary (ESP), in Philadelphia, is one place you could go by yourself. Although ESP is run-down and falling apart, it is a tourist attraction. “Eastern State Penitentiary was once the most famous and expensive prison in the world, but stands today in ruin, a haunting world of crumbling cellblocks and empty guard towers. Known for its grand architecture and strict discipline, this was the world's first true penitentiary, a prison designed to inspire penitence, or true regret, in the hearts of prisoners.” (https://www.easternstate.org/about-eastern-state). I had a grand time earlier this year roaming through this massive structure while taking photographs.
Additionally, if you Google “Abandoned Buildings in Virginia or Maryland,” you will get all sorts of results. Atlas Obscura website almost always pops up at the top of the list and is usually a fount of information. One of the great things about this site is the “Know before you Go” section of each entry. While a location may potentially look like a good place to go, the information in this section will let you know the status of entry and other pertinent information about that specific location.
Eastern State Penitentiary, the Trans-Allegheny Lunatic Asylum in West Virginia, and the Pennhurst Asylum near Philadelphia, are a few places to consider. Contact information for these sites, and other interesting places to photograph, are listed on Capital Photography Center’s Resource page: https://capitalphotographycenter.com/resources.
Some of my best photography has been done at old or abandoned buildings. Subsequently, many of my favorite images have been the results of these trips. Additionally, I’ve met some amazing photographers who have generously shared their knowledge and experience. Exploring these locations is a look back in time and if the walls of these old buildings could talk, I have no doubt they would tell some amazing stories!
Article and images by Beth Haubach. More of Beth's work can be seen on her website, A 2 Z Photography.
9 Tips To Stay Motivated With Your Photography
August 19, 2021 by Marie Joabar
Have you ever been in a photo slump and lost your motivation to photograph? Are you doubting your ability to create compelling images even though you know you’re capable of taking them?Are you struggling to find subjects to excite and motivate you to photograph?
 If you answered yes to any of these you’re not alone! Many people struggle with this but it's important to get it behind you.
Hoping these 9 tips will help you find motivation to start moving forward with your photography again.
1. Pull out your camera gear and clean and organize it. This alone should get you excited. Looking through your gear, remembering what all you have, and cleaning and neatly arranging it might just give you the impetus to take it out and photograph with it. It will also make it easy to just grab it and go at any time.
2. Starting close to home experiment with something casual and fun. Capture the kids clowning around, take some close ups of Fido or Kitty, explore your yard or nearby garden, or head out to the local square or city park. The point is to get the camera back in your hands and start shooting again, with luck you’ll start getting some of your motivation back.
3. Look at some of your past images that you especially liked. See that you are capable of capturing beautiful and compelling photos.
4. Look at photos online, in galleries, or on social media and get excited knowing there are images out there waiting to be captured every single day in every type of environment from the most mundane to the most extravagant. All you need is the camera to go capture it. View these images for ideas or inspiration or both.
5. Make a list of goals to help keep the momentum. For example, plan to
- Photograph at least one day a week.
- Go somewhere to photograph at least once a month.
- Share your photos (socially with the world, or just with a handful of friends or family) at least twice a month.
6. Once you get going, make a goal to get to the next level. Learn how to use that flash that has been sitting in the closest. Practice a new setting that you’re not that strong with yet, etc.
7. Get out of your comfort zone and try something new. Macro or close ups, Street photography, Night photography, Nature or Wildlife, Portraits, etc. The list is endless but it’s worth exploring. You’ll discover whether it‘s something you want to continue learning about or not and if not, at least you’ve tried it and can cross it off your list.
8. Push yourself to tackle one of your problems. What is it that you struggle with the most. Move that to the top of your ‘to learn’ list and take steps to overcome the problem. This could be through a class, a YouTube video, a conversation with a photo buddy, or a Camera Club discussion. Just don’t let the problem hold you back from enjoying your photography.
9. Don’t think you need the latest and the greatest camera gear, use the gear you have! It’s not the camera that captures such amazing images, it’s the person framing it up and choosing to freeze that particular moment in time in that particular way.
So get out there and get back at it, the world around you is waiting to be framed.

Exposure Bracketing: Why And When We Need It
July 29, 2021 by Marie Joabar
Often when shooting landscapes or cityscapes we’re faced with a scene which presents us with a challenge; How can we capture such a wide range of tones* from light to dark, in the same exposure? Although our eyes can see about 12 stops of light, our cameras can only capture 5.
When we want that full tonal range our only option is to bracket (defined as taking multiple images each with a different exposure setting) and then put them together later with software such as Lightroom’s HDR feature.
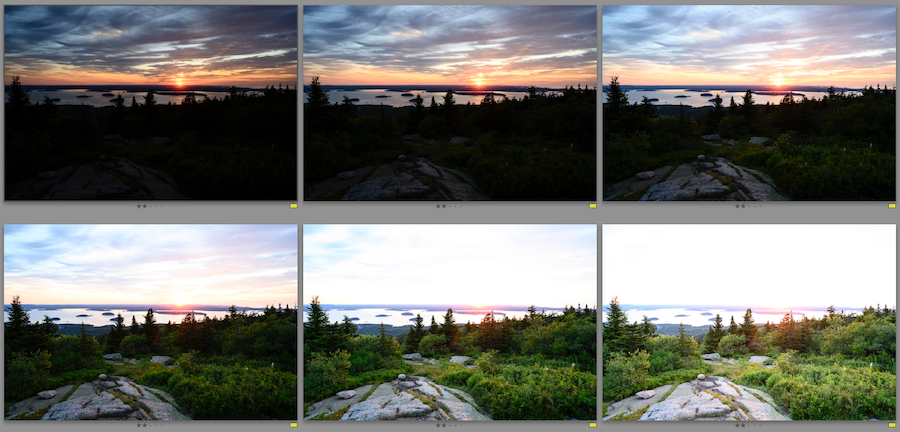 Above is an example where the sun and the clouds are an important part of this composition as are the foreground rocks and trees. We can either make the foreground look good or the sky but not both. If we add light we'll lose some of our highlight data, if we darken it, we'll lose some shadow data. So this is the time to use bracketing.
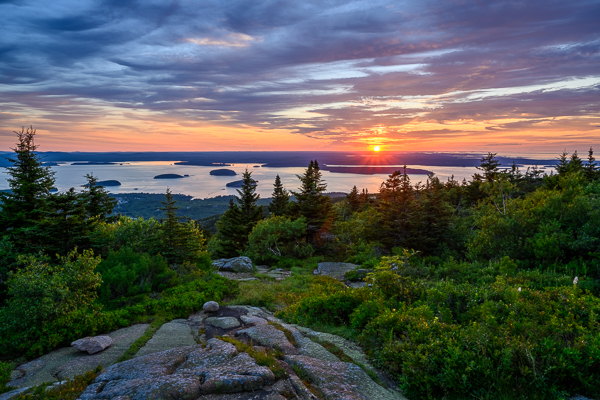
Let’s look at how to do this.
Use Your Histogram
You’ll definitely need to use your histogram to determine if you need to bracket. After you shoot a scene, look at your histogram, if you see that the data is hitting both ends or even just one edge and you want all of that data, you'll need to bracket. Further information on Histograms can be found on our blog at this link.
Bracketing
- Typically bracketing is done by changing the shutter speed and leaving the aperture and ISO set.
- Set a ‘normal’ exposure. Expose for the midtones before turning on bracketing.
- Then slow down the shutter speed 1 stop at a time (making your image lighter) until the data in the histogram no longer hits the shadow edge. You may need more than 1 stop.
- Then speed up the shutter speed 1 stop at a time (making the image darker) until the data in the histogram no longer hits the highlight edge. You may need more than 1 stop.
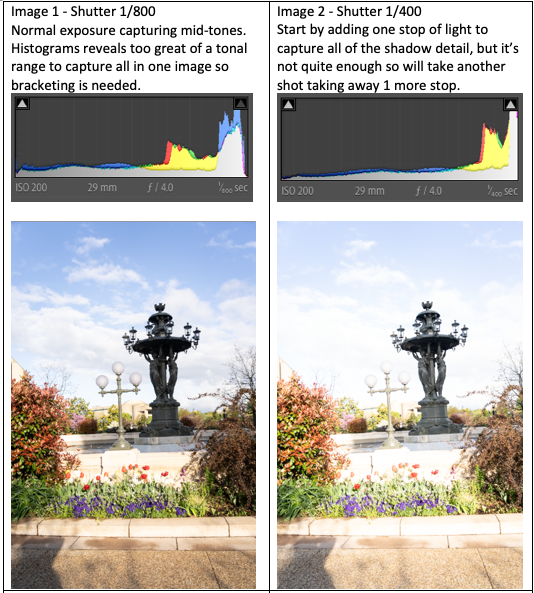
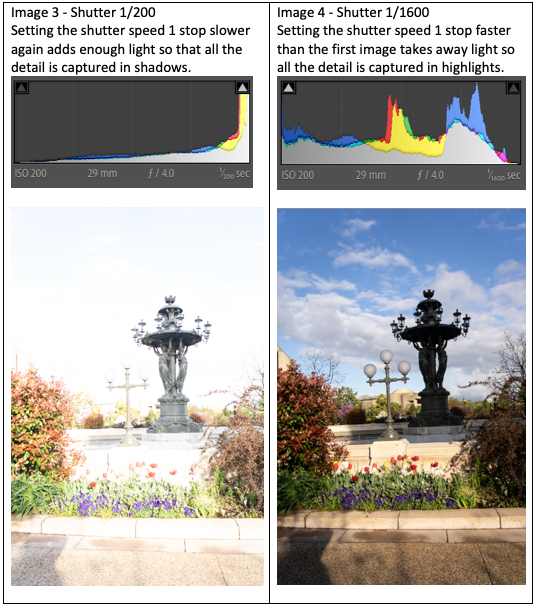 Below is the final image from the merged bracketed shots, cropped of course.
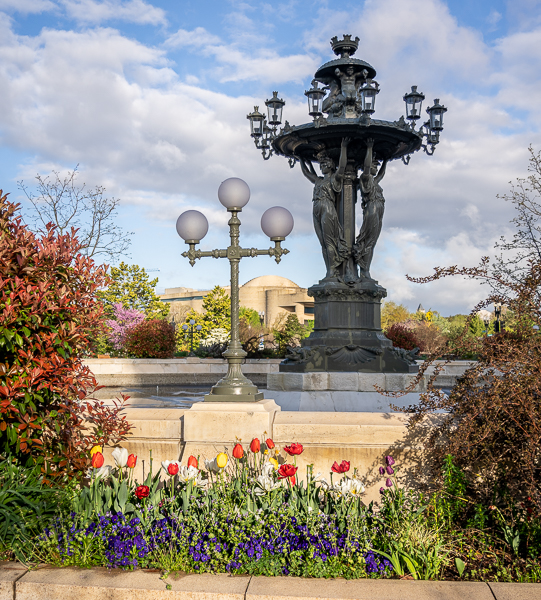
To Bracket Manually
- In Aperture Priority mode, use exposure compensation set to 0, then to plus 1 or 2 stops, then to minus 1 or 2 stops.
- In the Manual Mode, simply set the aperture, shutter and ISO for a zero meter reading. Then speed up the shutter speed so you have a minus 1 meter reading, then slow the shutter speed for a plus 1 meter reading. You many need to go to a plus and minus 2 meter reading to capture the full range (all the data from light to dark).
To Bracket Automatically
- Try using Auto Exposure Bracketing (AEB) with Continuous Shooting (drive mode) set to high or low speed. When holding down the shutter button, the camera will fire off the number of frames you have bracketing set to. Look in your camera manual to see if you have this option on your camera, most do but some beginner cameras may not.
- Decide if you want 3 or 5 frames, 1 or 2 stops apart. If you’re unsure, better to capture too many than too few.
- Then actually set the bracketing to X number of frames at X number of stops and fire away.
Putting Images Together With Software
Once you have your bracketed images, then use the Merge to HDR feature in Lightroom. It works really well and gives a very realistic look.
- You might choose to use all of the bracketed images or maybe just the middle three, or perhaps the two on the end with the center one.
- Experiment. Try more than one combination and see which you like best. There is no hard and fast rule.
- Merge to HDR first and then do any additional edits you'd like.

*The dynamic range is the range of tones from light to dark. When they exceed what a camera can capture in one frame, it is called high dynamic range more commonly referred to as HDR.
Nerxt time you're out shooting, make sure to give your histogram a look and determine if bracketing will help you capture all that you're seeing with your eyes.
Travel Tips for Photographers
June 16, 2021 by Marie Joabar
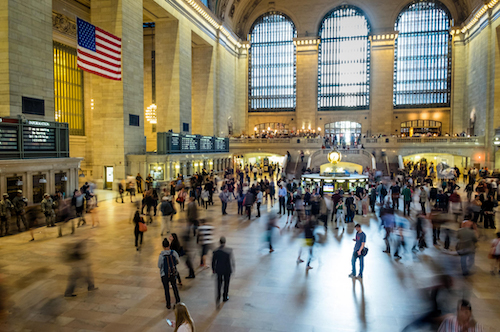 Summer is here and after a more than a year of Covid, who doesn’t want to travel and explore beautiful locations to photograph again?!
There’s a lot to think about when traveling with your gear but the first consideration is deciding WHAT camera equipment to take and then, HOW you’re going to take it. Also think about how to get the best shots and how to back up images as you travel.
What gear to take
For compact camera owners, it’s simple enough to throw your camera in its case with an extra battery and memory card into your carry-on, pack the battery charger and manual in your checked bag. DSLR and Mirrorless camera users have more decisions to make starting with which lenses to take, whether or not to take your tripod and how you’re going to carry it all. Ask yourself what you intend to photograph while on your trip and let your answer dictate what to bring.
- If your itinerary includes beautiful views and vistas, you’ll want your wide angle lens but don’t forget about the telephoto for candid shots or close-ups of any interesting finds.
- If you have lenses or accessories that you rarely use when you photograph at home, ask yourself if you’ll really use them on your trip. (Chances are, you won’t so leave them home.)
- Any combination of lenses ranging from 18mm to 200mm would cover most of what one would shoot on a typical vacation. (However, below 18mm is great for extreme wide angle shots (indoors at cathedrals, museums and such), and longer than 200mm is good for wildlife and birding.)
- Include a circular polarizing filter for your outdoor, sunny day shots to help reduce glare giving you richer saturation and crisp images. These are also useful to take the reflections off water or storefront windows.
- Another great filter for you landscape shooters is a graduated Neutral Density filter to help darken the bright sky when framing it with a darker foreground.
- A flash unit for fill-flash if your camera doesn’t have one built in.
- Extra batteries, the charger, and memory cards… don’t leave home without them.
- If you’re traveling to a remote location, consider taking a second camera just in case something happens to your main camera. It would be sad to have done all the planning for a great trip only to have your camera go out of commission in the middle of it.
How to carry your gear
Some people use one case to get their gear to their destination and another once they get there. This is especially helpful when flying.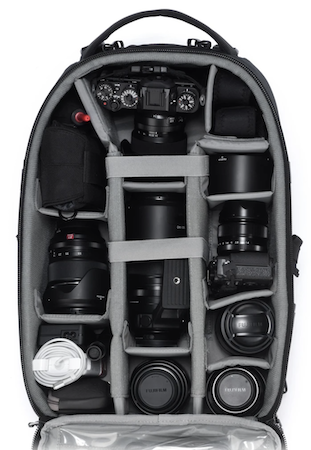
- For security reasons it’s always better to carry on your expensive gear rather than check it, cameras and lenses fit this category. Flash units, filters, and other accessories can go in your checked bags.
- Look for camera bags that fit into the overhead bin. If your bag is too big to fit, take out the camera body and lenses, wrap them in some clothing, and place them in your carry-on bag (purse or backpack) that will fit under the seat. Your camera bag can still contain some non-sensitive things like filters, cables, etc. just fill the remaining spaces with clothing for padding. This way it can be checked and you will have it upon arrival but you don’t have to worry about damaging your valuables.
- Don’t be caught off guard. Double check with each of the airlines that you are using that your carry-on bags fit their size requirements (see links below).
- Photo vests offer a nice alternative and can help with baggage weight restriction on airlines.
- When stowing gear, take the lenses off your cameras and pack them separately to reduce the risk of damage.
- Tripods are challenging. Although we can take them as carry-on, it’s usually easier to put them in your checked bag. Remove the head if length is an issue and wrap clothing around each leg and then sandwich it in between more clothes in the bag.
- Pack your spare Li-ion batteries in your carry on as required by TSA. Place each battery in its own protective case or plastic bag, to keep the contacts from touching each other which can cause short-circuiting.
- On your checked bags, use TSA approved locks so the agents can access your luggage if needed.
- Once at your vacation spot, consider a backpack, a holster bag or some other easy way to move around with your gear comfortably.
- Depending on where you are going, be street smart and try not to use a bag that announces to the world that you’ve got a camera.
Once you arrive it’s time to start shooting. Hopefully you’ve done a bit of research before your trip so you have an idea of where the photo opportunities are. Don’t plan out every detail, sometimes the best opportunities come along when we least expect or plan for them.
Tips for better travel and vacation photos
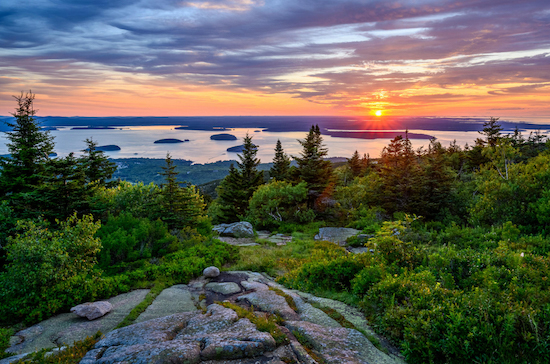 Everything looks better when it’s bathed in the warm, early morning or late afternoon sun so plan your best shots for that time.
- On a sunny day, the mid-day light is too harsh with a lot of contrast and dark shadows. Use this time to shoot subjects indoors, scout out future areas, enjoy lunch, or just rest instead of photographing.
- Take advantage of cloudy days for the even light and mood they provide.
- Buildings look better in sun so determine the direction they face and photograph them sunlit.
- Include people in some of your scenes for local color and interest. Also, people in the shots can make them more marketable to tourist organizations like Chambers of Commerce, state tourism departments, etc.
- If you’re location portraits, people look better in shade where they won’t have dark shadows in their eye sockets or under their chin. If they’re in the sun, use a bit of fill-flash to open up the darker shadow areas.
- When photographing your family or friends in front of a landmark, place them off to the side of the frame and compose showing the upper half of their body with the landmark behind them. The focus point should be on them, not the landmark.
- Look for pictures within pictures. Work an area; take a photo of the entire scene, then move to a different spot and see what the view from that vantage point looks like. Zoom in close, shoot up, shoot down, move around. There are many photos in a scene all for the taking if we just move around and zoom in and out.
- No one knows an area better than those that live there. Talk to the locals – they may help you discover a hidden gem off the beaten track.
Storing and or backing up your images
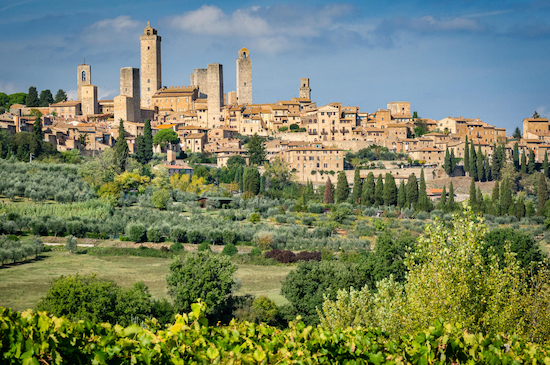 Take a laptop and an external hard drive and backup your files to the computer and external drive at the end of each day.
- If you don't want to travel with a computer, buy several large capacity memory cards and save downloading until you return home (use care that these are not lost, stolen or damaged since there is no back up).
- Some cameras offer the option to have the second memory card act as a backup for the first card. This is a smart option, just make sure to store them in separate bags.
Once home download, back up and enjoy the memories. Look through your images, pick out your favorites and have fun sharing them. 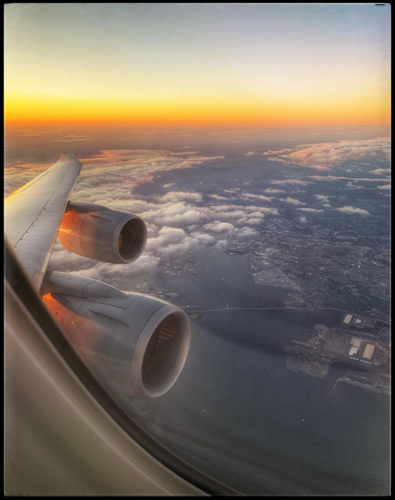
TSA Tips and PreCheck
- It's a good idea to review the TSA website as restrictions change. https://www.tsa.gov/ and https://www.tsa.gov/coronavirus
- Consider applying for TSA PreCheck. Visit this link, take 5 minutes to fill out the online application, plan an in-person visit to an office near you and in as little as 2 or 3 weeks, you’ll have the approval for 5 years. This will save you time as you go through the security check points. https://www.tsa.gov/precheck
Links to airline carry-on size requirements:
American - http://www.aa.com/i18n/travelInformation/baggage/carryOnAllowance.jsp
Delta - http://www.delta.com/content/www/en_US/traveling-with-us/baggage/during-your-trip/carry-on.html
Jet Blue - http://help.jetblue.com/SRVS/CGI-BIN/webisapi.dll?New,Kb=askBlue,case=obj%28633%29
SouthWest - http://www.southwest.com/html/customer-service/baggage/carryon-bags-pol.html
Spirit - https://customersupport.spirit.com/hc/en-us/articles/202096476-What-are-the-size-and-weight-limits-for-bags-
Frontier - https://www.flyfrontier.com/travel/travel-info/bag-options/?mobile=true
Happy travels and good shooting wherever you go!
10 Tips For Successful Silhouettes!
May 12, 2021 by Marie Joabar
 When faced with photographing our subject in front of a bright background, we often end up with the background perfectly exposed but our subject a silhouette.
Take for example trying to photograph our friend standing on the shoreline framed against a beautiful sunset, we would most likely get a gorgeous orange sky and our friend as a black shape.
If this has happened to you and you purposely planned to capture a silhouette, then good for you, you probably don’t need to read the rest of this article.
If however, you captured a silhouette by accident and want to know how it happened so you can do it again, or perhaps NOT do it again, then read on.
Silhouettes are caused when the subject is backlit and our camera metering is set to average. When the bright sky fills the largest portion of the frame, the meter chooses to accurately expose for that causing your subject, the smaller portion of the frame, to be under exposed.
A few simple tips can help us to shoot silhouettes intentionally or avoid them when they’re not intended.
When you WANT to capture your subject as a silhouette:
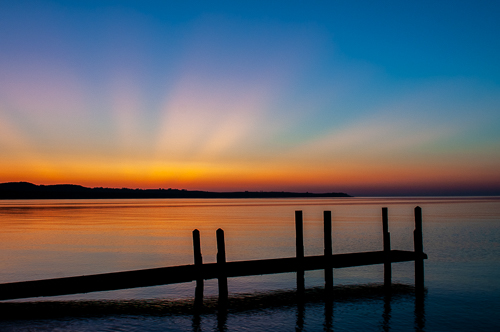 1. In using Manual mode, meter the bright area that the subject is in front of. Fill the frame with the bright part and set the exposure so the meter scale reads plus one or so (depending on how bright the area is) as a starting point. Then recompose to include your subject and take the photo. Adjust the exposure settings as needed from there.
2. If using Aperture or Shutter Priority or Programmed Auto, meter the sky by filling the frame with the bright area. Use Exposure Lock, then recompose to include your subject keeping the exposure locked and take the photo. (Look to your camera manual for the Exposure Lock setting, some cameras have an “AE-L” button, others like Canon, have an asterisk button as the EL button.)
3. Consider using spot or center weighted metering (if you have the ability to select it). Again, fill the center or the spot area with the bright sky and set the exposure to the plus side of the meter scale (if shooting in the Manual mode), if not using Manual mode, lock the exposure and then recompose and take the photo.
4. Having strong contrast between the subject and the background will give best results. For the subject’s silhouette to be distinct, frame it fully against the bright area. Any part of the subject that’s against a darker area will not stand out.
5. Experiment with positioning, turn people sideways to capture their profile instead of face front.
6. Placing the subject directly in front of the light source will show them with rim light so they appear to glow.
7. Find subjects anywhere. Buildings and structures, lone trees, animals, people, all can work to make strong silhouette images.
8. Some of the best times to create silhouettes are around sunrise and sunset when the background is painted with dramatic shades of orange and yellow. For best results, work on captures while the sun is low in the sky and its light passes thru the atmosphere making the sky the most colorful.
9. It might be helpful to have a Neutral Density filter or a split ND filter in your bag to block some of the lights intensity, or to darken an area that is brighter than the rest.
10. If you are metering the sky with the sun in it, meter to the side of the sun, never point your camera directly at the sun or try to meter off the sun.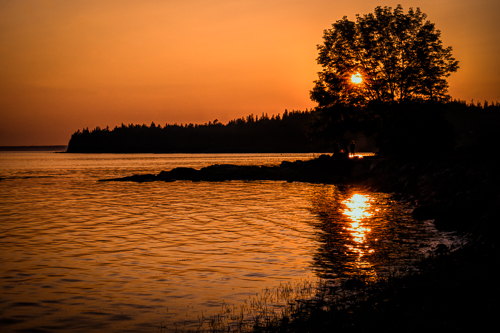
When you DON’T WANT your subject as a silhouette;
1. Take a meter reading off your subject’s face, (fill the frame with their face, set the exposure so the needle lines up close to zero), lock exposure and then recompose. Your bright background may be lost but your subject’s face will be exposed well.
2. Meter the brighter area, lock the exposure (if not using full Manual) and then use your flash to light your subject. It's important to consider your flash sync speed and either ensure the speed is at or below that (usually 1/200 or 1/250) or turn on high speed sync in your flash settings.
3. Move your subject so they are not positioned in front of a bright area.
Silhouettes can evoke emotion, show mood and create drama. Showing shapes with little color and no texture allows the viewer to enjoy the simplicity of a profile with no or few competing distractions. Most of all, it’s fun to do and can add another dimension to your photography. Experiment and have fun!
A Photographer’s Vision - Tips for Pre-Visualizing
April 21, 2021 by Marie Joabar
Each photographer has a vision of what they want their photo to look like either before they start shooting or once they see their images in post processing.
Pre-visualization is seeing the finished photo in your mind’s eye before you begin photographing. It is a helpful technique giving you a goal to achieve and working through the challenges you might face while shooting.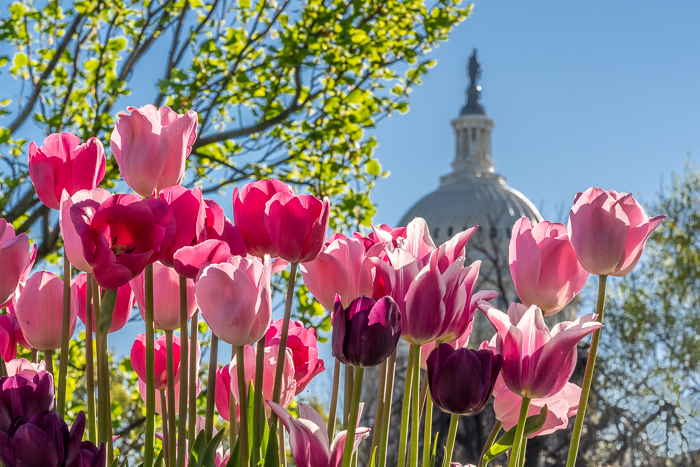
Consider these things as you pre-visualize:
- Where - Think about your location and when you can access it and photograph there.
- When - When is the light or lighting conditions going to be best for your particular vision?
- When will it be least crowded if you don’t want people in the shot, or more crowded if you do. - What weather conditions will be best to help you achieve this? Fog, clouds, a passing storm, a clear day, etc.
- What lenses will help you meet this goal? Something for a tight crop with a longer focal length, or a wider range, maybe a macro?
- What gear will you need? Tripod, filters, reflectors, etc
- Have a back-up plan. In case your previsualize won’t work when you get to your location. Maybe the location is closed, or there is construction or it clouds up when you need sun or vise versa or the model doesn’t show up, etc. What else can you do or where else can you go (hopefully nearby) to come away with compelling images.
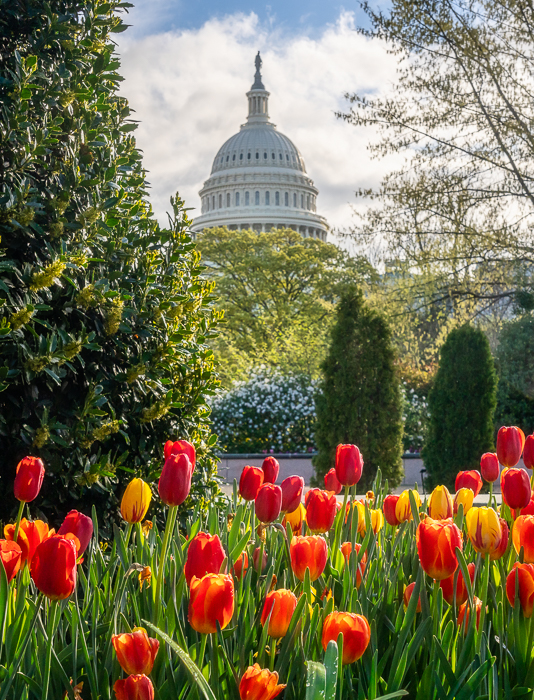 For example, with a vision of a shot I want with tulips framing the Capitol building, this would be my previsualization list.
Where would I go for this - US Botanical Gardens has plenty of spots to frame this shot. If the Capitol grounds weren’t fenced in, that too provides many spots to get low and frame w tulips.
When - The lighting conditions for this shot are good in early morning and also late afternoon. I decide on morning as the air is fresh, there may be dew on the flowers (which would add more visual interest) and there are fewer people to have to work around.
For lenses I decide a wide to normal lens will work best. I want a landscape shot with the flowers AND the Capitol both sharp, and a longer focal length won’t give me that. It will be easier to do with a lens in the range of 24-70 as these lenses give a greater depth of field than longer ones.
As an option, I could take a macro shot to use after I get my previsualized shot.
For Gear Since I want a lot of depth of field and I know I’ll be getting close to my foreground flowers, I’ll need to use f11 or 16. I may also need to bracket as I’ll have a wide range of tones, from deep shade to a bright sky so a tripod will be essential.
I may also take a split ND filter to darken the sky and a circular polarizer to remove any glare on the foliage leaves.
Once I’m at the location, I’ll walk around the area and find a spot with the freshest group of flowers and other framing elements I can use. I’ll photograph from several spots all the while keeping the photo in my mind’s eye as my goal. Once I have that shot I’ll shoot spontaneously and look for other treasures in the area.
 I often think of PV as a self-imposed assignment. This isn’t to say that spontaneity isn’t good. Many times, not planning leads to compelling images and it also gives us the freedom to think thru a shot on the spot. However, if you have a specific shot in mind, try these tips to previsualize it and see how you like it.
Here in the Washington DC area springtime is absolutely amazing and one of the prettiest areas in the country. You could go in any direction on just about any day and find something to beautiful to photograph. But where ever you are, put some thought into what images you want to have in your collection and make some plans to reach those goals.
My Favorite Places for Signs of Spring
March 31, 2021 by Admin
“Springtime is the land awakening. The March winds are the morning yawn.” — Lewis Grizzard.
As the cold of winter starts to leave, we experience the new beginning of spring every year. When spring begins to arrive, we can see the buds appearing on trees, crocus flowers popping up from the hard ground, and daffodils blooming along the side of the road. It is one of my favorite times of the year. The energy, color, and freshness of the earth is something to behold.
I love to get out on the weekends or for sunrise/sunset to capture this new beginning’s essence.
Here are some of my favorite local places to really see the birth of spring. I hope you will get out with your camera and celebrate the new beginning of spring.
- The National Arboretum is a great place to spot the early signs of spring. Crocus flowers popping up, Red Bud and Cherry Trees starting to bloom. The national park is large, with trails to explore. There is a cherry tree map to download to see all the unique varieties.
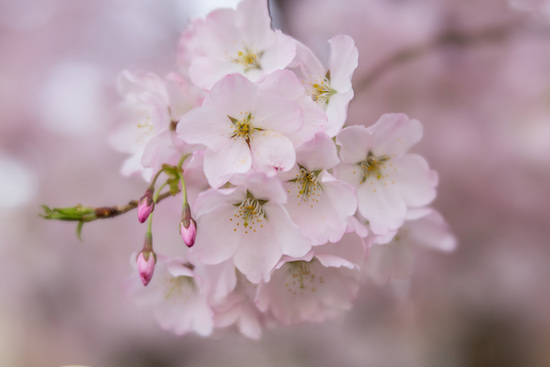
- The Congressional Cemetery in DC is a historical cemetery with a beautiful grove of early blooming cherry trees. They are some of the first to bloom in the city. This is a great place to visit on the weekend, walk the historic cemetery, and capture the trees’ beauty. Nearby is the farmer’s market at Eastern Market.
- The Parterre, at the Smithsonian Haupt Garden is one of the more popular places to see the beautiful early blooms of the saucer magnolia trees. They are spectacular to see. Get out early, the gates are open from dawn to dusk.
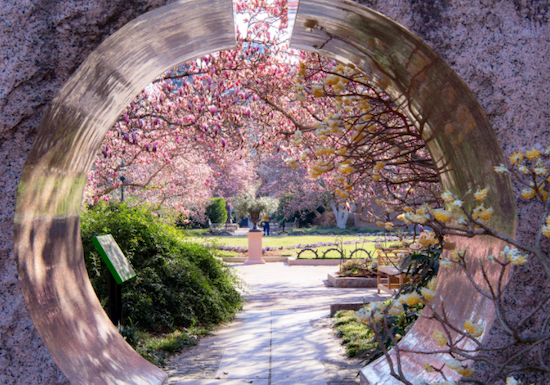
- Rawlins Park is a small park off the National Mall. There is easy street parking. The first bloomers of the Saucer Magnolias are perfect at this spot. Grab a warm beverage and plan to sit and enjoy these trees’ beauty in a quiet park.
- For a short day trip, the Lewis Ginter gardens near Richmond make for a perfect spring outing. The park is easy to walk in a day and has many spring plants to see. They start blooming a little earlier than in Northern Virginia, so it is a nice spot to visit starting in March.
- Meadowlark and Green Spring Gardens in Virginia and Brookside Gardens in Maryland are also worth exploring.
- Following the Cherry Trees and Saucer Magnolias in March and early April, we’ll find ourselves in Tulip season. Visit the Floral Library at the north end of the Tidal Basin (along Independence Ave) the Franciscan Monastery, Hillwood Museum in DC, the large collection at the Netherlands Carillion in Arlington, and in north Baltimore, check out the small residential park, Sherwood Gardens.
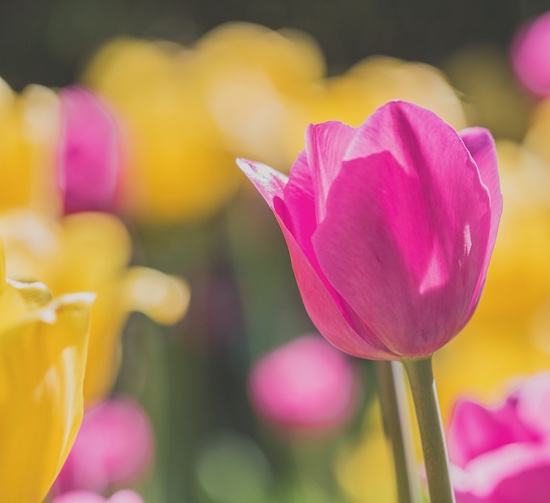
- Virginia Bluebell season is just around the corner. Bull Run is a great spot for this as is Riverbend Park near Great Falls.
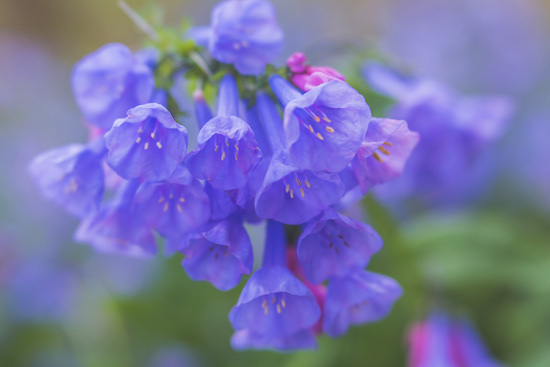
I hope you will brave the chilly days as well as the warm ones and get out this spring to see nature in all its glory.
“Listen, everyone has a chance. Is it spring, is it morning? Are there trees near you, and does your own soul need comforting? Quick, then––open the door and fly on your heavy feet; the song may already be drifting away.” Mary Oliver
Join Lori Lankford at these In-Person Flower and Garden classes;
April 25, 2021: Creative Close-Up Photography in the Gardens
May 16, 2021: Create Impressionistic Images in the Garden
May 23, 2021: Garden Photography - Storytelling In The Garden
June 13, 2021: Getting Started in Flower and Garden Photography
Online, Lori is teaching
May 5, 2021: Creative Photography Using Light
Also in May, Creative Close Ups
Tips for Stronger Compositions
March 9, 2021 by Michael Koren
“To compose a subject well means no more than to see and present it in the strongest manner possible.”
– Edward Weston
 The composition of a photograph is the single most important element a photographer uses to convey an artistic statement. What’s included, excluded and the arrangement of elements within the frame is all part of composition.
Composition makes order out of the chaos of a three-dimensional world and distills it to the two-dimensional picture that becomes a photograph.
The photographer is responsible for everything within the frame. Imagine if Albert Bierstadt included a stray trashcan near the bottom of one of his Yosemite paintings. Or if Leonardo Da Vinci painted a tree branch extending from the ear of the Mona Lisa. Or, while reading Hemmingway’s The Old Man and the Sea, finding a grocery list within the text just after the marlin bites the hook. All these examples would be a poor choice of composition. The elements of the trashcan, tree branch or grocery list do not belong in the final artwork.
Framing with the viewfinder is the first step towards good composition.
Get rid of distracting elements in the frame. If it doesn’t add to the photograph it subtracts.
To effectively remove distracting elements and make a stronger composition:
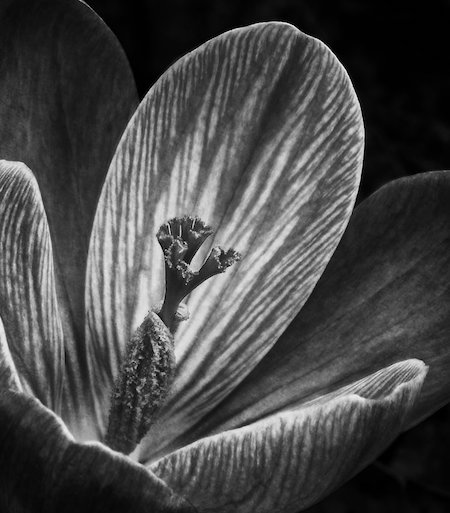 Try moving the subject
- Change the angle of view
- Change perspective
- Use a different lens
- Get closer
Concentrate on avoiding clutter:
- Watch the borders
- Fill the frame
- Shoot variations
- Pay attention to background tones.
- Look for hot spots caused by bright lights and reflections and black holes from dark shadows. Bad backgrounds ruin more photos than bad lighting.
There are several concepts to keep in mind when photographing that will help produce pictures with stronger compositions.
- Rule of Thirds - an imaginary grid that divides the picture frame into thirds: top to bottom, left to right. The subject should be on or near intersections of the grid lines. I placed the picture of the lone sunflower along the left third of the image because that was the main subject. The other sunflowers in the field are part of the setting and tell the story as supporting characters.
- Leading Lines - look for items in the frame that have generally straight lines that are directed at the main subject. This could be roadways, architectural elements, shadow or light areas, natural formations and even body parts. The picture of the light created by the prisms built into the wall of the Museum of the American Indian created leading lines to the shadow of the person at the bottom of the frame.
- Color vs Black and White - this choice is rarely thought of as a compositional choice but it’s just as important to the feeling you as a photographer want to convey. Ask yourself if the picture has color that needs to be in the final picture or is the picture about tone, texture, and shades? This picture of a flower has two different looks because of the difference created between the vibrant color and the monochrome study of tones and texture.
- Foreground and Background - build pictures from the background forward. The layering of both the foreground and background give a sense of depth or helps tell a story. This picture effectively uses the background mural to add a sense of emotion to the conversation between the two women and the person on the phone.
 Here are three easy assignments to give yourself to help practice building a visually stronger composition.
- Assignment 1: Choose a subject of interest and create three different photos with different compositions.
- Assignment 2: Choose a subject and find the angle with the best background. Walk all around the subject looking at it from all views.
- Assignment 3: Layer and frame a subject in three different photos. Only one can include a door or window.
For more practice and to receive gentle feedback, consider taking any In the Field Shooting class!
Michael Koren is teaching the following classes. Join him and pick up tips in the field with Michael guiding you.
March 21, 2021: Exploring Antietam Battlefield
April 11, 2021: Creative Smartphone Photography Field Shoot - Chinatown/Penn Quarter
April 25, 2021: Exploring Street Photography
May 15, 2021: Composition Field Shoot In Baltimore’s Harbor Area
In Recognition of Black History Month
February 17, 2021 by Admin
In recognition of Black History Month we want to share these three websites which shine on African American Photographers both past and present. Through their lens they speak volumes and their visual stories continue to be relevant now… especially now.
The Black Photographers Annual - From the Virginia Museum of Fine Art
 "From 1973 to 1980, a group of African American artists in New York City published The Black Photographers Annual. The idea emerged from the collective of African American photographers known as the Kamoinge Workshop (Kamoinge, from the Kikuyu language of Kenya, means “to work together”). The forty-nine artists featured in the book, however, far exceeded the boundaries of the collective."
This is an incredible collection! On the site you can click on the various volumes of the collection and view the entire volume, one page at a time, artist by artist.
Also, on the site are links to related stories, collections, and videos.
8 Quintessential Black Photographers and Their Books - From Widewalls Magazine
 To quote Elena Martinique, “Here, we pay tribute to a thriving field of African American photography. Many of the Black photographers on our list saw photography as a tool for social change, seeking to communicate the African American experience and culture and expand how it is seen and understood. Through the work of these photographers, we can witness the rage, the sadness, the pain, the beauty, the pride and power of belonging to a community that has been antagonized through America's history."
25 Black Photographers on What Drives Their Work - From the Editors of GQ Magazine
 “The Black Lives Matter protests across the U.S. have created reams of indelible imagery, much of it captured by Black photographers. Simultaneously, projects like See in Black and Reframing the Future have centered the work of—as well as the need to support—Black photographers. Through their lenses we can witness the rage, the sadness, the pain, the beauty, the power, and the triumph of living in skin that's been so undervalued and antagonized through America's history. In reaching out to 25 Black photographers (including several who have shot for GQ), we wanted to not only see what they see, but to hear—in their words—what they're working so hard to say.”
Our Favorite Photo Accessories
December 17, 2020 by Admin
With the Holiday shopping season in full swing, we thought we’d share a list of the favorite photography accessories of our instructors and staff. You might find a few to add to your Santa list or get some gift ideas for your photography friends.
Lenses, Filters and Lens Accessories
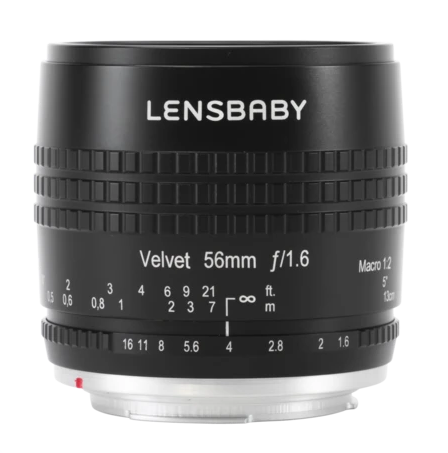 If you have not taken the plunge and tried out one of the Lensbaby Lenses, you need to give them a try. The lenses are durable, fun to use, and will add to the standard lens gear in your camera bag. I enjoy shooting with the Sol 45 and the Velvet but there are many other lenses to try. The lenses are all manual, and each one provides different creative elements, from blur to velvet glow. (Lori Lankford)
A high quality Circular Polarizing Filter to darken and add punch to blue skies and removes glare from water, leaves and other reflective surfaces. (Lewis Katz)
Neutral Density (ND) Filter: It’s perfect for when I want to use a slower shutter speed, but the lighting conditions or the camera settings don’t allow it. (Corey Hilz)
I love the brand Breakthrough Photography. Their filters are the sharpest quality on the market. The company is out of San Francisco and grew from the ground up with a Kickstarter campaign. It is great to support a small business that has created amazing products. This is one not to overlook. (Lori Lankford)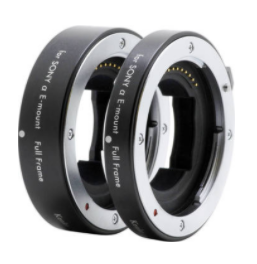
Extension Tubes are a great alternative to a macro lens. Use them to take close-up photos without sacrificing image quality. (Corey Hilz)
Step-up Rings: Enables me to attach a larger filter to smaller size lenses. Great for specialty filters (ex: ND filter) that I don’t want to buy in multiple sizes. (Corey Hilz)
Pinhole Body Cap: Use as a lens on most popular brand cameras to take real pinhole photographs. Depth of field is infinite, focus is always fixed from as close as a few millimeters to infinity. (Michael Koren)
Flash, Lighting Accessories and Light Modifiers
Gary Fong Lightsphere I hate raw on-camera flash and just about every diffuser I have used to soften the harsh light. The one exception is the Gary Fong Lightsphere series. The collapsible one is particularly useful for travel and a tightly packed bag on local jobs. And yes, the light is soft and diffused, making it a perfect tool. (Geoff Livingston)
The MagMod Light Sphere is one of my favorite items, it’s a rubbery material so it’s ‘smashable’ to store in the camera bag and easily snaps on the flash by the magnet mount. (Marie Joabar)
Any product by Lume Cube. Lume cubes are small but powerful lights that you can pack in your bag and use as needed. They are a great option when you don’t want to use Flash. They are perfect for nature photographers when you need just a little bit of light in a dark spot. The Panel Mini is a great price point at only $60.00; this little light packs a lot of brightness. (Lori Lankford)
 The shoe-mounted bounce and swivel off-camera flash with a diffuser head for that bit of fill light for people's faces on indoor and outdoor events. (E. David Luria)
Colored gels so the light from the flash (or flash light if light painting) matches the color of the ambient light. The CTO (color temperature orange) is extremely helpful but don’t stop there, use these to add a touch of creative color as well. (Marie Joabar)
Catherine Simmons likes to use colored gels in some of her portraiture to create fun color images.
Diffusers: When the light is too harsh, I will use a diffuser to reduce contrast and create even lighting. Great for everything from flowers to people. (Corey Hilz)
Reflectors: it’s helpful, especially when doing creative or macro photography, to have these little 12” reflectors tucked away in your bag. They come in handy to bounce a little light into shadowy places or onto your subject. (Beth Haubach)
A small reflector that is gold on one side and silver on the other handy. It’s very helpful indoors and outside for reflecting light onto your subject which is usually close up or macro work of flowers. (Lewis Katz)
Light Tents are great for product shots or any item that you want the light to be soft and even. Place the lights on the outside and the white cloth sides and/or top panels will spread it out evenly. Available in many different sizes. (Marie Joabar)
WOWTECH 1040 Lumen LED Flashlight- Flashlight is also small but packs a bright light which is essential for those night adventures. (Emily Carter Mitchell)
Tripods and Such
An “L” bracket tripod mount: This is ALWAYS attached to my camera and is one of the niftiest camera gadgets. You can quickly switch the camera from landscape to portrait orientation (or vice versa) without having to do a lot of fiddling with the tripod. Additionally, it helps keep the weight of the camera over the center of tripod, rather than the camera hanging off the side in portrait orientation. (Beth Haubach)
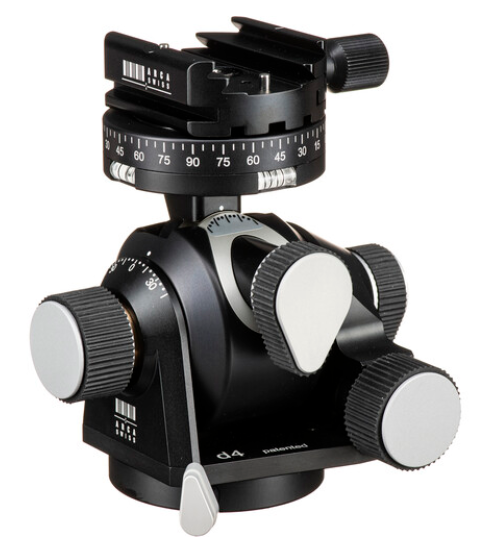
When I am shooting on a tripod I want to be able to make precision adjustments so I can achieve just the framing I want. The Arca Swiss D4 Tripod Head with a classic knob quick release supports both coarse and fine adjustments and of pan, tilt, and yaw, with exceptional smoothness. And it is more weather proof than its predecessor, the Arca Swiss Cube. For advanced photographers (Roy Sewall)
Another great tripod accessory is the Really Right Stuff TA-3 Leveling Base. Usually it takes quite a few passes with leg lengths to get a tripod absolutely level, such as for panoramic photography. But with the leveling base (under the Arca Swiss D4), you can turn the knob at the bottom of the column, orient the base to horizontal with the built-in level, and turn the knob back to lock it in place. Very quick and accurate. You will choke at the prices of this and the tripod head listed above. (Roy Sewall)
A remote shutter release is beneficial to prevent camera shake when taking a picture on a tripod. (Mel McNamara)
SmartPhone Accessories
The Joby Gorilla Pod with Smartphone Mount: Small lightweight tripod designed for a mobile phone. It has legs that wrap around a branch, pole or railing. A ball head and smartphone mount makes composition and long exposures a breeze. (Michael Koren)
Moment Lenses are one of my favorite accessories for my iPhone 11, great for amazing macro and wide angle imagery. (Catherine Simmons)
Camera Bags, Pouches, Wraps
PeakDesign Slide: The only camera strap that I will ever buy. Comfortable and versatile, it lets you sling your camera onto your hip, on your back, and never ever fails. I love them so much that I have bought them as gifts for other photographers. The slide ‘lite’ is not as good. (Geoff Livingston)
Do your camera straps get in the way sometimes? I love the quick release strap and hand strap by Peak Design. The strap is sturdy, adjustable and the ability to move it in 2 seconds is perfection. (Lori Lankford)
Domke 19x19" Color Coded Protective Wrap: I love these when I need a protective wrap when my gear is not in my padded camera bag. These are really versatile; great for camera bodies, lenses, flash units and more. They stay closed with velcro. (Marie Joabar)
Vanguard ALTA FLY 49T ROLLING CAMERA BAG The world of accessories for photography is endless, but in my life, it is essential to have a compact kit that is good for international travel. My favorite camera bag I’ve owned so far is the Vanguard Alta Fly 49T. As a rolling bag it’s small enough to fit in an overhead compartment. In it I can fit a full-frame DSLR, 500mm, prime lens unattached, a 100-400mm attached, a 24-105mm and a wide angle 16-35mm. There are wonderful storage sections for up to a 15-inch laptop, two pouches for chargers, etc. and still space to add small items. (Emily Carter Mitchell)
The Tiffen Filter Pouch for 62mm – 82mm round filters and the Ruggard Neoprene Protective Memory Card Pouch
Both are lightweight and can fit into small spaces. (Emily Carter Mitchell)
Card Wallets: I always carry spare cards and batteries, but if I didn't have a card wallet to keep mine in, I'd surely lose my memory cards. And yeah, that gets to be expensive after a certain amount of time. Not the most flashy accessory, but definitely one of the most practical.
OpTech Hood Hat: This neoprene lens cap quickly slips over the front of the lens even if your lens has a hood attached. Soft neoprene will not scratch the lens or absorb water. Collapses to fit easily in a pocket when not in use. (Michael Koren)
Miscellaneous: Helpful To Have On Hand
CamRanger Mini so I can bracket the ISO on my studio lighting shots (since I can't bracket f/stop or shutter in studio). This allows me to capture all the shadows and highlights and basically create HDR portraits. (Catherine Simmons)
Altura Photo Professional Cleaning Kit Full Frame DSLR Cameras Sensor Cleaning Swabs with Carry Case: I use the Altura DLSR Cleaning Kit to keep my camera sensor clean and it is a great kit that includes all sorts of goodies like a rocket blower, brush and microfiber cloth. (Emily Carter Mitchell)
 For bright sunny days when it’s difficult to see your LCD screen, a hood loupe is a must have item. It allows you to check your exposure, composition and focus. (Mel McNamara)
Beth Haubach likes the Hoodman Loupe brand, it’s super handy on those sunny days when it’s literally impossible to view the LCD screen on the camera.
The bubble level app on my phone to make sure my tripod-mounted camera is level from left to right and front to back. (E. David Luria)
Copper tube and tulle: I keep these tucked in my bag if I want to add a creative touch to flower or macro photography. (Beth Haubach)
The Heat Company makes some incredible gear for shooting outside in the winter. Check out their incredible gloves that keep your hands warm and give your fingers access to use your camera. They are amazing! (Lori Lankford)
Rain Sleeves: This was a “splurge” and an “upgrade” from plastic bags for me! They are heavier weight than grocery store plastic bags, and great to have on hand if you get caught in the rain. The not only cover the lens and camera but also part of your arm. (Beth Haubach)
A plastic sheet or large trash bag for whenever I have to set my camera bag on the ground. It keeps the bag free from sand or grit that may work its way into the camera bag and cause damage to the gear. It also protects it from the wet or muddy ground. (Marie Joabar)
A trash bag! A little trick I learned from fellow photog is to always carry a trash bag in my camera bag. While this may sound odd, rain happens and cameras don’t tend to mix well with water. There are many great rain covers for cameras none are as compact and cost effective as a plain ole trash bag. I prefer the clear translucent ones but any will do! (Claire Edkins)
Hair ties! The secret power of the hair tie is a McGyver like use to hold together tripods, fix a broken camera strap, or hold close a battery door! Plus, for the long haired photogs out there, there’s nothing worse than your own hair ruining a shot or getting stuck in a camera strap and a hair tie can be a lifesaver. (Claire Edkins)
Whether your holiday shopping or not, we hope you'll find some handy accessories for yourself from our favorites listed here.
Brightness and Visual Weight
October 13, 2020 by Admin
By Roy Sewall
I say there should be no rules in photography but we should be aware of human nature - how people are likely to react.
We can observe that viewers' visceral reactions to photographs are driven by the subject, light, composition, and color (or black-and-white tones). I believe that all four of these "attractors" have to be in good condition to make a great photograph; we've observed that if any of them are lacking viewers will be less pleased with the photograph. However, even if they are all in good condition, there are over 60 "detractors" that can ruin a photo. Awareness of these issues is very helpful for creating successful photographs.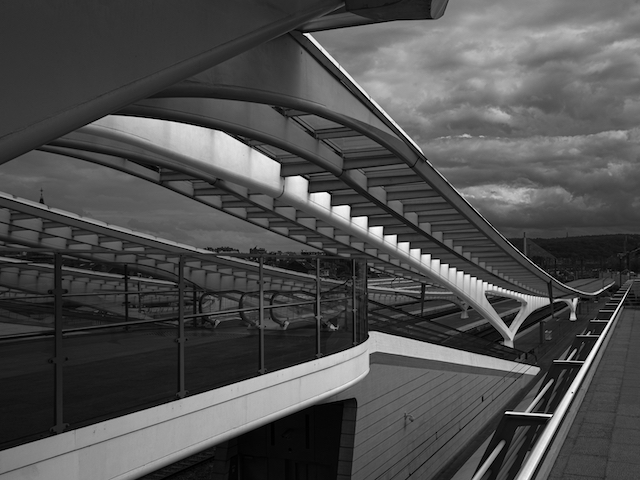
One of the most prevalent detractors I see in work by less experienced photographers is bright white or near white skies with no detail. When you look under the covers to figure out why this is a problem, you find that bright areas, like white skies, create a lot of "visual weight," meaning that the viewer cannot help but go look there. But when the viewer's eyes get there, there is nothing to see. It's totally counterproductive, as it takes the viewer away from what you want them to look at.
Take a look at the sample photograph below. While in Ireland in 2015, I stumbled onto a wedding photo session in progress on a country road. I snapped a few quick shots for fun but didn't want to interfere with the official photographers.
Do you notice how much the white sky in the upper left corner is a distraction that pulls the eye away from the couple, who are the point of the photograph? Even the little white triangle over their heads is distracting. These bright white areas have way too much visual weight.
My own solution to this is to avoid white skies in all serious photographs. They never help a photo, and if you work the scene hard enough you can get white skies out of the frame. (I don't worry about them in casual snapshots or record shots.)
As artists we need to direct the viewer's eyes to where we want them to look. Part of this process is to manage the visual weights of the various objects and areas. I call these objects and areas "elements," as in compositional elements. In the photo above, the elements are the people, the road, the trees, the bushes way in the back, the sky - all the things in the scene. (Note that the word "elements" can have other definitions by other photographers.) So in analyzing a photograph I will identify elements with inappropriate visual weights that are creating a distraction, or conversely, not enough emphasis.
I'm aware of six contributors to an element's visual weight: size, position in the frame, brightness (white skies are an example), sharpness, contrast, and warm colors.
This is the kind of discussion that Roy has during his critique groups and the “Take Your Photography to the Next Level course.” Learn more about how you can work with the Attractor elements and avoid the Detractor elements in your photos.
Are You Ready For Autumn?
September 23, 2020 by Marie Joabar
 The calendar states September 22 is the first day of fall and the cooler weather these past few days definitely confirms it.
Gone are the hazy, humid days of summertime and it’s so much easier to enjoy photography now as we’re not bothered by pesky bugs and stifling heat. Instead, we find crisp mornings, cool breezes and the promise of a beautiful color palette to photograph.
Here are a few ideas for photographing fall.
And check out the fall themed class list below to inspire you further.
- Look at your past fall photos or at photos online now and get some ideas of the photos you would like to capture, then seek our locations that offer you that opportunity.
- Looking for fun places to get your fall shooting going? Think about pumpkin patches, farm stands and country farm markets. Even your local garden center will have displays of gourds, winter squash and of course pumpkins.
- Photographing waterfalls during autumn is extra special. Find some falls or cascades framed with colorful leaves. Consider a long exposure for a silky look to the water.
- Let’s not forget reflections. Sunlight through an orange sugar maple reflected in a still stream makes a stunning fall image. Skip the polarizer for these shots, it could remove the reflection you’re trying to capture.
- Fall gives us plenty of opportunities to capture fog. Plan some early morning trips to the forest with w nearby stream, a colorful lakeshore or riverbank. While the air is cooler than the water, we’ll find fog and perhaps even mist.
 - Fall is the ideal time to think about textures; close ups of crisp leaves, intricate seedpods, leaves carpeting the forest floor, etc.
- Capture colors of the season. Not only do we find the lovely warm tones of the leaves; orange, bronze amber, etc. we’ll also find fall stand outs like purple asters, garnet colored mums, and yellow goldenrod.
- Pair opposite colors in a frame for a more compelling shot; orange leaves against a blue sky, purple asters against yellow mums.
- Nothing’s cuter than children playing in a pile of leaves! And don’t forget to capture friends, family members, and pets enjoying the season too. This is the perfect time for family portraits and shooting images specifically for sharing with others.
- Try using the Cloudy White Balance setting even on a sunny day to add a bit more warmth to a fall scene.
Hoping you all enjoy a beautiful fall season!
Don't forget to share your favorites with us and maybe your shot will be selected as an entry in our Best Of Fall photo contest!
On Instagram, tag CapitalPhotogCenter.
https://www.instagram.com/capitalphotographycenter/
On Facebook; tag, CapitalPhotographyCenter
Phone Photography Pointers
August 13, 2020 by Marie Joabar
 Many of us have DSLR or Mirrorless cameras yet we all turn to our phone camera at times simply because it’s always with us and let’s face it, it’s just quicker and easier to share right away from our phone.
Think of the phone camera as simplified version of your real camera. With a real camera, we might be more deliberate and conscious of our exposure settings and choose the right ones to yield a specific look.
- With the phone, we’re often faced with a large depth of field with everything in the frame sharp (unless we’re using the portrait mode to blur backgrounds).
- Our shutter is usually set fast enough to give us sharp motion shots but we don’t have the option to be creative and blur the motion with a slower shutter speed.
- The native camera settings give us limited options such as flash or no flash, HDR (for scenes with a wide range of brights and darks), as well as the ability to take a slow motion or time-lapse video.
But if you use capture apps you’ll find an endless number of settings available to achieve any look you’re after.
CAPTURE APPS
Having a collection of go-to capture Apps will help take your phone photography to the next level. The Apps are your tools and you’ll use the one that will give you the “fix” you’re looking for.
Here are just a few of our favorites:
- Camera+ offer the ability to set ISO, aperture and shutter speed but it also offers a Macro setting so you can get nice tight shots with a bit of blurring behind.
- Slow Shutter gives you plenty of options to slow the action so you can be playful and creative with your motion shots.
- Hipstamatic is super fun and creative for some funky looks.
EDITING APPS
 The real fun in phone photography lies in the editing apps and the list is truly limitless. We recommend learning just a few and getting stronger with those before purchasing more.
Once you have a few you like, you’ll compose a shot knowing right then how you’re going to edit it with a particular app. You might use one that adds birds to the sky or will remove telephone wires or render a creative sketch or painterly look.
Here are just a few of our Editing App favorites:
- Snapseed; This is a must have editing app. Adjust exposure, saturation, contrast, add lens blur, vignettes, a grunge look, BW rendering, frames, text and text bubbles, and so much more.
- Touch Retouch will remove unwanted objects like cable wires, trash cans, etc.
- Artista Oil gives a painterly look to your images.
- Distressed will add textures and also has options to add birds.
- The list goes on.
We can do our quick edits right there on our phone but we can also sync our images to our iPad and have a larger space to work on for more complicated edits.
LENSES
 With a regular camera, we’ll choose a lens to give us the view we’re after; be it an all-encompassing wide shot or the super magnified telephoto one. With the phone camera our options are much less and we have to be more creative as we frame our scenes to tell our stories.
- We can zoom in but it actually reduces resolution and the quality may suffer as a result. The same thing happens if we crop after the fact, we’re simply reducing the resolution and giving up picture quality.
- Accessory lenses such as those offered by Momenta are an alternative worth looking into. The lineup has options for macro, wide angle, fisheye and telephoto (58mm).
Instructor Michael Koren states, “Photography with a phone is as real an art form as using any other camera or artistic medium. The smartphones of today offer incredible editing power to compliment the quality lenses and ever better sensors. All editing can be done on the phone and shared with the world in minutes after taking a picture.”
To unleash the power of apps and expand your creative vision with a smartphone, consider the Creative Smartphone Photography In-Person class or the Online Getting Started With iPhone Photography course. You'll be amazed at what you will create!
 CLASSES
IN-PERSON
June 19, 2021 - Creative Smartphone Photography Field Shoot - On the Mall
ONLINE
Getting Started with iPhone Photography in June, 2021
Shutdown Silver Linings
July 22, 2020 by Marie Joabar
Curious about what we were doing with our time during the shutdown? Read on and discover how many of our instructors and staff kept themselves busy and motivated with their photography these past few months. Learn what they found as a Silver Lining in all of this.
Beth Haubach
 "The shutdown gave me an opportunity to focus on my photography in a way that my normally jam-packed life usually didn’t. However, the reopening has seen my return to interfacing with Capital Photography Center class participants. I love getting to view images taken at the various classes….it gives me a chance to live vicariously through their experience!
I “need” to do photography regularly to take a break from the demands and routines of daily life. Photography takes me to my “happy place” where it’s just me, my thoughts and the chance to create something. Recently I made an early morning visit to Kenilworth Aquatic Gardens to photograph the lotus and lily flowers. I literally spent the morning “lost” amongst the lotus; one flower more beautiful than the last. It definitely helped me recharge. This past weekend a photographer friend and I visited an old woolen mill in Pennsylvania. We spent four hours rummaging through four floors of old equipment, looms and spider webs! It was good for the soul! The next adventure may just be to my garden but the distance from the house is not important. What is important is that I put down any “work”, pick up the camera and take the time to do something that is just for me.
One of my favorite sayings; “Just do it!” Whether it’s simply a trip to your backyard or a planned destination: JUST DO IT! Things are starting to open up so do a little Google search on your favorite places to see if they are open or venture out to a place you’ve been wanting to visit. Keep your camera bag packed and ready to go at a moment’s notice so you’ll never miss an opportunity to grab the shot!"
Corey Hilz
"Explore close to home! You don’t have to travel far to find fabulous photo opportunities. Check out somewhere you’ve heard about, but have never been to. Or challenge yourself and find somewhere completely new to you!"
Marie Joabar
 "From mid March thru mid June I was buried at my desk but I was thankful to have the work; from building the Online site, creating my own online courses to teach, planning for the reopening, and scheduling summer and fall in-person classes. Whew it was a busy time!!
While I was not able to get out and shoot myself, I would look at the exciting images on Instagram, thankful for the view of the world beyond my office!
Finally in July I was able to venture out with my camera for the first time since February. I managed 2 different shoots and it was like therapy! I loved getting lost in it and focusing only on my current environment. I’m hopeful you too will get out and photograph even if it is only in your backyard. There is something about seeing a slice of life thru your lens that can give some much needed pleasure right now."
Michael Koren
"One positive as a result of the shutdown is time to scan and add my older negatives and slides to my Lightroom catalog.
The reopening and leading live classes again helps one appreciate and notice the smile in a student’s eyes."
Lori Lankford
"As spring came with Covid, I knew I needed a project. As I walked each day to take a break from Zoom calls I started to really notice the light, colors, textures around the homes in my neighborhood. I started taking my camera and capturing the sights around me and then creatively editing the scenes to add emotion to the images. It has been so rewarding to look at things that I see each day and really focus on the details. I have been printing the images to share with each home’s owners as a way to give back and add some joy during this time.
While Covid has impacted my ability to travel and shoot grand landscapes or the Milky Way, I have used this time to expand my macro skills. Macro allows me to focus on the small details around me, which has a calming effect. I have also poured through old images, finding nuggets to edit or refresh. Learning new skills as an artist has also been a focus. I have taken a course in learning about light through a review of artwork. While this time with COVID has been limiting, it has also allowed me time to expand my knowledge and skills in a new way.
This is a great time to try something new in your photography, stepping out of the norm to explore and expand your skills. A great activity is a themed photo walk of your neighborhood or local area. Walking and shooting with a theme can help you focus on something different, explore different styles of photography, and take a break from the routine.
Ideas for a quick photo walk:
- Walk and look for textures
- Focus on a color and only shoot that color
- Walk and shoot the alphabet—find images for each letter
- Shoot in black and white
- Walk and shoot reflections or shadows. "
E. David Luria
"With all the extra time on my hands,
I reviewed 3,600 family slides going back to the 1960's, picked 800 of them and scanned them into flickr sites for my children.
I also wrote and edited a 130-page ebook on photography entitled "Washington Photo Safari's Guide For Amateur Photographers."
Emily Carter Mitchell
"As a nature and wildlife photography, the pandemic has presented new opportunities for me. With the quieting of the world, nature has begun to reclaim its surroundings and springtime was migration season. It was refreshing to enjoy quieter natural areas that were lesser known to rekindle my creativity and to refresh the spirit. Now with the hot summer I’m enjoying the indoors and spending my time honing my artistic skills and creating new photo projects. The newly found free time has allowed me to rest, refresh and return with an inspired eye for creativity behind the lens."
Roy Sewall
 "The COVID-19 situation has been exasperating and creepy for all of us. But there have been some real silver linings. Since I found myself with much more available time, I decided to look into photos that I had never gotten around to processing. It was a treasure trove. I started processing like crazy and posting the best photos on my website. Between lots of shooting last summer and fall, and all the processing this spring and summer, I have had my most productive photography year since 2006 when I was shooting for my second book. When would I have done this if it hadn’t been for the pandemic – maybe never?"
Catherine Simmons
 "Covid is changing the landscape of the entire globe. This change reaches into every facet of our lives, photography included. Social distancing has demanded new ways of thinking about portraiture. Shutdowns have caused otherwise travel photographers and portrait photographers like myself to stay home and focus on creating new kinds of art with accessible tools on hand. Branching out into new ideas and experimenting within different genres of photographic arts is inspiring and will certainly expand your creative and aesthetic bandwidth. Keep making pictures and always stay curious.
Because photography is my weapon against boredom as well as my creative outlet through which I process life, I've enjoyed creating a visual narrative of Covid through socially distanced, masked portraits. I've also begun shooting ornamental chickens for fun as they can't get me sick! The world may crumble, but as long as I have my gear, I'll be just fine."
We hope these words inspire you to get out and shoot. As Roy Sewall often says, "Shoot often, shoot well!"
10 Tips For Landscape Photography
June 25, 2020 by Marie Joabar
The key to an engaging landscape image is to photograph visually interesting scenes, convey a sense of depth, have foreground interest and use strong compositional elements. Review these 10 tips for stronger Landscape shots.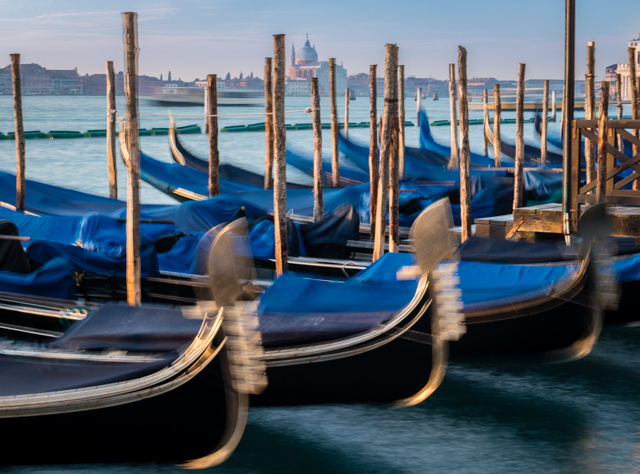
1. Plan Your Shoot
Is there a specific image you’re looking to capture? If so, research and plan where you can go to get it. Make a scouting trip so you know where to go, where to park, what angle you’ll shoot from, etc. Make a note of how it will be lit and whether to shoot it in the morning or afternoon. If you can’t go there in person to scout, do some online research and gather as much info as you can.
2. Use An App
The Photographer’s Ephemeris (TPE) is invaluable for knowing the direction of the light for your scene at various times of day at whatever location you dial in. You can also pay for Skyfire which forecasts the probability of a colorful sunrise or sunset.
Another popular app is PhotoPills (for iOS) which gives even more; depth of field tables, exposure adjustments when using filters, Milky Way position tools, star trail calculator and Augmented Reality (AR) modes so you can see the sun, moon, or Milky Way position overlaid on your scene.
3. Plan For the Best Light
If the scene is facing east, plan a morning shoot and capture the soft golden light. If it’s facing west, plan for late afternoon. If the scene is facing south, either morning or late afternoon could work, and if facing north, it will be shaded just about all of the time.
Cloudy days give nice even light allowing us to shoot all day while thick, heavy clouds may be gloomy (fine if that’s the mood you want to capture). Consider processing your drab sky images as black and white. Cloud formations before and after storms are dramatic and definitely worth capturing.
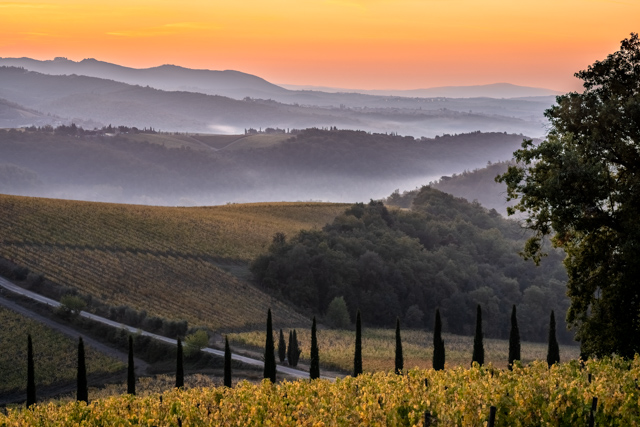 4. Lenses For The “Look” You’re After
Wide angle lenses such as 14mm, 18mm, 24mm give greater depth of field. So when you want everything rendered sharp from front to back, you’ll have an easy time if you use a wider lens. Try using f8 and f11 if there is nothing too near you in the foreground, use f16 or 22 if there are nearby foreground elements that you want sharp as well as the background.
For the times when you cannot get close enough physically, a longer telephoto will come in handy. However, these give less depth of field and compress space so carefully choose the aperture and zoom in in playback to make sure you captured the depth you wanted.
5. Composition
- Frame a compelling image. Successful landscape images usually include a foreground element as well as the vast scene beyond. This conveys both depth and visual interest.
- Intentionally decide what to include in the frame and what to leave out. If it’s not helping the image, it’s not worth including. Sometimes less is more and helps focus the viewer’s attention.
- Practice “Frame Patrol,” look at the edges along the entire frame, are there distracting elements? Can you zoom tighter, or go wider?
- Shoot from different position and angles. Capture a few compositions of the same scene; some wide, some tight, some vertical and some horizontal. When you get home, you can decide which you like best.
- Avoid centering your main subject, instead, think thirds and place your horizon lines in the upper or lower third of frame. Think of a tic-tac-toe grid over your viewfinder and place your main subject near one of those intersecting lines for better visual interest.
- Work with compositional elements to affect mood.
- Bright colors, convey excitement and energy and grab the viewer’s attention. A moody scene with a muted color palette can cause the viewer to pause and linger.
- A winding path, road or stream will lead the viewer’s eye through the frame as will leading lines.
- Play with angles, shapes and patterns for visual interest.
6. Check Focus
For the large scenic landscape shot, focus on something approximately one third into the scene and press the depth of field preview button* to see if you have the sharpness throughout the scene that you want. If not, focus on something a bit nearer or further and again check what’s sharp. Be sure to put some distance between yourself and your closest subject for best results.
*Depth of Field Preview button - When we look through the lens, the aperture is wide open letting in the most amount of light so we can see what we’re shooting. When we press the depth of field preview button, it closes the aperture to the one we’re using so we can see what’s in focus and what’s not.
Don’t forget to zoom in in Playback to ensure you have a tack sharp image.
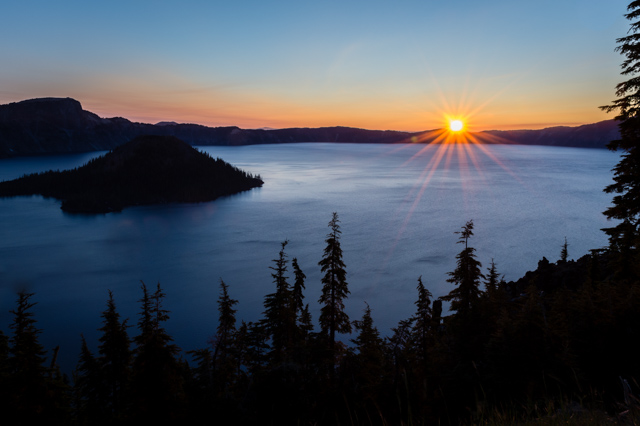 7. Check Exposure
Set your camera to display over exposure warnings (sometimes referred to as the blinkies) so you can retake the image if needed with a different exposure setting. Use the camera Histogram to measure your exposure and to determine if you have captured a good range of data in your file.
8. Gear Recommendations
- Carry a tripod so you’re able to use low ISO settings and have less grainy images. These also to allow you to use slow shutter speeds that might be needed when using small apertures of (f16 or 22). Additionally, you can be more creative and blur the moving clouds and flowing water, etc.
- Plan on 3 filters;
- On sunny days a Circular Polarizer will blue up your skies, add nice contrast and give better saturation.
- For times when the sky is super bright, a split Neutral Density filter can be placed over the lens to darken the sky and balance it better with the landscape below.
- A Variable Neutral Density filter allows you to dial in the amount of darkness that you need in the whole scene and allows you to use slow shutter speeds on bright days, great for shooting waterfalls, blurring flowing water or clouds.
9. Be flexible and Go With The Flow
Careful planning can help you reach your goals for lovely landscape shots but sometimes things happen that are out of our control. Don’t despair, look for the silver lining in the situation and try to make something from it. Having a Plan B helps.
 10. Shoot Happy
Don’t get caught off guard, carry extra memory cards and batteries and bring water and a snack. Bug spray in the summer and hand/foot warmers in the winter. Don’t let poor planning distract you from capturing that winning landscape shot!
For hands-on practice with landscape compositions, consider any of our In-The-Field-Shooting classes. Hope to see you at one soon.
Editing Your People Pics
May 16, 2020 by Admin
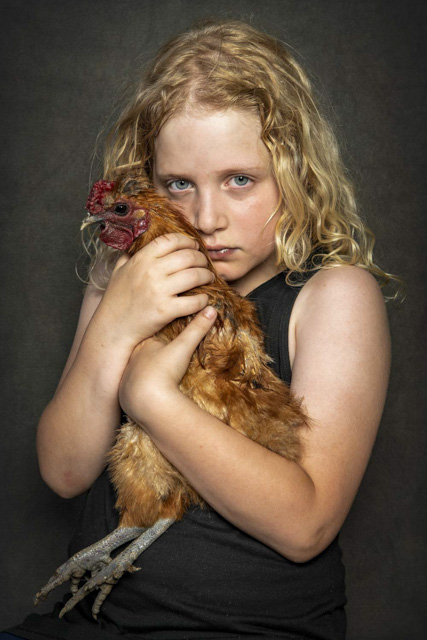 Whether you are taking casual family & friends’ photos or capturing professional style headshots and portraits, having the skills to edit them will make your images stand “head and shoulders” above the rest, pun intended.
Lightroom and Photoshop have incredibly powerful editing tools and learning them is not as difficult as you may think. Many photographers begin by learning Lightroom, but eventually transition to Photoshop as their needs for specialized editing tools and techniques increase.
Lightroom is great for tasks such as whitening teeth, brightening eyes, removing small blemishes, or lightly smoothing skin; however, some tasks require the more advanced capabilities offered in Photoshop. For instance, fixing a chipped tooth, removing stray hairs, slenderizing trouble spots, enhancing a smile, or a toning down a hot spot on the forehead are easy with Photoshop’s built in filter tools, adjustment layers, and advanced brushing techniques.
Additionally, even some of the fixes Lightroom offers, such as skin softening or color correction, can be accomplished with more advanced specificity in Photoshop.
- For enhancing highlights in the hair, Photoshop users can dodge and burn on an 18% gray layer so as not to destroy pixels as well as to have fine tuning capabilities by reducing or increasing opacity on those changes.
- Sometimes, skin tones can appear to have red blemishes or rose-colored imbalances. By using a hue/saturation adjustment layer in Photoshop, those red problem areas can be eliminated rendering a more natural and healthy-looking skin tone.
- The patch tool can be used to remove the redness, bags, and wrinkles from underneath a person’s eyes with a few clicks of the mouse.
- The liquify tool allows for the slimming of specific areas on the body and/or face as well as in enhancing of a smile or evening out asymmetrical attributes, in the eyes for example. Photoshop is a very powerful program with which photographers can fix just about anything with a basic understanding of simple to use tools.
 Which Program to use? To decide which of the 2 programs is right for you, it’s helpful to consider the needs at hand. If you have 30 images from an event or photo shoot and you just want to add some basic exposure or color adjustments, Lightroom may be a better choice. If you have a few stand out portraits or images which you want to transform into an heirloom photograph, Photoshop will probably be a better option. Regardless of which category your work falls under, it’s highly likely that at some point, you will need both.
It is good to have Lightroom as a foundation to using Photoshop and when you subscribe to the Adobe plan, you get the Photography Plan, you can get Lightroom Classic, Lightroom and Photoshop all bundled together for $9.99 month.
Workflow - A good workflow might be to use LR for your simple exposure adjustments, white balance correction, and cropping. These edits can be applied as a “batch edit” which means that by editing one image in the bunch, those edits can then be applied to all other images taken in the same lighting elements, so you are not having to edit each of the 30 images separately. This saves time and ultimately money if there is money involved. After these basic edits are finished, you can then load your top choices or the files which may need some advanced work into Photoshop. In other words, it’s invaluable to have a working knowledge in both programs.
 Certainly there is a plethora of editing programs available, however, Adobe LR and PS are highly supported programs in the photographic industry. Both offer RAW file processing which are then easily sharable among other creatives who utilize these tools and trouble shooting is easy with Adobe support.
We offer classes covering both of these programs througout the year. We hope to see you in one soon.
5 Social Media Tips For Photographers
April 25, 2020 by Admin
 Social media is one of the most powerful tools a photographer can use to get their work out there to new clients, editors, or just art lovers. Social media like Instagram and Facebook have become proven business tools in this new market and are crucial to a photographer’s success. However, social media can be intimidating. We all want to get our work out there and reach new people, but with the millions of photos out there it can feel easy to get lost in the algorithms. But fear not! Your work deserves to be seen and these tips and tricks are here to help!
1. Schedule your posts!
One of the main reasons we feel intimidated by social media is because of the time commitment that posting regularly can require. An easy way to maintain regular posting is to use one of the many free post-scheduling sites. Take an hour and pull out the photos you want to share, write up some captions, and pick which dates and times you want the posts to go out- it’s a great way to have your photos go out regularly and at optimal times without having to think about it! 
2. Engage with fellow photographers!
We all want the most amount of likes and comments on our posts, right? One of the best ways to do this is to give what you want to receive. Comment on the photos you love and like and follow other photographers that inspire you! The more interaction you have with people, the higher up you will be in their algorithm, and they’ll see your posts first! 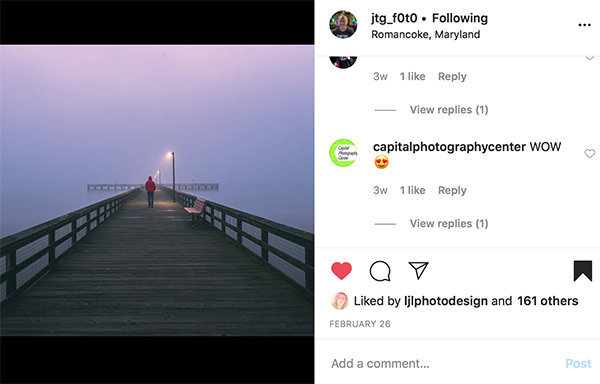
3. Switch to a business account!
Apps like Instagram have a ton of helpful features that you can only access if you to switch your profile from a personal account to a business account. With a business profile, you can access your account analytics, which tell you information about your followers and your posts! With this feature, you can find out everything from the age range of your followers to what times of the day your followers are online. Take some time to explore and experiment with what your followers like! 
4. #Hashtags
#Use #hashtags #always! Hashtags are short relevant words preceded by a # symbol and are a crucial way to bring new people to your images! Make sure to use specific hashtags to draw in the most people that would be interested in your work. For example if you take photos of birds in the wild, when you share them using hashtags like #birdphotography #bird_captures #birder you are more likely to reach those with similar interests. Broad descriptor hashtags like #bird or #nature are likely to get lost in the shuffle and will have minimal reach. While opinion on the optimal number of hashtags per post, I recommend an average of 10 per caption.
5. Focus on the content!
Social media is, at its core, all about the image! As photographers we have a hard time editing our own work and unless you have a photo editor on call, it can be tough to decide what to post and what you think your followers will like. Luckily social media is like your own personal focus group. Take some time and look through your posts and see what kind of photos have been most popular and consider posting similar content. Remember though that the photos that don’t preform well on social media are not necessarily bad photos! Sometimes photos just don’t translate as well on small screens or in the fast paced environment of social media!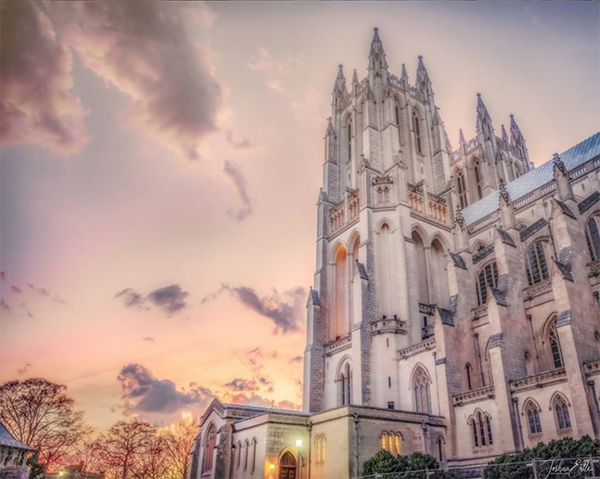
Overall the most important thing to remember with social media is to be yourself! Behind every account is a person, and authenticity goes a long way- so go post without worry and make sure to tag #CapitalPhotogCenter so we can see your posts and images!
Pier in Fog image by John Goucher - @jtg_f0t0
Washington Cathedral Image by Joshua Ertle - @joshua_ertle_photography
Spring Things To Photograph
March 4, 2020 by Marie Joabar
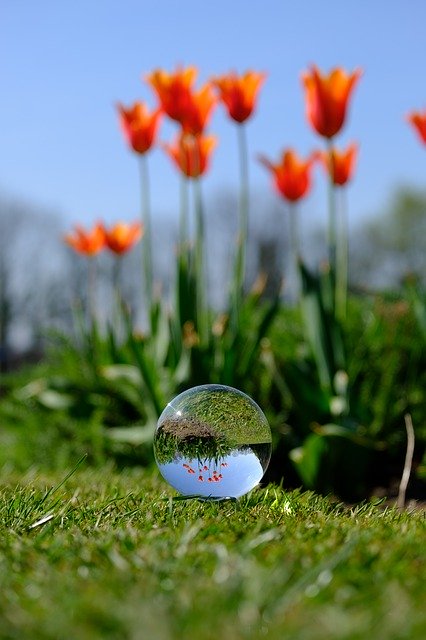 Winter is behind us now and we’re so excited to see the signs of spring! It’s time to get in the outdoor shooting mode again and enjoy capturing our favorite things at our favorite places.
Whether you prefer to photograph flowers, or friends and family framed against a lovely spring backdrop, or capture street scenes at one of the area’s spring festivals we hope you’ll find a few choice places to visit in the list below to help get your spring groove on.
Grab your camera and let’s get the season started!
Street Photography Opportunities (Festivals, Markets and more)
Cross Hairs Garage Races - March 10, 17 & 24
The series is held every Tuesday in March and challenges amateur and elite cyclists alike to compete. Frame the excitement from the comfort of the sidelines. https://www.crystalcity.org/do/crosshairs-garage-races
Savor Bowie 2020 Food, Wine and Music Festival - April 18
http://concertsforcausesinc.org/event/savor-bowie-2020/
Passport DC - Around the World Embassy Tours - May 2
https://www.culturaltourismdc.org/portal/signature-events
Revolutionary War Weekend At Mt Vernon - May 2 & 3
https://www.mountvernon.org/plan-your-visit/calendar/events/revolutionary-war-weekend/
Mt Vernon Wine Festival and Sunset Tours - May 15-17
https://www.mountvernon.org/plan-your-visit/calendar/events/spring-wine-festival-sunset-tour/
National Cinco De Mayo Festival - May 23
https://www.evensi.us/national-mayo-festival-mall-9th-12th-streets-sw/341662842
Farmer’s Markets - A few farmer’s markets are open year round such as Dupont or Old Town Alexandria but many won’t open until April or May.
https://dc.curbed.com/maps/map-washington-dc-farmers-market
http://freshfarm.org/farmers-markets.html
Cherry Blossoms Events
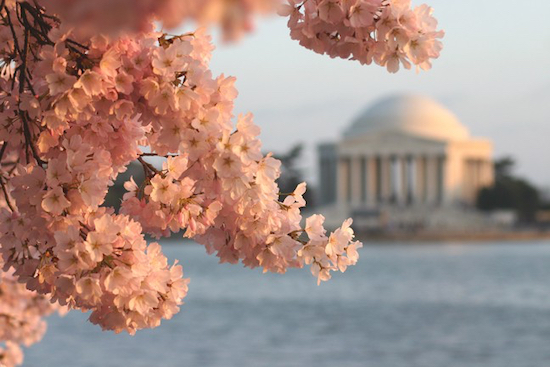 Blossoms Kite Festival - March 28
https://nationalcherryblossomfestival.org/event/blossom-kite-festival/
Cherry Blossom Parade - April 4
https://nationalcherryblossomfestival.org/event/parade/
Japanese Street Festival - April 4
https://nationalcherryblossomfestival.org/event/sakura-matsuri-japanese-street-festival/
Anacostia River Festival - April 5
https://nationalcherryblossomfestival.org/event/anacostia-river-festival/
Petalpalooza - April 11
https://nationalcherryblossomfestival.org/event/petalpalooza/
Japanese Jazz Day - April 26
https://nationalcherryblossomfestival.org/event/japanese-jazz-day/
Parades
St Patrick’s Day Parades
- In Alexandria - March 7
https://www.visitalexandriava.com/things-to-do/events/st-patricks-day-parade/
- In DC - March15
http://dcstpatsparade.com/
DC Emancipation Day Parade - April 18
http://dcemancipationday.com/
Funk Parade (in U St neighborhood) - May 9
https://www.funkparade.com/
Flowers and Gardens
Dumbarton Oaks Gardens
https://www.doaks.org/visit/garden
National Arboretum - The Arboretum offers a wonderful collection of cherry trees, perfect for those who want to enjoy the blossoms without fighting the crowds at the Tidal Basin. But there is so much more to photograph here in the spring from the Dogwoods, to the renown bonsai museum, and more. It also boasts one of Washington’s premier azaleas gardens with thousands of azaleas in a blaze of color.
https://www.usna.usda.gov/discover/gardens-collections/
The Bishops Garden at the Washington National Cathedral is rich landscape tapestry of plants of historic interest, plants of the Bible and Christian heritage, and native American plants. Among the 59 acres you’ll find Olmsted Woods, home to native wildflowers and a host of migratory birds, and All Hallows Amphitheater featuring curved stone walls and grass walkways.
https://cathedral.org/gardens/
Flower Mart at the National Cathedral - May 1 & 2. With vendor booths, an international floral display, free entertainment, food stalls, and activities for children, this is one event you don’t want to miss. https://allhallowsguild.org/programs/flower-mart/
U.S. Botanical Gardens - If faced with a rainy weekend head over to the U.S. Botanical Gardens and enjoy their orchid display through May 3. https://www.usbg.gov/
Smithsonian Castle Enid A. Haupt Garden
https://gardens.si.edu/gardens/haupt-garden/
While you’re there make your way around the Castle and enjoy the Katherine Dulin Folger Rose Garden and the Moongate Garden as well. A short distance away at the Smithsonian Arts and Industries Bldg is the Mary Livingston Ripley Garden.
https://gardens.si.edu/plan-your-visit/our-gardens/
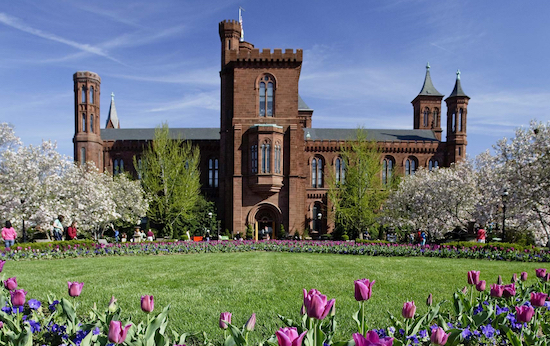 Meadowlark Gardens in Vienna Virginia offers lovely gardens to explore and photograph with 3 lakes, beautiful cherry trees, thousands of different bulbs in bloom, large colorful tulips, delicate fern fiddle heads, an intimate forest hollow and native wildflowers.
https://www.novaparks.com/parks/meadowlark-botanical-gardens
Brookside Gardens in Wheaton offers an amazing tulip display among other lovely gardens and settings such as the Woodland Walk, 2 conservatories, a lake, azalea, rose and aquatic gardens and much more.
https://www.montgomeryparks.org/parks-and-trails/brookside-gardens/visit/
Bluebells - find these beauties early to mid April at River Bend Park in Great Falls,VA, https://www.fairfaxcounty.gov/parks/riverbend at Bull Run Regional Park in Centerville, VA https://www.novaparks.com/parks/bull-run-regional-park/things-to-do/bluebell-trail and various other Virginia locations.
Cherry Blossoms - You'll find a stunning display at the Tidal Basin and Haines Point. Also look for them at various places in the region; around the Capitol, at the Nat Arboretum, at Meadowlark Gardens, Dumbarton Gardens and more.
Tulips - Early to mid April in the DC region is peak Tulip time. You'll find them at many of the gardens listed above as well as these few places.
- Floral Library - At the north end of the Tidal Basin boat rental parking lot you'll find an incredible dispaly of tulips.
http://www.washingtongardener.com/index_files/TulipLibrary2007.pdf
- The Franciscan Monastery in NE DC has a wonderful display.
https://myfranciscan.org/visit/#gardens
- Visit the area in front of the Netherands Carillon at the edge of Arlington Cemetery for a spectacular view of the Lincoln, Washington Monument and Capitol all framed with colorful tulips in the foreground.
https://www.nps.gov/gwmp/planyourvisit/netherlandscarillon.htm
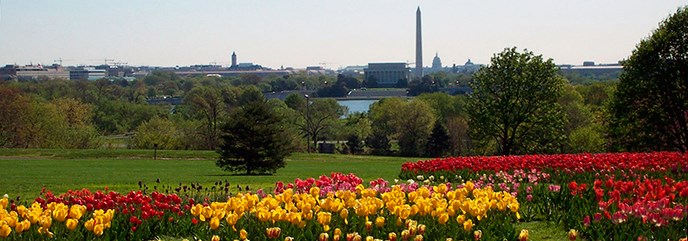
If you have a favorite place to photograph in the spring, share the news with us on Facebook.
Camera Sensor Cleaning Options
January 23, 2020 by Marie Joabar
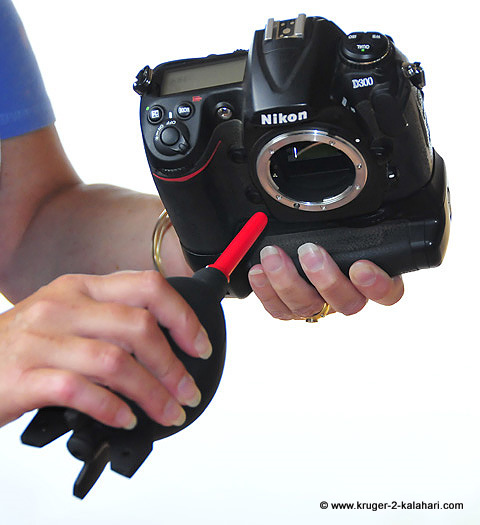 If you have a digital interchangeable lens camera, chances are at some point you’ll come across sensor dust. You’ll first notice it as little spots in the same place on all of your pictures. More an inconvenience than anything else, if not removed from the sensor, you’ll spend time removing it from your photos when editing.
Take precautions to minimize the amount of dust getting inside your camera and prevent having to clean the sensor as often.
- Keep a lens on the body at all times (unless it's packed for long distance traveling). There's no need to remove the lens when you're not using it or you're storing in your camera bag. Instead, leave your favorite lens attached so you don't have to open and expose the inside of the camera each time you use it and then put it away.
- Dust or pollen on the exterior of the body can easily work its way into the camera or lens and land on your sensor. When you’re done shooting outdoors and with the lens still attached to the camera, wipe down the exterior of your camera and lens using a lint free cloth. Wipe the front of the lens with a separate lens cloth or a lens brush so as not to scratch the glass or coatings.
- When changing lenses;
- Power off the camera to prevent the static electricity from pulling dust particles in.
- Turn the opening in the camera towards the ground to prevent anything from falling into the camera.
- If you are outdoors, and especially if it is windy, try to shelter your camera as best you can when changing lenses.
No matter how careful we are, dust inevitably works its way into the camera and finds a home on the sensor. We may not always see it in our photos because the dust particle may be in a darker area of the frame, it's much easier to see when it is in a brighter or smoother area like the sky. It’s also more visible on photos taken with a small aperture, f16 or 22, than those taken with a large aperture, f4 or 5.6.
If you see dust as you look through your viewfinder, you’re simply seeing dust on the mirror which isn’t a problem… until it moves further into the camera.
Many DSLR cameras have self-cleaning sensors that shake a bit when the camera is powered on or off which is designed to make the dust particles fall off. Although this is very helpful, don’t rely on it to keep your sensor free of dust or dirt. Sometimes humidity or moisture in the camera causes dust particles to adhere to the sensor, and sometime oil from the shutter or mirror splatters on the sensor. No amount of shaking will remove these spots. 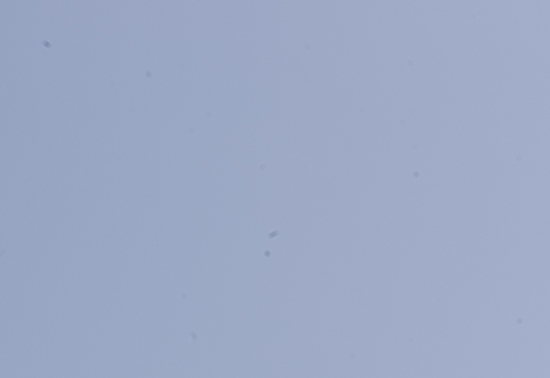
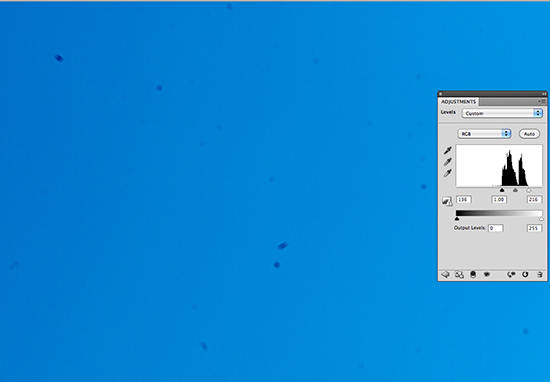
To check your sensor for dust or dirt follow these steps;
- Use a longer focal length - 70 to 100mm should work fine).
- Set your camera to its lowest native ISO (avoid the Lo 1 or Lo 2 settings).
- Set your Aperture to f16 or f22.
- Over expose the shot by a stop or two. (If using Program, Aperture or Shutter mode, use the Exposure Compensation setting to over expose).
- Manually focus to infinity.
- Take a photo of a white piece of paper, a light colored wall or even a plain blue sky.
- Download the image, open it with your software and enlarge it on the screen - magnify to 100%. Any dust specs and particles should be visible.
- To get a better view of the spots, open Lightroom, go to the Basics panel in the Develop Module and move the Black slider toward the negative. In Photoshop, use the Levels adjustment and move the black and white sliders under the graph to line up with the edges of the mountain in the graph. (See photo)
Note that with DSLRs, the images are flipped as they are reflected off the mirror to the viewfinder; the dust you see on the bottom of the downloaded image is really on the top portion of the sensor.
Another way to check for dust or dirt is to buy the Delkin Sensor Scope. This is like a loupe that fits over the camera opening and has a light to shine on the sensor allowing you to see any spots.
If you've found dust, consider these 4 options to clean the sensor.
1. Blow out the dust with a blower bulb.
2. Use a sensor brush to collect the dirt.
3. Use sensor pads and solvent to wipe the sensor (only take this step for stubborn and stuck dirt.)
4. Skip the “Do it Yourself” route and have it professionally cleaned. Take your camera to a local dealer who can clean it or send it to the manufacture for cleaning. This may take a couple of weeks so plan accordingly.
1. Start with the safest and easiest tool to use, the blower bulb.
- With a fully charged battery or better yet, with AC power, choose “clean image sensor” from the camera’s menu. In most cameras, this will raise the mirror and expose the sensor behind it.
- Holding the camera with the opening facing the floor, use a blower bulb and ‘blow’ out any dust being careful to keep the tip of the bulb outside of the camera body. Do not use canned air, it is too powerful and it can leave a residue.
- Take another test shot of white paper or sky and see if you’ve gotten the dirt off.
- If not, you can attempt further steps to clean it yourself and many people do, just use extreme care. If you are not good with your hands or are clumsy, you shouldn’t - let the professionals do it for you. Many people have ruined their camera sensor by using the wrong techniques and/or the wrong products for cleaning.
2. If you choose to continue cleaning, the next step would be to use a sensor-cleaning brush with static-charged bristles. The bristles attract particles off the sensor – similar to a magnet attracting metal. “Visible Dust Arctic Butterfly” is a popular brush and is battery powered. Prior to using it, spin the bristles to charge them and then very lightly brush the sensor. Do not spin it while it is inside the camera. Having your camera on AC power is a must for this type of cleaning.
3. If that fails to remove everything, your next step would to be to wipe the sensor with a sensor swab moistened with only one or two drops of solvent. One can find pre-moistened swabs or use swabs with a solvent like Sensor Clean for stuck particles, or a solvent like Smear Away for oil spots caused from the shutter or mirror. Again, AC power is a must.

Some common problems from this type of cleaning are:
• It’s possible to brush thru a spot of oil from the shutter or other sticky substance and smear it across the sensor.
• Using too much solvent and causing streaks.
• Not wiping to each edge and leaving dirt along the sides of the sensor.
4. Have it professionally cleaned. Most of the local camera stores can help you with this either by performing the service themselves or sending if off for you. For a list of local stores, visit our Resource page.
If you are not going to have the sensor professionally cleaned and are going to do it yourself, it’s best to first visit the manufactures website for a tutorial on using their products as well as your camera manufacturer’s recommendations. The information at this website http://www.cleaningdigitalcameras.com is a great resource and contains many helpful recommendations. Read through it before deciding whether to clean the sensor yourself or let the pros do it for you.
Reducing the opportunities for dust to enter the camera will certainly help but no matter how careful one is, dust will find its way in and land on your sensor. Depending on how you use your camera, the sensor may need cleaning once a year, once a week or once a day. How you clean it is your choice.
This article is not a “How To” by any means and if you choose to clean the sensor yourself you are doing so at your own risk and we accept no liability.
More resources:
Information about products by Visible Dust such as the Sensor Brush, Sensor Swabs, Sensor Clean and Sensor Smear can be found on their website http://www.visibledust.com/
Information about Giotto bulb blowers and pre-moistened sensor swabs can be found here, http://photosol.com/
Make Photography Plans for 2020
January 2, 2020 by Marie Joabar
Distinct time frames or “temporal landmarks” are great for starting new projects and making goals to work toward. As we begin a new year and decade, this is the perfect time to get our photography plans in place. Perhaps some of these tips will help you get started.
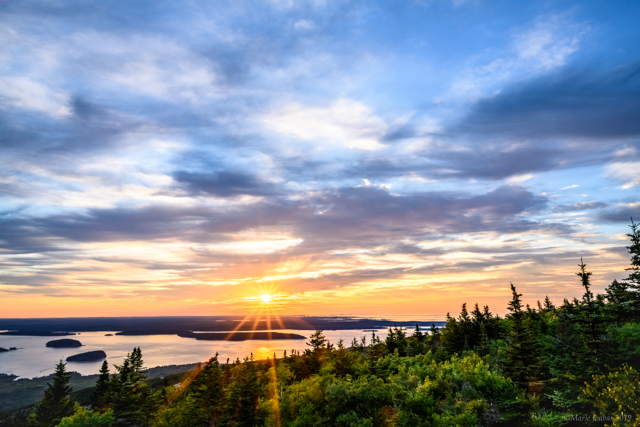 Start With Your Gear
- Do you have the right gear? How about making a list of needed items as well as wish-list items.
- If you need new gear, helpful sites are DPReview.com, check out their camera and lens reviews, forums and more. Also, KenRockwell.com offers an interesting (and somewhat entertaining) source of information on gear.
- Are there items in your bag that you no longer use? If so, consider donating or selling to a company that accepts used gear. A few are listed on our Resources tab.
- Is your gear organized? Does it need to be cleaned?
- How about your camera bag? Why not empty it, give it a good shake and then re-load it reorganizing as you do.
Technical Challenges
- Think of the settings on your camera that you struggle with and take steps to overcome them.
- Are there settings you’re unfamiliar with? Time to pull out that camera manual or find help at one of our classes or Private Sessions.
Capture Challenges
Review your photos from 2019. Look at your best images and identify what worked well and why you like them. Also notice areas or techniques you can improve on? List them and make a strategic plan to work on them throughout the year.
 Schedule Photography
Schedule outings to photograph and set dates to practice. List them on your calendar as a reminder and as a commitment.
Plan to Learn
- Schedule time to read or to take a class to learn a new skill or technique.
- Is this the year to join a Camera club? The support, encouragement and learning opportunities will help you grow your photography.
- Visit your camera manufacture’s website for product information and helpful tutorials from basic to advanced.
Photo Management
- Get your photos organized. The Adobe Lightroom (Classic) software is one of the best programs out there to help you get organized. However, there’s a bit of a learning curve so plan to spend some time with it.
- Revisit your images from 2019 (or even further back) and make time to delete those you have no use for or should have deleted long ago. Do it sooner rather than later to avoid being overwhelmed when you’re faced with several years instead of just one.
- Do you have a good backup system for your photos? It would be a shame to lose them so now is a good time to put a solid backup plan in place.
Get Your Favorites Printed
Whether you get some of your favorites printed to hang on your walls or make a book with them, it’s gratifying to see your images printed. Mpix, Shutterfly and Snapfish are just a few online sites that print digital files. BayPhoto and White House Custom Color are 2 high-end, quality print houses. Local camera stores also print, find the list on our Resouces tab.
Get Inspired
Visit local art exhibits and look at photos either online or in print. Find inspiration to get out to photograph.
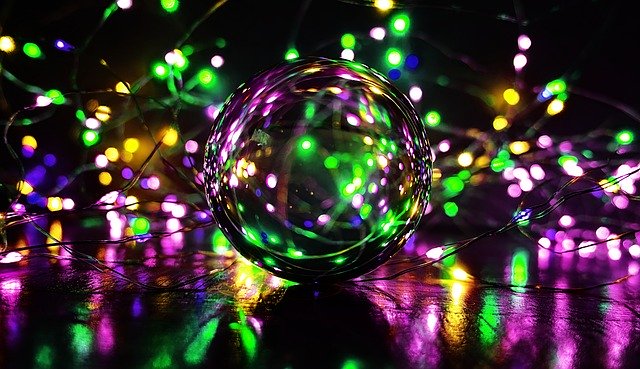
Wishing you a happy and rewarding photographic year ahead! Make 2020 the year to grow your photography, improve your skills and get your images organized.
10 Tips For Holiday Smartphone Photos
December 18, 2019 by Marie Joabar
 With the rush of the holidays, our photography sometimes takes a back seat. While out with family and friends (who are not photographers) carrying our gear is too cumbersome, and finding our composition and setting our exposure takes away from our time with them. However, having our phone camera handy allows us to capture those fleeting family moments and the magic of the holiday season no matter where we are or who we’re with.
Here are 10 tips to help you get your best shots.
1. Capture the holiday spirit in photos the next time you’re shopping or running errands. Decorations are everywhere so why not frame up a festive shot. If you’re shopping with a friend or family member, pose them along with the decorations.
2. Get close to your subject as a way to blur your background (the easiest way to blur the background with any camera is to get close). Also, have separation between your subject and their background.
3. Have fun with the time lapse setting when visiting crowded places where people are active, such as an ice-skating rink, the shopping mall and popular holiday attractions.
4. Try using the slo-mo setting to slow down fast action like a child opening a present. And using the video is an easy way to record a special time, such as carolers or snippets of a festive party.
 5. When shooting back lit scenes, like the friends in front of the tree or a lighted display, they’ll appear as silhouettes. To correct for this try one of these 3 things:
- Tap on the screen and you may notice a brightness slider. Sliding up or down anywhere on your screen will make your image brighter or darker. Slide it until you have the brightness you desire.
- Try using the camera’s flash.
- Check that the HDR setting is turned on and it will combine the dark photo together with the light one and the final image will look well exposed.
6. The best photos will be those in even lighting. The ability to record a wide range of tones from light to dark is very limited with our phone cameras. As a result, we often see the bright and the shadow areas lacking any detail.
7. Put your favorite snaps in an album on your phone so they’re at your fingertips throughout the year.
 8. Share immediately with nearby family and friends by using Airdrop (on Apple products). Android users can try the app SHAREit.
9. Use editing apps for a finished look. Snapseed is free software that allows you to make straightforward adjustments as well as creative ones, and add fun additions such as text bubbles and frames. The Artista Oil app offers the ability to give a painterly look and the TouchRetouch app lets you remove unwanted objects in the frame.
10. Backup your special memories. Options include cloud storage such as iCloud (Apple), One Drive, Dropbox or Google Photos. If not cloud based, copy the images to computer as a means to back up.
Enjoy this magical time and capture special holiday memories with the phone camera that’s always with you.
All images captured on an iPhone and edited in Snapseed. Christmas tree image was also processed in ArtistaOil.
Memories from Tuscany Workshop
November 7, 2019 by Marie Joabar
It’s been just 2 weeks since our Workshop in Tuscany ended and not a day goes by that I’m not reminiscing about the amazing experience it was. From the workshop participants, the first-class resort where we stayed, the kind and friendly people we encountered everywhere we went, the amazing food and wine, to the gorgeous landscapes and beautiful light we had to work with. Our Tuscan workshop was fantastic!
The resort offers gorgeous sunrise shots right at our front door and the sun cooperated each morning rising over the small mountain ridges and kissing the vineyards to start the day. On a few days, we had mist and fog in the nooks between the ridges which only made the scene more magical. Some of the participants got out every single morning taking advantage of the convenience of this perfect location.
Our excursions led us to various historic hill towns where we enjoyed photographing and every trip ended on a high note with a stop for gelato!
A day trip to Florence was one of the highlights. Beginning at the 11th century Romanesque church, San Miniato, we enjoyed photographing one of the most spectacular views of the city stretched out in front of us on a beautiful blue sky, puffy cloud day. From there we wandered to the Piazzale Michelangelo (another great overlook) and then casually down to follow the Arno river to the Ponte Vecchio bridge, making our way to the Cathedral of Santa Maria del Fiore. Taking 142 years to build, this 13th century marble tiled, red dome, gothic style “Duomo” (cathedral) is THE church of Florence.
Another favorite outing was our trip to Pienza. This ancient hilltop town retains its old world charm and is less crowded than some of the other locations. Interestingly, it seemed Pienza had a lot cheese and kitchen shops (more so than other towns although I'm not sure why). 
Vibrant and alive, Siena is exciting. Everyone in the group was up for the “tower climb” which leads to the ceiling of the Duomo on the inside, and spectacular views from the outdside. A visit to the Campo (main square of Siena) offered people watching, street photography options, and plenty of outdoor restaurant options to enjoy.
A trip to Tuscany is not complete without a stop in San Gimingano. A great spot for exploring and photographing the historic towers of the 13th century walled city as well as the views overlooking the fields of olive groves and vineyards below. Additionally, it's a great shopping spot for Italian treasures; leather goods, linens and such. 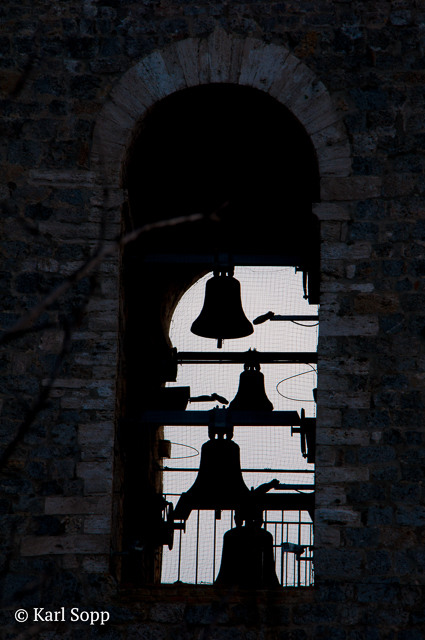
Wine tastings, delicious sit-down dinners with endless wine offerings, breakfast buffets, a pig roast, bon fires and an outdoor pizza party all helped to make our stay at Dievole Winery and Resort so very memorable.
Above all the Tuscan wonders, what made the trip the most special was the workshop participants. Its always such a pleasure watching everyone enjoy Italy and help them take exciting photos to remember it by. Meeting new people and working with those I already knew, it was such a gift to be able to explore the Tuscan countryside together with them. 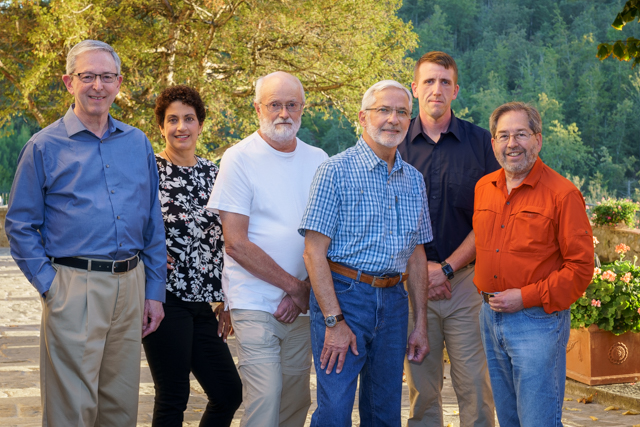
To see just some of what we experienced, check out the participants photos on the Tuscany Student Showcase.
Next year? Who knows, perhaps Venice in September?? Perhaps Cinque Terre in June?? Stay tuned as I try to decide between the two. 
Tips For Exciting Fall Photos
October 10, 2019 by Marie Joabar
October rolls in and we find ourselves full swing in the most colorful season; autumn. It’s such a fun time to photograph and the opportunities are endless so have your camera ready.
On your way in to work or on your way home, even if you're running errands around town, you’re sure to pass many photos waiting to be captured along the way. Be prepared for any opportunity by carrying lenses that cover a range of 18mm to 200mm so that no matter what you encounter, you have the right focal length to capture it.
Here are a few tips to help you capture the best of the season.
- When photographing the kiddos in their Halloween costumes in the evening, try not to use flash. Instead, have them facing a large light source. For example, position them outside so the porch light is lighting them well, or have them on the deck with the interior lights on, or consider a nearby street lamp that can shine on them. This allows a stronger story with the dark of night showing through yet the children lit well enough to show their faces and costumes.
- When photographing fall scenes, try changing your camera’s White Balance setting to Cloudy. Even if it’s sunny, the Cloudy setting will warm up the scene giving you even warmer toned fall images.
- Find an accessible pumpkin patch and have fun framing up the colorful gourds in the fields. If there is a large patch, play with having some sharp and some blurry by adjusting the aperture and positioning the focus point on the ones you want sharp. Getting really close to your subject is one of the easiest ways to blur the background. Stepping back a bit will give you more sharpness throughout the scene.
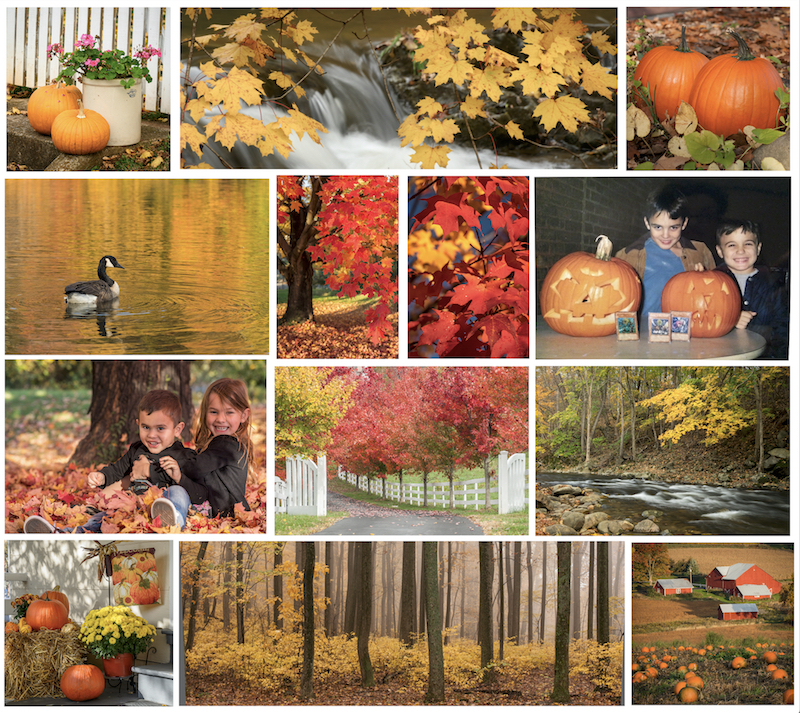
- It’s a great time to gather friends or family so why not plan a group photo session? When photographing people together with the fall leaves, check that the warm tones of the leaves are not reflected on their skin making them appear a bit orange. If so, adjust the White Balance to Sunny or Auto to avoid this color cast.
- Kids jumping in piles of just raked leaves or throwing the leaves overhead always makes a fun memory shot. Check that your shutter speed is fast enough to freeze their motion. 1/125 or 1/250 should work fine and use continuous shooting mode. If using an Auto mode, try the Sports mode.
- The best time of day to shoot most fall scenes (if it’s sunny) is early in the morning or late in the afternoon when the sun is low in the sky and the light is warm and more colorful. The light of mid-day is harsh with a lot of contrast and deep dark shadows. Cloudy days can be perfect as they give us soft, even light to work with throughout the day.
- Anticipate foggy mornings, get out early and make the most of the magical look you can frame. Fog occurs often in the fall when the air is cooler than water or the moist ground. Choose a Cloudy White Balance setting and compose several different frames getting the wide forest shot partially obscured by fog to the close-up shots of a single tree emerging from the fog. So much mood to capture with these scenes.
- Look for contrasting colors and frame the image to show just those. Orange leaves against a blue sky, yellow leaves with purple pansies in the background, red leaves framed next to bright evergreen branches. Colors opposite each other on the color wheel make for interesting images and nature provides plenty of these during autumn.
It’s the best time to be outdoors, and we finally have cool fall weather so get out there and enjoy capturing all that the season offers!
The Photographers Notebook Podcast
September 25, 2019 by Marie Joabar
Growing Capital Photography Center has been quite a journey! My interview on The Photographers Notebook Podcast is now live so give a listen to learn more about my story and Capital Photography Center.
Photography has changed drastically over the past 5 to 10 years; with smartphones and affordable digital SLR cameras, more people are shooting their own images like never before. In this podcast I talk about the importance of photography, why educating yourself and photography workshops are important, how great images helps tell our stories, and new trends in photography learning.
One lucky listener of this podcast will win the The Photographers Notebook Free Capital Photoghraphy Center Class Giveaway. (See the notes on the bottom of this podcast page for specifics and rules)
Resources Mentioned in the Episode
Website - http://capitalphotographycenter.com/
Blog - http://capitalphotographycenter.com/blog
Resources - http://capitalphotographycenter.com/resources
Instagram - https://instagram.com/capitalphotographycenter
Hashtag - #capitalphotographycenter
Facebook - https://www.facebook.com/CapitalPhotographyCenter/
Twitter - https://twitter.com/capitalphotog/
The Photographers Notebook
The Photographers Notebook podcast is THE destination for inspiring photographer interviews and conversations. They discuss photography tips and tricks to bring your photography to the next level, down to earth guidance for couples arranging their weddings, and some innovative information for entrepreneurs to pump up their business. Professional photographer, Daniel Douglas hosts inspiring guests - professional photographers, photography educators, wedding vendors, software specialists and more. It's lighthearted and packed with information you can use.
I'm thrilled to have been interviewed and hope you enjoy listening. Check out their episodes and subscribe to their show. The Photographers Notebook
8 Tips For End Of Summer Photos
August 29, 2019 by Marie Joabar
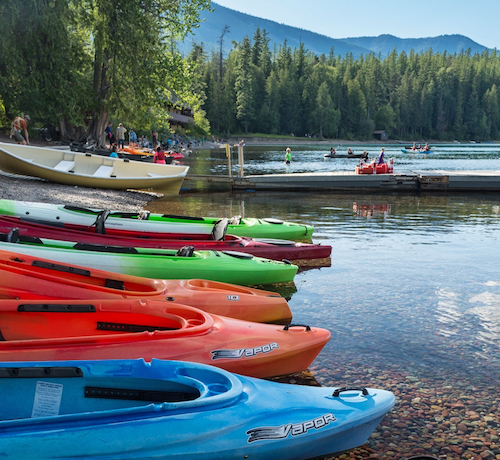 It's Labor Day weekend and that means the end of our precious summertime. It's the perfect time to grab your camera and snap a few more memories. Whether your plans take you to the beach, the mountains, or a backyard barbecue, here’s hoping you’ll capture some exciting images from this last “last hoorah” weekend.
We’d love to feature some of your “End of Summer” favorites. Just tag #capitalphotographycenterendofsummer on Facebook or Instagram and we’ll be sharing our favorites over the next few weeks by reposting or featuring them in our next newsletter.
8 Tips for Shooting End Of Summer Memories
 1. Try shooting candid shots at your summer gathering and frame the moment as it unfolds. Posed or staged shots are fine too but the candid ones will tell a different and sometimes a more real story.
2. Work with the light. Where is the light in relation to your subject, try shooting front lit, as well as back lit and side lit. Decide later which one you like most. Place your subject in front of a brightly lit background for a perfect silhouette.
3. Plan Some Shots. Nothing like being spontaneous but also try setting a goal for the type of image you want to capture, whether it’s slow motion, a beautiful portrait or a gorgeous sunrise. Planning for your shot helps you think about the settings you'll need and can be quite rewarding when your plans work well and help you capture the shot you had in mind.
4. Nothing wrong with leaving the camera at home and using the phone camera. It can be liberating and might also help you “see” different opportunities.
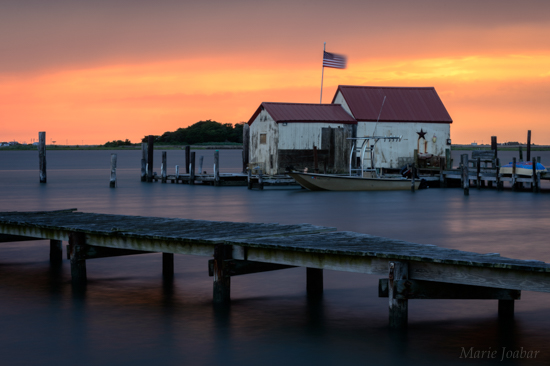 5. If you're with non-photographers, try rising early and photographing while they’re still sleeping. It’s a great feeling going thru the rest of the day knowing you’ve already got a solid winner. Plus, the early morning golden light is just plain beautiful, it’s more colorful and the air is clearer and more crisp. All of these factors give us more pleasing images.
6. On sunny days use a Circular Polarizing filter to boost saturation and remove glare. It’s one of the easiest ways to get a little more punch in your photos.
7. Photograph people enjoying themselves. Whether you’re at a festival, fair or a family gathering, including people in the photo adds another dimension to the story.
8. Capture some food photography shots. Having a dinner party or barbecue? Why not photograph those wine glasses against a beautiful background or that plate of burgers and dogs for some summer fun food photography.
Let’s squeeze the most out of this last weekend. Capture SUMMERTIME and savor the images well into the future! It’s really fun going through images from previous years that just scream summer.
Can’t wait to see your favorite summer memories. Remember to tag @capitalphotographycenter so we can see and share them. 
Camera and Lens Care
August 5, 2019 by Marie Joabar
Keeping your camera and lens clean goes a long way in preventing equipment damage and also helps save money to have it sent in for cleaning.
Before Shooting
Look at your front lens element and see if it needs cleaning. Finger smudges, dust, and other debris on your lens may appear in your images, especially when using f16 and 22 when there is sharpness front to back.
After Shooting
 Make it a habit to wipe down your gear before stowing in your camera bag. This keeps the dust from getting inside the bag and working its way back onto your equipment. Use a larger lens cloth to wipe it down. It’s good practice to extend your zoom lens and wipe the exterior barrel down as well so dirt won’t work its way into the lens.
Sand and grit can be extremely damaging to our gear. Keep an old tooth brush around to brush the crevices of your lenses and the exterior of your camera body occasionally. When wiping down the part of the camera body that meets the lens, or vice versa, turn it upside down (with the opening toward the floor) so any dust falls out of the camera or lens.
Lens Cleaning Tips
To clean the front glass use a lens cloth and wipe the glass. Also try using a “lens pen.” This has a brush on one end which can be used to brush off dust on the glass or other areas on the lens or camera. On the other end of the lens pen is an eraser type fabric which is great if you have a stubborn spot on the glass. With stubborn smudges, you could also try breathing on the glass to create a bit of condensation and then wiping it down.
Protect The Front Lens Element
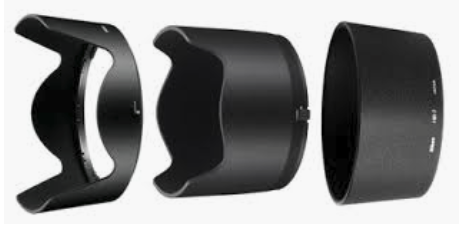 Lens hoods and UV Filters are especially helpful for protecting lenses. Hoods keep stray light from entering the lens but also protect it from rain or snow or from getting scratched. The clear UV filter protects the lens from getting scratched but many times it helps absorb the damage if the camera or lens is dropped. Note – when using filters, don’t stack them, take off one filter if you’re going to use a different one such as a circular polarizer.
Cleaning Camera Sensors
When you view images on your computer, if you’ve noticed spots in the same place then you’re looking at sensor dust, tiny specs of dust or dirt that are on your sensor. You can try blowing it off the sensor with a rubber squeeze bulb. If that doesn’t do the trick, a more involved cleaning may be needed. You can try it yourself or send it off to a trained specialist. Your local camera store might also offer this service. This link takes you to an article about the ins and outs of sensor cleaning, The Skinny On Sensor Dust.
Weather and Temperature
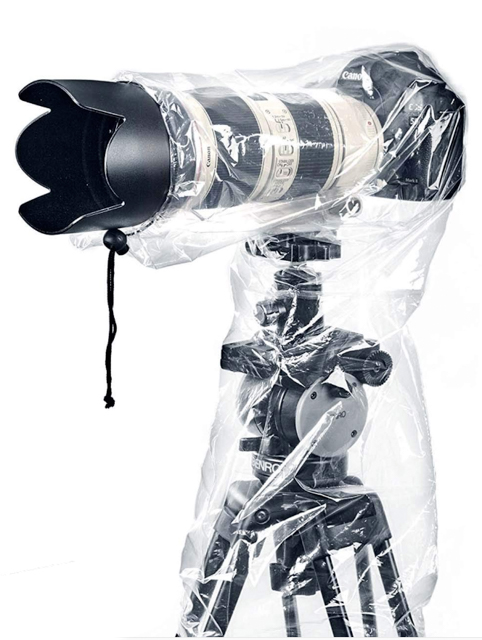 Condensation forms on both the outside as well as the inside of your camera and lens when we move from the cold to the warm. This can damage our gear so allow time for the gear to acclimate by leaving it inside your camera bag. In the summer when going from cold air conditioning to a humid outdoors, place your camera bag outdoors for about 30 minutes before pulling it out to start shooting. In the winter, bring it indoors inside your camear bag and leave it to acclimate to the warmer conditions for about 30 minutes.
Plastic rain sleeves are handy to have in your bag in the event of unexpected rain or snow. These are made to cover both the camera and the lens while you are photographing. No need for a little bit of rain to spoil your shooting. They can be found at many price points from $6 for a quick plastic cover to $200 or more for a more professional cover made of sturdier fabric.
After investing hundreds of dollars on your gear, good habits for protecting and cleaning it will save you time, money and frustration.
10 Tips For Shooting the Moon
July 10, 2019 by Marie Joabar
July gives us the Thunder Moon, so named by the Algonquin when spectacular electrical storms would rake the skies. Another common name is the Buck Moon referencing the new antlers which grow on deer buck's foreheads around this time.
You’ll find more fun moon facts at the end of the article but here are 10 helpful tips for photographing it.
1. Scout Out Areas Ahead Of Time
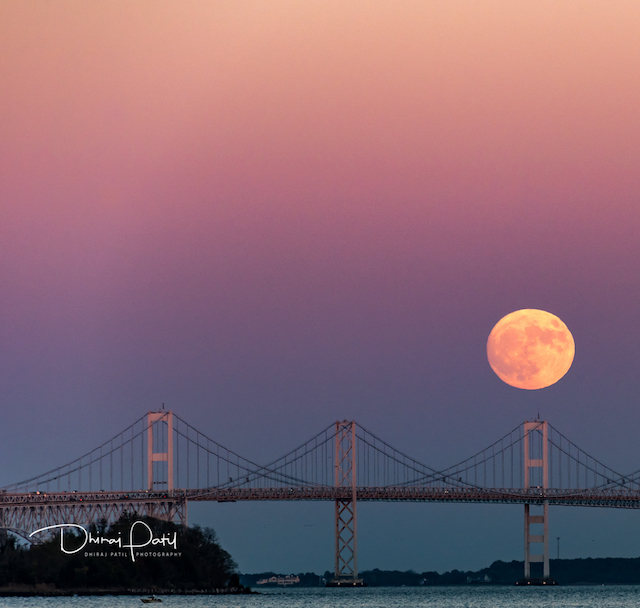 If you simply want the moon in the sky, look for areas where you can capture the moon close to the horizon and low in the sky. It’s always more colorful at this time and it appears larger as well.
- If you want to include foreground landscapes or buildings, find your spot ahead of time to make sure you’ll have the best vantage point based on where the moon will be in the sky.
2. Use An APP
- Use apps to determine the moon’s track across the sky, the moonrise time and the location of moonrise and moonset.
- The Photographer’s Ephemeris is quite handy for this, it also lists the sunrise time, and civil and nautical twilight times.
- Moon Seeker is another.
3. Determine Which Day And What Time Is Best To Shoot The Moon
- Although the moon is only truly full on one day, the day before and the day after can offer fantastic photographic opportunities as 98 to 99% of the moon is still visible.
- The biggest factor to consider when planning is the time that the moon rises (or sets). Not so good if it rises or sets at 3:00 in the afternoon. Being able to capture it during the 20 to 30 minutes of Nautical Twilight time is just perfect. This is the time after daylight and before nighttime when the sky is a beautiful blue. Before this time, the sun has set but there is still a lot of light in the sky. After this time, the sky is black.
- The full moon is on July 16 and this is the perfect day to capture it as it rises at 8:36pm (after the sun sets) and it sets at 5:32am (before the sun rises).
- Timing - When the moon is low in the sky it appears orange in color because the Earth’s atmosphere scatters the bluish elements while the reddish elements remain visible. The higher it rises, the brighter and whiter it becomes.
4. Exposure Settings
- The full moon is fully lit by the sun and brighter than you might think. Expose for it just as you would for other sun-lit objects.
- Many people over expose the moon because the camera meter reads the darkness of the sky and determines a long exposure is needed.
- Best results can be had when shooting in the manual mode.
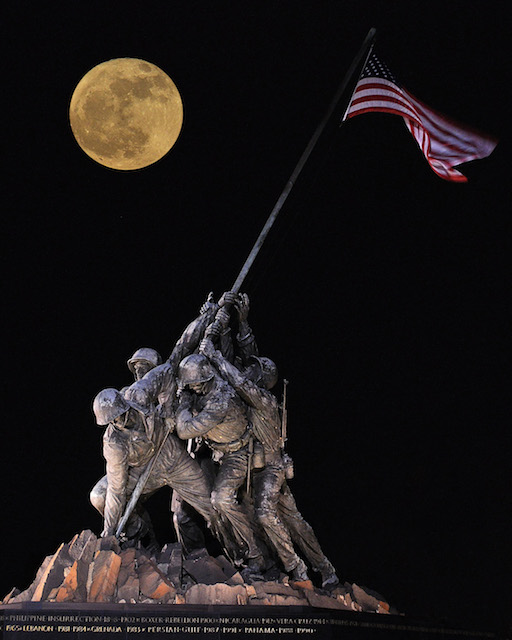 SHUTTER - Don’t be fooled into thinking you need a long exposure. The moon is moving across the night sky, a long exposure will render it blurry and cause it to be over exposed and lacking detail. Use a shutter speed of 1/30 or faster.
APERTURE - The Aperture setting won’t be important unless you have foreground elements. If they’re off in the distance, f8 should work fine, if they’re closer, try f11. If there are no foreground elements, f8 is a good setting to use.
ISO - A high ISO setting will cause digital noise (graininess) in the dark sky. A low ISO setting will help keep it to a minimum. ISO 200 or 400 should work fine.
- Below are some exposure values to start with. These are just suggested settings, there is no one correct exposure setting for shooting the moon. Much depends on the atmosphere, how high in the sky it is, whether there’s still light in the sky, whether you include the foreground or just the moon, etc.
Aperture f8, Shutter 1/60, ISO 100 or Aperture f11, Shutter 1/125, ISO 200
5. Check for Over Exposure
- Activate your camera’s Highlight alert, anything that blinks in the Playback mode is overexposed. As you’re shooting, check that you don’t over expose the moon. If so, lower the ISO, speed up the shutter speed or close the aperture.
6. Multiple Exposures
- Sometimes the only way to capture both the moon AND the darker foreground landscape is with a multiple exposure set to 2 exposures (unless you’re capturing the moon just after sunset when there is still a lot of light in the sky). Otherwise use a multiple exposure and capture 2 images:
- Take one exposure set for the brightness of the moon.
- Take another longer exposure to capture the darker night landscape scene.
- With the multiple exposure turned on, the camera will merge the 2 images in-camera.

- If your camera doesn’t offer multiple exposures, merge the 2 photos together with Photoshop.
- You could also try using Image Overlay if your camera has it, (Nikon cameras do, other brands most often don’t but check your camera manual to be sure.).
7. Focusing can be difficult in the dark.
- Leave Auto-Focus off and manually pre-set the focus on the moon. If capturing the moon and foreground elements, focus on the foreground elements.
- Line up the focusing point on an edge of the moon or the edge of a landscape element so there’s something for the focus to grab on to.
- Even though you are manually focusing, you’ll still get focus confirmation indicated by a solid dot in the very bottom of the viewfinder. If you are not in focus the dot won’t appear.
- Zoom in on playback to make sure your images are in focus.
8. White Balance
- Try Auto or Daylight but also experiment. Cloudy will warm up the moon and may give it an orange glow, Tungsten will give it a cooler tone.
9. Gear
- Tripod - A sturdy tripod and a remote or cable shutter release are a must for any moon, astro or nighttime photography. Turn off Vibration Reduction or Image Stabilization when using a tripod.
- Lenses -To make the moon large and not just a speck in the sky use a telephoto lens of at least 200mm. If capturing the moon and foreground elements, a shorter (wider) lens such as an 18-70mm might work better depending on the distance of the foreground elements.
10. Be prepared
- Check your camera settings and get your gear bag in order before heading out to photograph at night.
- Carry a small flashlight to see camera controls, inside your camera bag and the tripod mount, etc.
Future Classes
Join us at our Moon Over the Capital Columns class at the National Arboretum. With special access, we photograph the moon with the lighted Capital Columns in the foreground.
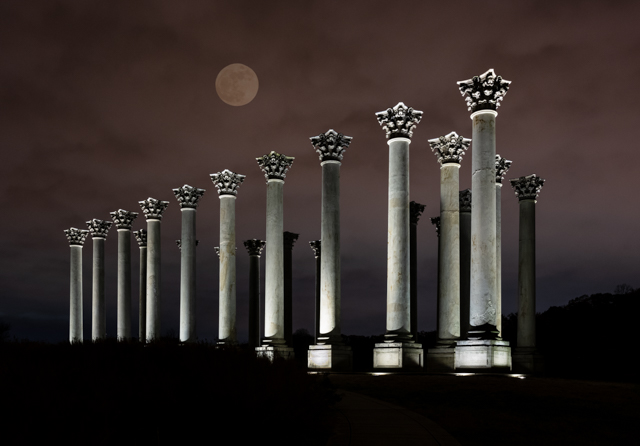 These are offered at various time throughout the year.
Fun Moon Facts
The next full moon, in August, is call the Sturgeon Moon because of the large quantity of fish in the lakes where the Algonquin tribes fished. The reddish appearance of the moon through the frequent hazy skies of August also prompted a few tribes to label it the Red Moon. Other names included the Green Corn Moon and the Grain Moon.
** “It takes the Moon 29.53 days to orbit completely around the Earth in a full lunar cycle. During this time, the Moon will go through each phase. Since the Moon’s orbital journey takes a little less than a full month, when you click on future dates you’ll notice that depending on the exact number of days in that month, the Full Moon occurs a day or two earlier each month.
The four  main Moon phases in order are the New Moon, First Quarter Moon, Full Moon and Last Quarter Moon. These phases occur at very specific times and are measured by both the Moon’s luminosity and how far along the Moon is in its orbit around Earth.
- The New Moon Phase occurs when the Moon is completely dark with zero-percent luminosity.
- The Full Moon Phase is completely bright with 100-percent luminosity.
- The First and Last Quarter phases happen when the Moon is exactly half illuminated, with 50-percent luminosity."
It wasn’t until the 16th century that our understanding of the Solar System evolved. In the early 1500s Astronomer Nicolaus Copernicus developed a model of the Solar System where Earth and the other planets orbited around the Sun, and the Moon orbited around Earth. One hundred years later Italian Astronomer Galileo used one of the first telescopes to observe the terminator and deduced from the uneven shadows of the Waning Crescent Phase that the Moon’s surface was pocked with craters and valleys and ridged with mountains."** (**From https://www.moongiant.com/calendar/)
Prior to the 1500s, the belief was that Earth was the center of the Universe and the moon, sun and the stars revolved around it.
We hope this article helps you capture amazing moon images in what ever month you decide to photograph it. Perhaps we'll see you at one of our classes.
Photo credit and exposure information - from the top
Dhiraj Patil - f9 1/125 ISO 400
Beth Haubach - The moon was added by using Photoshop.
Multiple exposure - 1 image exposed for the landscape, 1 image exposed for the moon, merged in-camera through the multiple exposure setting.
Marie Joabar - The moon was added using Photoshop.
Emily Carter Mitchell - f8 1/200 ISO 320
Tips For Using External Flash
May 29, 2019 by Marie Joabar
 Good photographic light isn’t limited to the sun, it comes from many different sources, some we can control, some we cannot. Use the sun to your advantage but when you want to add light to a dark scene or skillfully sculpt it for a certain effect, you’ll find your external camera flash unit one of the best tools in your bag.
Using an off camera flash, often referred to as a speedlight, to control and shape the light can mean the difference between a snapshot and a great photograph and if you understand the basic principles of photography, learning to use one is not as difficult as you may think.
Whether shooting portraits, events or even macro, the speedlight can be used to simply fill in shadows to provide a more evenly lit scene or to create drama by directing or modifying the light a certain way. Although the on-camera pop up flashes can be handy at times for fill, speedlights allow greater control.
Flash units vary between brands and models and although they are pretty sophisticated, they can be used right out of the box in the auto mode, referred to as TTL (through the lens) or iTTL, ETTL depending on brand. But as you’ll quickly discover, better results and more control of the light can be achieved by adjusting the flash power in the TTL mode or by using it in the manual mode.
Consider exposure. When using an external flash the ISO controls the overall brightness of the image, the Shutter speed controls the ambient light and the Aperture controls the amount of light from the flash that actually reaches the subject.
Keep in mind that the smaller the light source, the harder the light. Straight on flash is very harsh and for portraits is unflattering. Modifying that light is the next step and this can be done numerous ways. Umbrellas to shoot through or reflelct off of, softboxes, accessories like a Gary Fong Lightsphere or Honl light modifiers that attach directly to the flash, all help control how soft or harsh, direct or indirect the light is. They help you to shape the light and create the effect you are looking for.
 Portrait photography is best done taking the main light source away from the camera to create a more flattering look. Light stands offer the most flexibility in placement of the speedlights and can easily be repositioned to adjust the direction of the light. Using multiple speedlights allows you to be more creative; positioning them for backlight, hair-light, sidelight and such and to create mood and drama.
The same applies for event photography but depending on the size of the group or venue, you may need to use multiple speedlights strategically placed on stands around the event location. Using the Master/Slave setting on the camera and flash, or triggers such as Pocket Wizard, allows you to fire flash units wirelessly. In smaller venues or house parties, you can experiment with things like bouncing the light off of white ceilings or walls as a way to diffuse and soften the light. Most speedlights swivel and tilt for this reason.
Another great use for off-camera flash is when shooting macro photography. Whether it is photographing flowers or even smaller items like coins or jewelry, off camera flash can create dramatic results and show the detail that close-up photography demands because you can place the flash very close to your subject. By using flash only inches from a subject, you can use very small f-stops, like f16 or f22, to create a large depth of field, something that is often hard to attain in macro photography.

Using one off-camera flash unit can greatly improve your photos and is the best way to start. Experiment and practice and when you have one mastered, consider adding additional units or simple light modifiers.
You’ll find it surprisingly fun working with speedlights. Try it and you’ll see how easy it is to take your photography to the next level.
If you want to learn hands-on how to use your off-camera flash, join us at our External Flash Made Easy class on June 23, 2019. Instructor Corey Hilz begins the class covering the basics of flash photography and builds on it, by the end of it you'll be comfortabe using the flash. You’ll come away with the confidence and know-how to use your speedlight and your photos will look better for it.
Photos by Corey Hilz
Community Building Through Social Media
May 8, 2019 by Admin
 Most of us are on some sort of social platform these days, including the Capital Photography Center!
Facebook, Twitter and Instagram aren’t just ways for us to communicate upcoming classes, photo tips or student highlights, it’s our way to build a community of photography-loving folks around the Washington, D.C. metro area and areas far beyond.
These online platforms connect the Capital Photo Center community in a way that gives us the ability to learn together, interact in real time and keep up with what your circle is up to!
We might be a local-focused group, but social media lets us connect people from across town or across the globe. Sharing our lives together builds relationships through creative outlets and understanding the photographic craft.
Visual communication is imperative to the social media experience! What better medium to explore social media with than photography? Through social platforms, especially Instagram, you can browse amazing images from all around the world or see what your long distance loved ones experienced on their vacation.
However, it’s not all about the social aspect. The more images you consume as a viewer, the better your photographic eye becomes. This helps us “see” better images and also helps us define what we like and what we don’t like as we grow our photography.
There’s a plethora of ways you can get involved with social media platforms. Following your loved one and brands you trust (like us) keep you updated on what’s new but when other folks follow you, they can see what new photographic endeavors you’ve been up to!
We’re committed to using our platforms to amplify the photographic voices of our students, past and present. We regularly share our student’s beautiful work, as well as friends of CPC who use our #capitalphotogenter hashtag. There’s an awesome feeling of gratification knowing others will enjoy seeing your image on our platforms and we’re always looking for new ways to highlight our students.
Come join us and see how we reach our respective communities through these platforms. No need to be plugged in 24/7, social media gives us opportunities to connect faster than we ever could before with each other and with our community.
Our social media platforms are our foundation for connecting with you all and we look forward to sharing awesome photography together!

Interesting Places to Photograph
April 9, 2019 by Beth Haubach
“To me, photography is an art of observation. It’s about finding something interesting in an ordinary place…I’ve found it has little to do with the things you see and everything to do with the way you see them.” ~ Elliott Erwitt
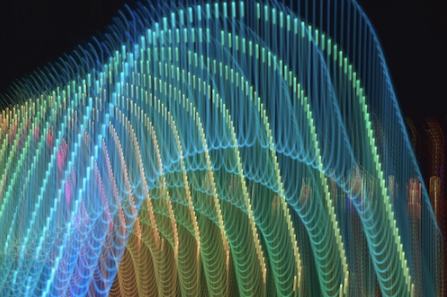 Elliott Erwitt is correct in that finding something interesting in the “ordinary” is an art form of sorts – it’s an elevated way of “seeing” things. However, continually finding new and unique ways to photograph the world you see EVERY day can zap your creativity and lessen your enthusiasm for photography. Our new RESOURCES tab will definitely help with this as we have added a section titled INTERESTING PLACES TO PHOTOGRAPH (IPTP) which list locations and events and also includes the links to them.
Within the immediate DC area, we have access to a plethora of amazing photography destinations. The National Mall and the monuments, especially at night, provide all sorts of interesting photographic opportunities and challenges. There are a multitude of indoor shooting possibilities: museums, Union Station, the Library of Congress, and the Botanical Gardens to mention a few. Several neighborhoods in DC are splashed with colorful murals that make for beautiful street images.
The airports in the DC region can provide hours of fun watching and photographing airplanes and are great places for architectural photography. The underground Metro stations provide low light challenges and interesting architecture as well. (While it’s okay to photograph inside the stations, you are prohibited from photographing on the trains!)
For the landscape, nature or wildlife photographer there are wonderful parks, such as Rock Creek Park, right in downtown DC! Huntley Meadows, the National Arboretum and Dumbarton Oaks are close by as well. Heading west into Virginia, Sky Meadows State Park provides miles of hiking trails, wildlife and beautiful vistas of the Piedmont. The Chesapeake Bay and eastern shores of Maryland and Virginia are paradises for the nature photographer.
Farmers’ markets are great places for candid photography and the fruits and vegetables can provide repeated patterns and a variety of colors perfect for stunning images. Fairs and festivals present the photographer with multiple possibilities: low-light night shots, fun street photography, and chances to try experimental shots such as “zooming in” with your lens. The Waterford Fair is a step back in time to when life moved at a slower pace.
The Water Lantern Festival at National Harbor and the annual Fredericksburg National Cemetery Luminaria are beautiful events that celebrate life and honor those fallen in the service of our country. Attend one of these events and challenge yourself to “tell a story” with your images.
In the late fall and early winter, the Washington Metro area is a bevy of “light” shows. Light City, at Baltimore’s Inner Harbor, is a celebration of “light, music and innovation” with a variety of light-art installations. The Festival of Lights at the Mormon Temple in Kensington, MD is an amazing site to behold with over 650,000 colored lights! Not to be beat, Meadowlark Garden’s Winter Walk of Lights, in Virginia, is a stunning display of lights, music and vignettes. GeorgetownGlow is an innovative light exhibit in that it is an interactive, public art installation. Once a year the gothic architecture of the Washington National Cathedral is illuminated with continually changing colored lights for an otherworldly experience.
Choosing to venture outside of DC provides you with a lot of options. If you’re into architectural salvage, Maggie’s Farm in Front Royal and Housewerks Salvage in Baltimore are a couple of options. Traveling north towards Pennsylvania or west into West Virginia, photographers can experience the rather macabre. Eastern State Penitentiary and Pennhurst Asylum (both near Philadelphia) and the Trans-Allegheny Lunatic Asylum offer some chilling, somber and downright creepy photographic opportunities.
Of course, perusing the class offerings at Capital Photography Center might provide you with the needed impetus to grab your camera and go out and shoot! In addition to a regular rotation of various “shooting” classes, we also offer “one off” classes that provide unique opportunities or access to unusual venues. These classes usually sell out quickly, so check our website on a regular basis to register for one of these classes.
Hopefully these suggestions, though by no means all inclusive, will inspire you to try some new places to photograph, and/or provide you with opportunities to challenge your photographic skills or to try new techniques.
Please refer to the INTERESTING PLACES TO PHOTOGRAPH (IPTP) section of the RESOURCES page as there are many more “unique” places and events listed that were not referenced in this article. You will also find the links to these events and locations. Lastly, check back to the section periodically as we will continually update the list with new events and places to explore to “broaden your photography horizons.”
If you have information you’d like to share about unique or unusual places you’ve enjoyed photographing at, you can email me at classes@capitalphotographycenter.com and I'll share that with our community of photographers.
Happy shooting!
PHOTO CREDITS:
Colors of light photo (top) taken by Ping Park
Rock Creek Stone Brige photo taken by Joy Phillippi
Waterford Fair photo taken by Beth Haubach
Lantern photo from Water Lantern Festival website
Tips for Photographing Waterfalls
March 28, 2019 by Marie Joabar
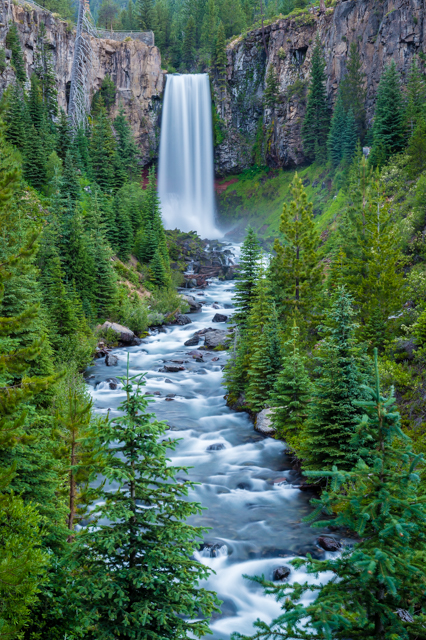 Spring is typically the best time to photograph waterfalls. The melting snow and the season’s rains increase the flow and volume of the streams and rivers making them more powerful than at any other time of the year.
TIME OF DAY - The trickiest part of shooting waterfalls is properly exposing for both the white flowing water in the falls and the darker forest area surrounding it. This is especially the case when the sun is overhead casting harsh shadows in the gorge or basin while at the same time striking the falls and rendering them totally white and lacking in detail. The range of contrast between highlights and shadows is too great to expose for one without the other being over exposed or lost in shadow.
- To avoid this shoot in the early evening with the orange glow of the late day sun, or very early with the warm morning light before the sun rises too high.
- Morning also presents the opportunity to capture mist or fog rising from the falls which can make them look almost magical.
- Take advantage of a cloudy or overcast day when the light is diffused and there are no harsh shadows.
FAST OR SLOW - In some photographs, we see the water in the falls with a silky, almost cotton-candy look to it. In others, the flowing water is frozen and we see water droplets suspended in mid air. This is the choice of the photographer. There’s no right or wrong way and no rule about how the water should look. The two different styles are explained below, try shooting both and see which you prefer.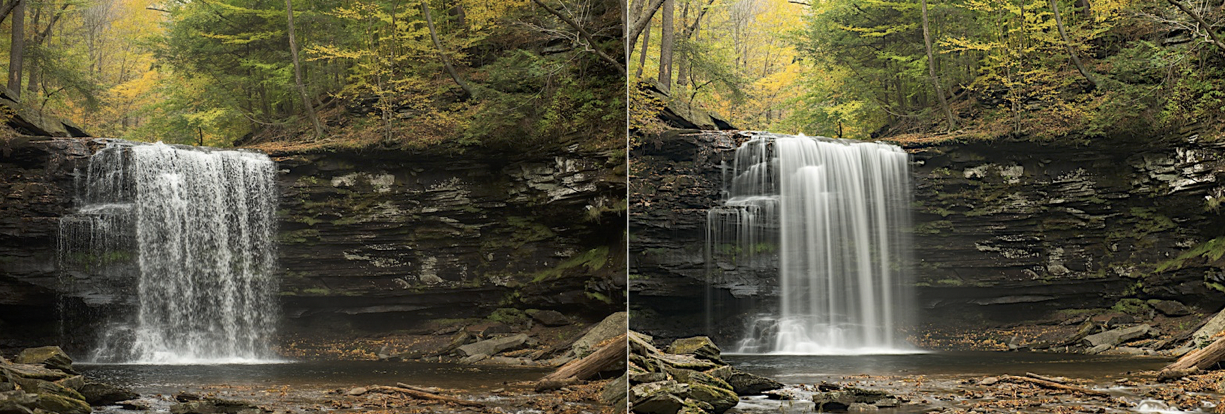
- THE SLOW & SILKY LOOK - The silky looking water is a result of using a very slow shutter speed. Just HOW slow depends on the volume of the water and how fast it is flowing. The lighter the volume and the slower the flow, the longer the shutter speed should be to achieve this look.
- Set the camera on manual (M) and select a slow shutter speed somewhere between 1/5th of a second to 3 full seconds as a starting point. Select a small aperture (large f-stop number) such as f22 to avoid over-exposing the image.
- Take a photo then check the histogram in playback. Make sure the graph isn’t going off the chart on the far right side. This would indicate there is no detail in the highlight areas; the result is water that looks like a solid white blob.
- Many times, even stopping the lens down to f22 is not enough to prevent overexposure. To correct for this, consider using a Neutral Density filter (ND). These filters reduce the light entering the camera and allow for the use of the slow shutter speeds that make the water look like a silky veil flowing over boulders as it flows downstream. A 2X and a 4X ND filter can be used separately or together if needed, they can also be stacked with a circular polarizing filter. Many times, it takes using all of them to cut the light enough to allow for the slower shutter speeds.
- A sturdy tripod is essential in order to capture the frothy looking water. Together with a tripod, a cable release or the camera’s remote timer is necessary as simply depressing the shutter can cause the camera to vibrate and cause blurring.
- CAPTURE THE FALLS FAST & FURIOUS - To show the falls as a powerful force and freeze the flow of the water use a fast shutter speed.
- In either Manual (M) or Shutter Priority (S, or TV if Canon), set the shutter speed to 1/125 or 1/250 of a second as a starting point. Adjust to a faster shutter speed if needed depending on the volume and speed of the falls.
- If using Shutter Priority, you'll choose the shutter speed and the camera will select the aperture accordingly.
- If using the manual mode set the aperture to f8 or f11 which should give enough depth of field to capture the falls together with some foreground interest such as boulders in the water, or ferns, or greenery near the base of the falls.
- In playback, refer to the histogram and check for blown-out highlights. If this is the case, further reduce the light entering the camera; use a faster shutter speed, a smaller aperture or a ND filter.
- Regardless of a fast or slow shutter speed, the ISO (the sensor’s sensitivity to light) should be set to 100 or 200.
 LENS CHOICES - Any range of lenses from a focal length of 12mm to 300mm will work for capturing waterfalls. Which to use depends on how far away the falls are and how much of the surrounding area is to be included in the scene. A wide angle lens (anything below 50mm) will allow a lot to fit into the scene from the sky above to the boulders at the base. A telephoto lens, (anything above 50 mm) allows for greater magnification, useful if the falls are off in the distance and not accessible. Telephotos can also be fun for zooming in and isolating just a portion of the falls.
COMPOSITION - Vertical framing accentuates the height of long and narrow waterfalls while shorter wider waterfalls look better in a horizontal frame. To be safe, capture it both ways. In fact, shoot the falls from every angle-up high, down low, horizontal and vertical. In some shots, include the entire falls, in others, frame them without a portion of the top or bottom to spark the viewer’s imagination.
SEASONS - Athough the water flow is the heaviest in the Spring, it’s definitely worth return to the falls in different seasons.
- Winter snow and icicles can be gorgeous - just take care getting to the falls if icy.
- Autumn provides an opportunity to frame the waterfalls in the brilliant color of fall leaves which is often reflected in the pools at the base as well.
- It’s a treat during the summer to visit the falls of smaller rivers and streams which offer pools safely downstream for jumping into.
WHERE THE FALLS ARE - Great Falls Park is just 15 miles from the District and terrific views of the Potomac River falls can be found on both the Maryland and Virginia side. Waterfalls worth hiking to in Virginia’s Shenandoah National Park are Lewis Falls, Dark Hollow Falls, Rose River Falls, and the many falls of the White Oak Canyon (just to name a few). Maryland offers Cunningham Falls in Frederick County and many others in Garrett County.
Regardless of the season, find a friend or fellow hiker and venture off to find and photograph one of the area's unique waterfalls.
Move In Close with Macro Photography
March 7, 2019 by Marie Joabar
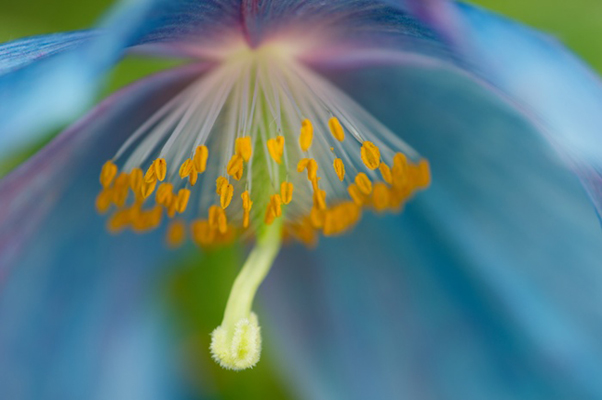 With spring just around the corner, it's easy to anticipate all the beautiful subjects we can capture. Whether you enjoy the flowers in your own garden, wildflowers in fields and meadows, or the exotic variety you find at your favorite botanic conservatory, learning to take better close-ups is a lesson in macro photography.
Although you can shoot beautiful photos with your wide angle and telephoto lenses, to capture amazing close-ups and extreme magnification of flower petals, stamens, and any interesting little bugs you find, a dedicated macro lens is a better choice. Extension tubes and close-up filters are alternatives and are discussed below.
MACRO LENSES, although pricey, offer superior image quality and edge to edge sharpness. They allow you to get closer to your subject, filling the frame with them, and revealing the tiny, fine detail that would have otherwise been too small to see.
- A true macro lens, sometimes referred to as dedicated, will give you a 1:1 reproduction ratio, meaning the subject and its image are the same size. Some lenses on the market may claim to have macro capabilities but they are not true macro lenses. Before you purchase one, check the lens specifications for the reproduction ratio.
- Another important factor to consider is the minimum focusing distance (MFD). This is the closest distance your lens can be from a subject and still achieve focus. With a true macro lens, you can get much closer than with a non macro lens of the same focal length.
For example, let’s say we were photographing a grasshopper on a flower. If I were using a 70-200mm telephoto lens zoomed to 200mm, I would have to stand 5 feet away from the flower to be able to focus on it as that is the MFD of that lens. If you were using a 200mm macro lens, you could focus on it standing as close as 18 inches away as that is the MFD of that lens. You would capture a much more interesting photo than one composed from 5 feet away.
The focal lengths of dedicated macro lenses (Nikon calls theirs micro) typically range from 50mm to 200mm. The difference between these numbers represents how physically close or far you can be from your subject and still maintain a 1:1 reproduction ratio. The larger the number, the further away you can be. If you’re photographing flowers, 60mm, 90mm or 105mm may work fine, but if you need more distance between you and your subject, like butterflies (which fly away if you get too close) a 180mm or 200mm macro lens would be better.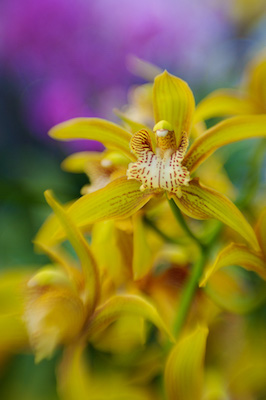
A few tips when using macro lenses.
- For the sharpest image, align the plane of focus to the subject plane. In other words, position the back of the camera so it’s parallel to the subject.
- Because there is such a shallow depth of field (the amount of area in focus in-front of or behind your subject), when using macro lenses, make sure to focus on the most important part.
- If shooting outdoors, hope for a still day without wind. Focusing is key with Macro and trying to lock focus on a moving flower is difficult.
 EXTENSION TUBES are a less expensive alternative to macro lenses. These are hollow tubes with circuitry on each end and are placed between the camera body and lens. They allow you to focus closer to your subject by reducing the minimum focusing distance of the lens.
- Because there is no glass in the tube, there is no loss of quality.
- Some extension tube brands retain all of the lenses ability to auto focus, while with others, you may need to manually focus.
One caveat with using extension tubes is that you will lose some light. Your camera will meter for this automatically, just be aware that a longer exposure time will be needed.
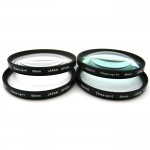 CLOSE-UP FILTERS (sometimes called diopters) are another option. These filters screw onto the front of the lens just like other filters and allow you to focus closer to your subject. Think of these as a magnifying glass for your lens. They’re found as 1X, 2X, and 3X, the larger the number the stronger the filter. Close-up filters can be stacked allowing you to get even closer, always use the strongest one next to the camera lens. You may want to avoid using more than 2 stacked together as this will affect the sharpness of your image.
- Because of the shallow depth-of-filed with close-up filters, experts say it’s better not to set the aperture smaller than f11 or larger than f8 when using them.
- Depending on the quality of the glass, there may be some loss of sharpness and some distortion on the edges of the frame.
 When shooting Macro, a must have in your camera bag is a diffuser to hold over the subject and evenly spread the light striking it. These can be clipped into place with Plamp. If it is a cloudy day, thank Mother Nature for providing the clouds as a natural diffuser. Reflectors are also helpful to have on hand to throw light onto a flower.
Tripods are definitely needed to capture a sharp, in-focus subject but some people find using them in a small garden is cumbersome and limits their positions for capture. Start with a tripod and see if it’s manageable in the space you shooting in. Visit your local camera retailer. They can give you more information about the specifications and pricing of these different options and help you select the right ones for your camera and lenses.
Spend a quiet morning immersed in Macro photography now so you'll be ready when it's full bloom season.
Blue poppy and yellow orchid photos by Corey Hilz
Tips For Capturing Better Snow Scenes
January 13, 2019 by Marie Joabar
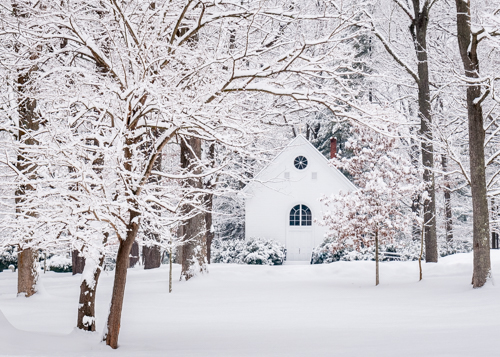 Photographing your favorite subjects in snow offers a special way to make winter memories.
Grab your gear and head out to capture your kids sledding down a hill-a blur of bright jackets and hats, or find winter’s frozen designs in sparkling snowflakes through a macro lens, or frame a nearby stream or wooded trail still covered with freshly fallen snow.
No matter what your favorite snow subject is, exposure can be tricky. Our camera’s light meter is easily fooled by the brightness and underexposes snow scenes resulting in dark photos with washed out, gray looking snow.
What we view as a beautiful snowy scene (photo below on right), the camera reads as an overly bright subject and determines less exposure is necessary. This is because the camera’s light meter is designed to measure the amount of reflected light from a subject and make it medium toned. But since bright subjects, such as snow, reflect twice as much light as medium tone, the camera overcompensates and underexposes the scene. The result is drab scene with gray snow (photo on left) but it can be pretty easy to correct for this.
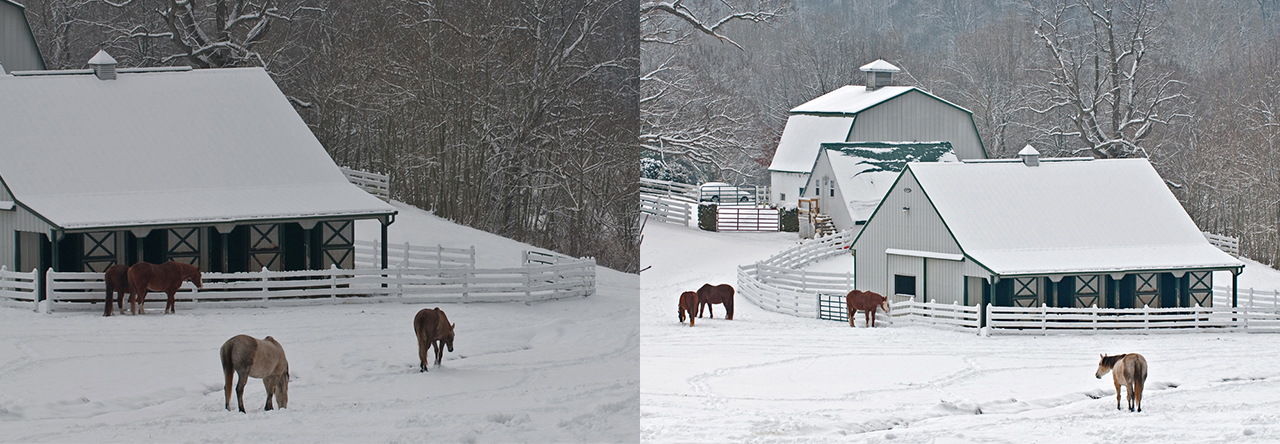
Four Exposure Setting Tips For White Snow.
 1. If using A, S or P (Aperture, Shutter or Program mode), use Exposure Compensation. Look for a button with a +/- symbol. Set the compensation in the (+) plus direction by 1 to 2 stops. (0.3 is 1/3 of a stop, 0.7 is 2/3 of a stop, 1.0 is one full stop, and so on.) Refer to your instruction manual under Exposure Compensation for how to set this on your camera.
2. Another way to capture white snow when using A, S or P is to use Exposure Lock. Aim the camera at something neutral in tone; something tan, grey, or the blue sky, then press the exposure lock button keeping the pressure on it until you recompose and depress the shutter all the way. (See your camera manual to locate the Exposure Lock button.) Exposure Lock is best to use with either spot metering, or, if using the cameras default metering system (evaluative or matrix), fill the frame with the subject that is neutral in tone and then lock exposure, recompose, then shoot.
3. If shooting in full Manual mode, spot meter the snow and simply change the shutter speed or aperture until the meter scale in the bottom of the viewfinder reflects 1 to 2 stops over exposure. (Each of the little pegs on the meter scale represents 1/3 of a stop. Dial it towards the plus + direction until its shows 1 to 2 full stops over zero).
4. Lastly, if using the Auto Mode, look to see if your camera has a Snow/Sand setting (usually found as one of the Scene modes). This setting is designed to properly expose for subjects that reflect more light than normal. If your camera doesn’t have Snow/Sand setting, try locking the exposure on something other than snow - aim at something neutral in tone, depress the shutter button half way and keeping the pressure on it, recompose then depress fully. This may lock focus as well, so it’s best to aim it at something at the same distance as your subject.
With any of the above, set a low ISO of 100 or 200, especially on sunny days.
Additional Shooting Tips: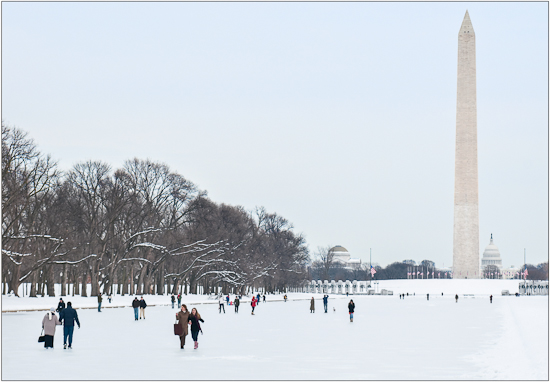
- If you're shooting on a cloudy snowy day and you notice a blue cast to your images, try the Cloudy White Balance setting to add a little warmth. Also experiment with the Sunny setting.
- Look for interesting shadows and silhouettes. In the winter, patterns and shapes become more visible simply because of the lack of color. It’s also a great time for black and white photography. It’s a fun way to take an OK image and kick in drama and creativity with some black and white treatment.
- Enable your highlight alert setting if your camera offers it (usually in the Playback menu settings) to ensure you don’t go too far and overexpose your highlights. If the alert is set and you over expose something, you'll see it blinking when viewing the image in Playback.
- Lastly, use your histogram as a helpful tool to ensure you haven’t overexposed the highlights. Snowy scenes will show most of the data in the right side of the histogram which is fine, just check that the mountain range comes down within the graph and doesn’t hit the right side which would indicate overexposure. If this happens, change the exposure to take away a bit of light and then retake the photo.
Winter is upon us and it’s a bonus to have snow so get out there and enjoy it. Who knows when we’ll see it again!
Caring For Your Camera In Winter
Find important tips for caring for your camera in winter in our blog article, Tips For Winter Camera Care.
Celebrate Photography This Holiday Season
December 20, 2018 by Marie Joabar
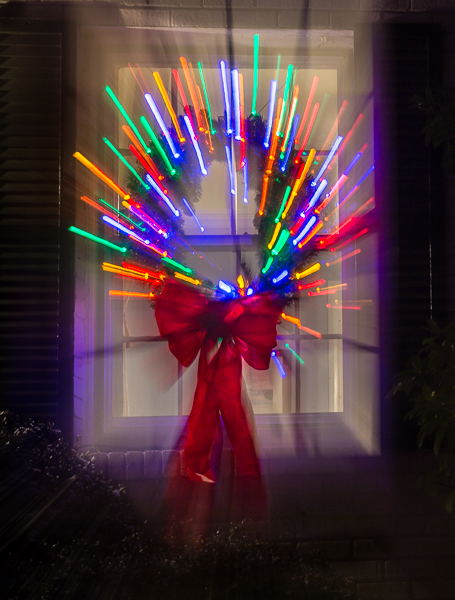 Tis the season for celebrating and we’d like to take a minute to celebrate what connects us; photography.
Not everyone shares the passion to capture images but if you’re reading this, clearly you DO. Embrace your passion, join the community, share your favorites, and learn and grow.
Check out these past holiday Blog articles, perhaps you'll find some fresh ideas for holiday photos.
Fun with Holiday Lights
Holiday Lights Bokeh
Tips for Creative Holiday Photos
Where The Stores Are - Shopping Locally For Your Shutterbug
Celebrate the voice photography gives you now at this festive time and throughout the year.
Camera Picture Styles and Lightroom Profiles
November 15, 2018 by Marie Joabar
Whether we’re setting a Picture Style in our camera or using Lightroom’s Profiles, we can tap into these creative tools to make our images pop. Let’s look at each and discover how we might use them.
Camera Picture Styles
Our cameras give us some fun settings to affect the look of our image from really vibrant to more natural to black and white and using these can add a totally different feel to our photos.

These Picture Styles are designed to simulate different films. For example, when shooting portraits or weddings one might have used Kodak Portra or Fuji Astia film for less contrast, softer saturation and better skin tones. For landscapes one might have used Fuji Velvia film for more saturation and better contrast. Today, we can simply set our camera Picture Style to achieve the "look" we want.
 These are found in our camera shooting menus listed as:
- Nikon; Picture Control
- Canon; Picture Styles
- Olympus; Picture Mode
- Sony; Creative Style
- Pentax; Custom Image.
The most common presets with these are Neutral, Standard, Vivid, Portrait, Landscape, Faithful and Monochrome. Each affects color tone, saturation, sharpness and contrast differently and in most cameras we can further tweak them to fine-tune the preset we choose.
NOTE- These are only used when shooting in the JPEG format and the “style” is processed to the file in the camera. If shooting in the Raw format, we’ll be working with Raw data so the “style” is not applied to the file. However, since our camera LCD screen previews JPEGs, it would display what the image would look like if the style were applied.
This can be helpful to see the potential of what an image could look like and what we might aim for with our editing. For example, if the final image is to be black and white, we might set our camera Picture Style to the Monochrome setting to visualize how the image looks. Again, if shooting Raw, once the files are downloaded, they’ll be in color but then we can use the tools in Lightroom to make them black and white.
Lightroom Profiles
Lightroom has always provided Profiles in the Presets panel but Adobe has taken them to another level with LR Classic and have many more to choose from.
 The newest profiles are now found at the top of the Basic panel (in the Profile Browser shown above) which suggests Lightroom is indicating, this is a great starting point. Regardless of whether we’re shooting JPEG or Raw, we can choose between B&W profiles, Artistic, Vintage, and Modern profiles. If shooting Raw, there are 2 additional Profiles; Adobe and Camera Matching. The Camera Matching Profiles actually travel from our camera to Lightroom with the rest of the metadata so they vary based on camera manufacturer.
If all the profiles listed above aren’t visible in the Basics panel Profile Browser, it may be due to working with JPEGs, look instead in the Preset panel for similar looks (as shown below). 
After selecting a Lightroom profile we may find much of our editing is done. However, we can continue to edit further if we choose to. We’ll see our sliders set based on the profile we chose and we can easily adjust those if desired.
So let’s give these settings a look and explore if they might help us “see” better images as we capture or offer a better starting point for editing on the back end.
Learn more about these Lightroom profiles in any of our Lightroom classes.
- Lightroom in A Day covers the Library Module (organizing) and the Develop Module (editing).
- Lightroom Library Module In Depth – Learn importing, organizing, searching, keywording, collections, exporting and more.
- Lightroom Develop Module In Depth – Learn how to get the most out of your files with the powerful editing tools in Lightroom from adjusting the entire image to selecting just a portion of it for adjusting.
This link lists all of our Post Processing classes, just scroll by date.
Inspired In Italy
October 26, 2018 by Marie Joabar
What an amazing week we had on our first international photography workshop exploring Tuscany! With a group of 9 workshop participants, we set off to capture exciting images and all came home with memory cards filled.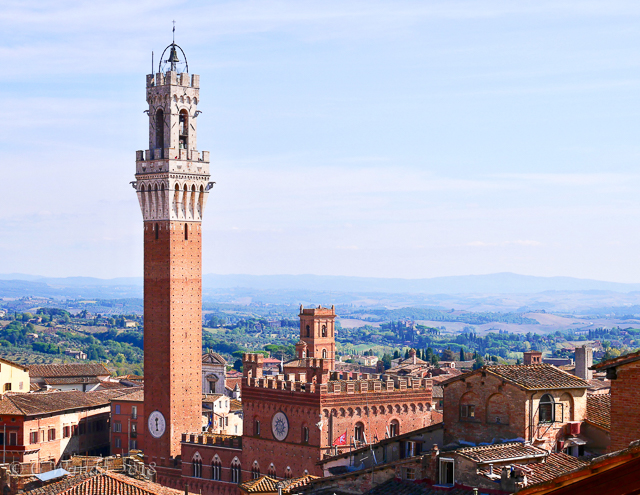
Our base location was just 20 minutes south of Siena at the Dievole Winery and Resort. With luxurious accommodations and gorgeous scenery no matter where you looked, it only took a second to fall in love with the place. Sunrise could be captured right out our front doors with views overlooking the vineyards and the distant mountains.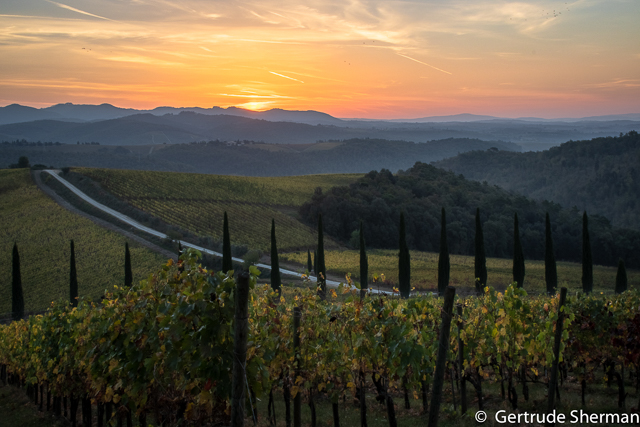
The workshop was organized by Il Chiostro as their Autumn Arts Festival and participants could choose to take the Photography, Painting or Cooking workshop. In all, it was a group of about 35 people. On one morning, people could switch up their workshop and try another and most of the photographers tried painting. They all came away with their very own masterpiece of a beautiful landscape scene of a rustic farm house and vineyards framed with cypress trees. 
The food was amazing; an Italian style breakfast buffet, and a sit-down dinner complete with endless bottles or red and white wine were provided every day at Dievole. I don’t think there is one person who didn’t come home a few pounds heavier.
Each day we’d travel to a nearby village or hill town and each presented unique photo opps. Some of the highlights were:
- The medieval town of Siena where we enjoyed the Duomo (cathedral) and museums. Although they had their Palio (Sienese horse race) in the town square, we avoided it because of the huge crowds, yet a few captured some great shots of the rehearsal race.

- San Gimignano was another hill town that we all fell in love with. Great for people shots, old town charm, wonderful shopping opportunities and delicious restaurants… a fun day was spent discovering just why people put San Gimignano at the top of the must-see towns.
- Other hill towns such as Peinza and Radda provided many photos opps and amazing views to the landscape below filled with vineyards and old Italian farm houses.
- I think our favorite photo session was shooting the iconic scenery of the Val d’Orca on the way home from Pienza. Featuring soft rolling hills sprinkled with old chapels, farmhouses and stands of cypress trees, it was a “must have” image and it was great fun shooting it.

The last evening was spent showing off our photos in a presentation to the Cooking and Painting workshop participants and the oohs and aahs were humbling. As a workshop leader, I loved seeing everyone's favorite images and was so happy for each of them to come away with such strong shots! It’s also interesting to see how each person captures such a unique image even though they might have been standing right next to each other.
We left Italy with a collection of beautiful images and all had a great time learning new photography skills. We also took with us the joy of having met new people, the pleasure of drinking local Italian wine and sampling the region’s olive oil and overall, just having had a grand time.
I’m so fortunate to have been asked to by Il Chiostro to lead this workshop and I just loved the time spent with my photography group. In fact, they are the reason I loved it so much! They’re such wonderful people, they were all so supportive of each other and we enjoyed great camaraderie. I have them to thank for the amazing week exploring Tuscany on this workshop!!
Look for this workshop to be offered again in 2019, it was just too much fun not to do it again.

